© 2024 HamiltonTileGA.com

Public contractor content: Why does it matter? #showyourwork

Contractor online content is all about the WHO, WHAT, WHERE, HOW, WHY.

Telling the story, historical documentation, brand building, SHOWING our work, making our work PUBLIC.

“Content” comes in the form of video, pictures, writing posted to the internet…

This is all a pivotal part of what we do. After almost a decade, I’ve fine tuned my reasoning as to why this is important to YOU, a homeowner and here it is:


1.      Trust – Trust is the reason for creating content. Lately, thinking about why we have overwhelming success with our homeowners---it comes down to trust. I talk about how homeowners don’t have to “babysit” us. It’s mostly because they can visually see, with their own eyes, that we know what we are doing.


2.      Historical Documentation – Our homeowners can look back YEARS to see where we’ve been and what we’ve done. They can observe us over time and see that we’re still around, building awesome home improvements. I’ve seen it a couple times, a formerly “great contractor” goes through a rough divorce, starts drinking or drugging…and their business goes downhill with no warning.

 Our homeowners can watch our content —-and aside from me gaining or losing weight; they can see Jason and I are still solid guys, doing great work.


3.      Brand – When I look at our content online, I consider that a big part of our “brand”, which adds major security for our homeowners.

 Our “brand” is defined as our business character. It can almost be seen as a “contract” stating what you are going to get and what you can expect. We don’t stray from who and what we are and our homeowners can observe that over the course of years.

Don’t like what you see? That’s okay. You don’t call us. You go with another company and no one’s TIME is wasted.


Can you see how creating content is a SERVICE to the public?


People can IMMEDIATELY see if we are a good fit for them, if they put a few minutes into watching our online content.

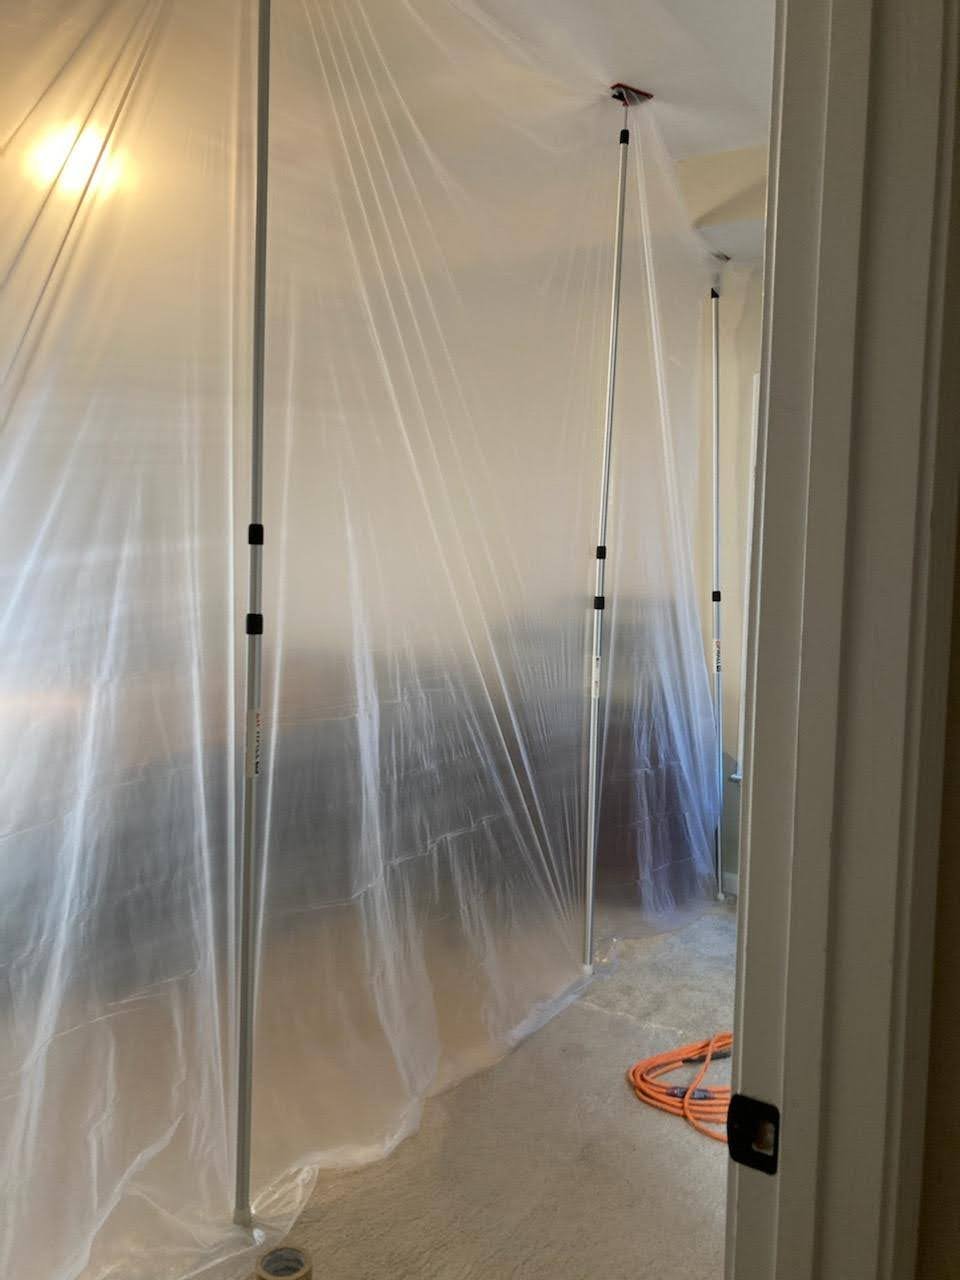
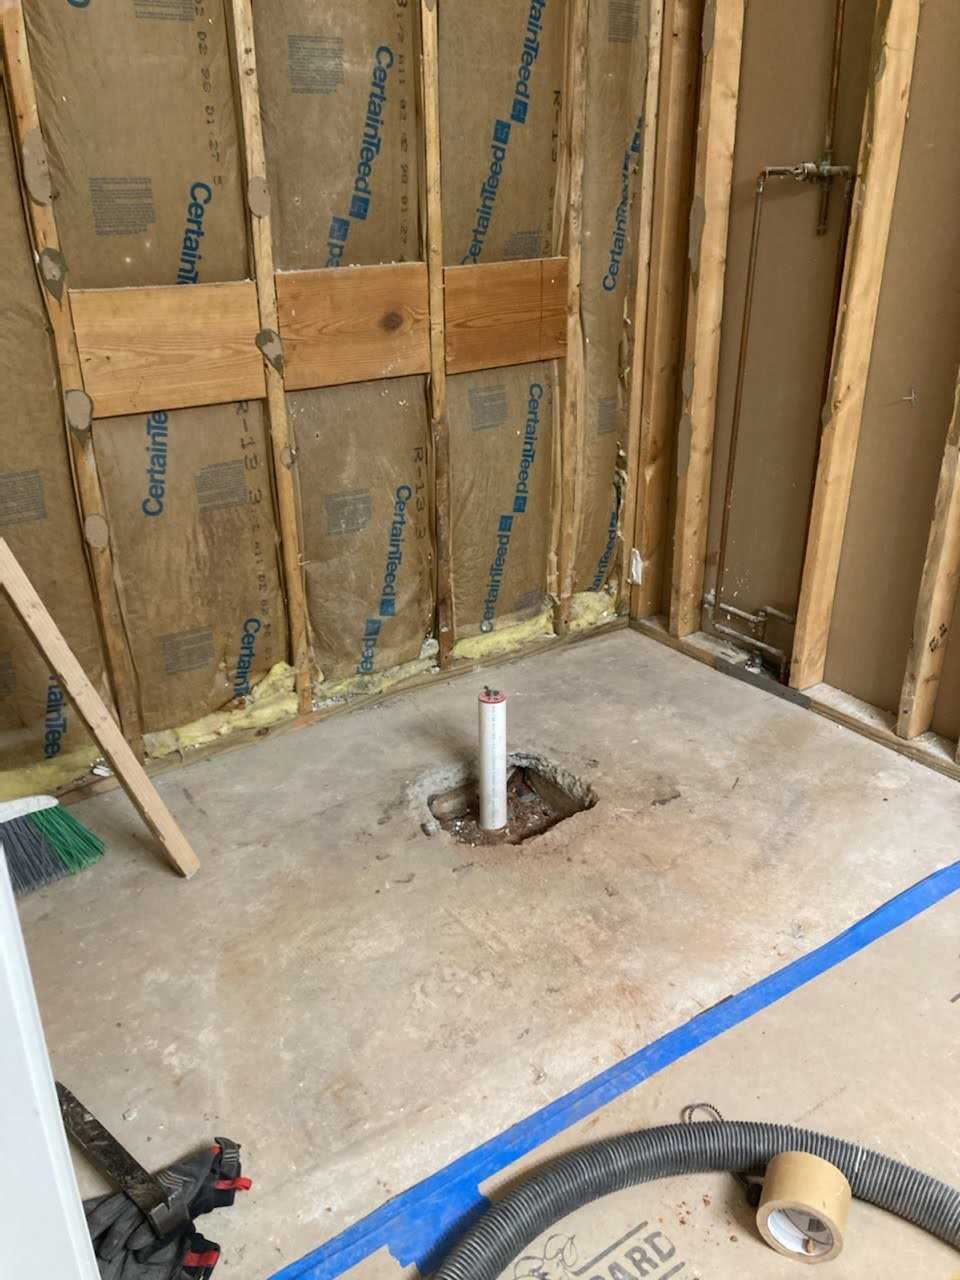
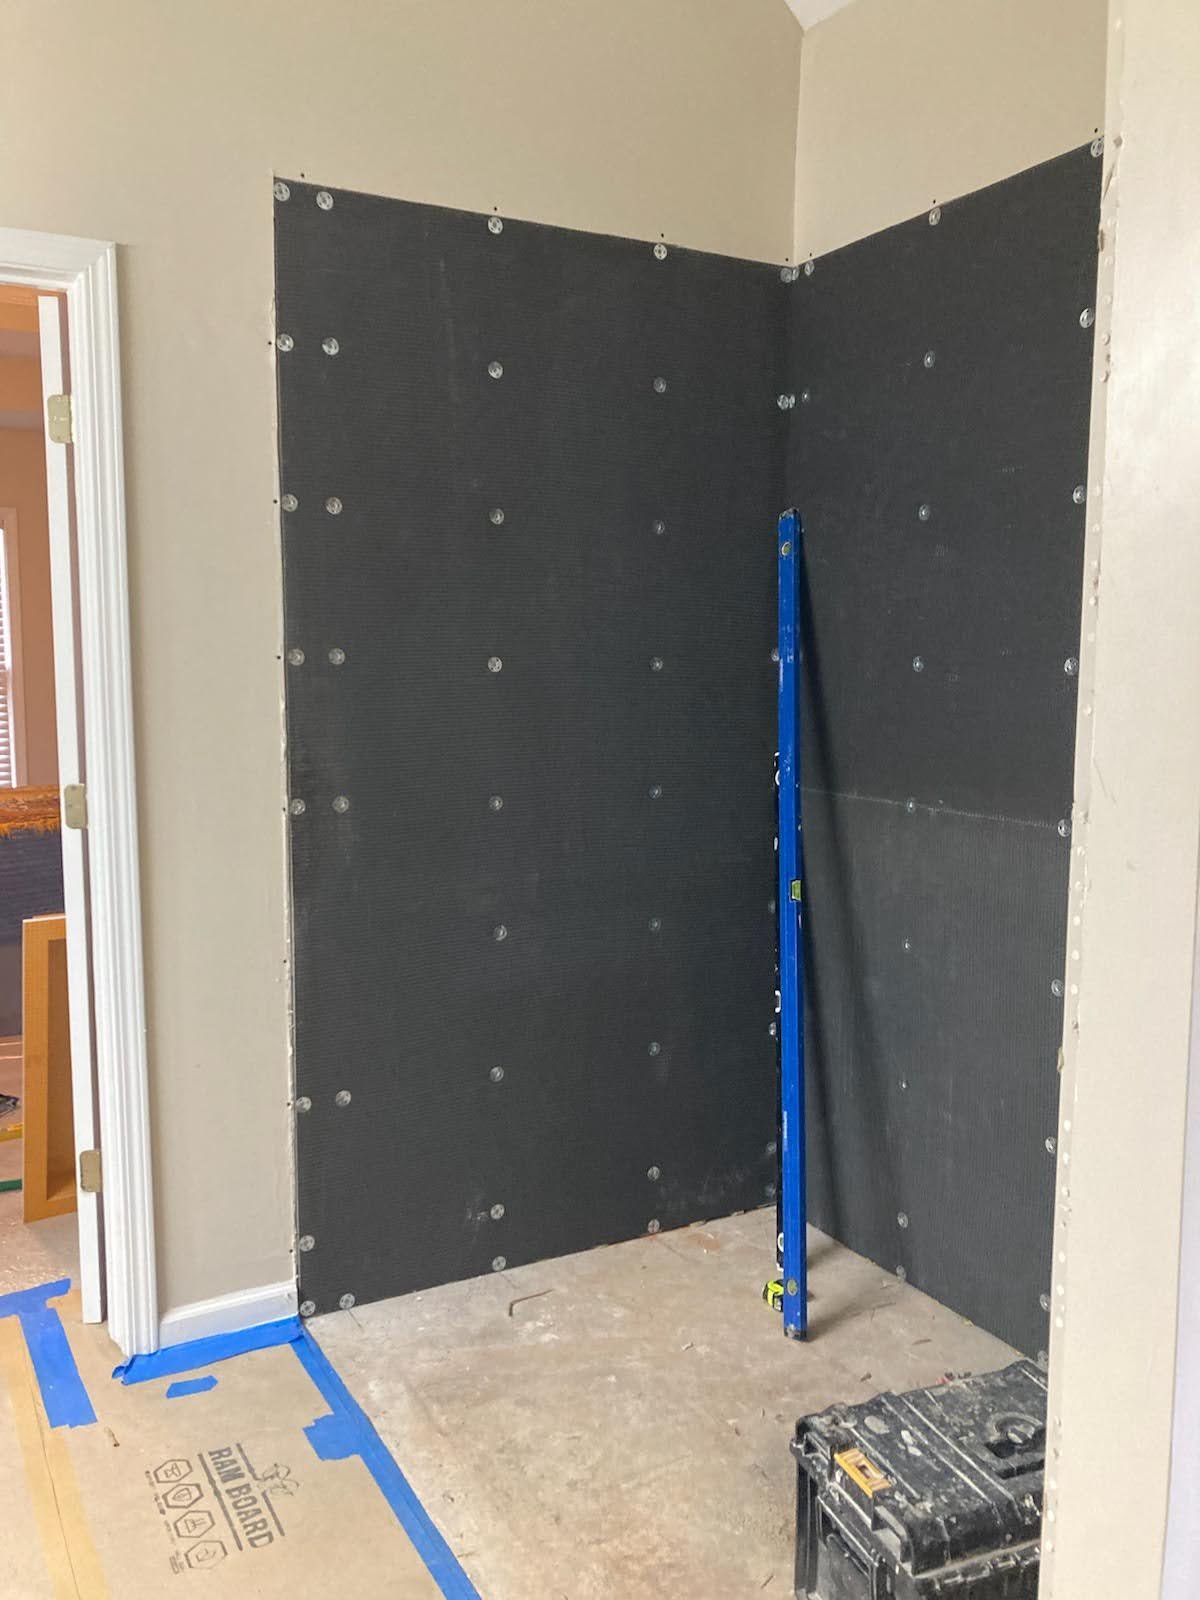
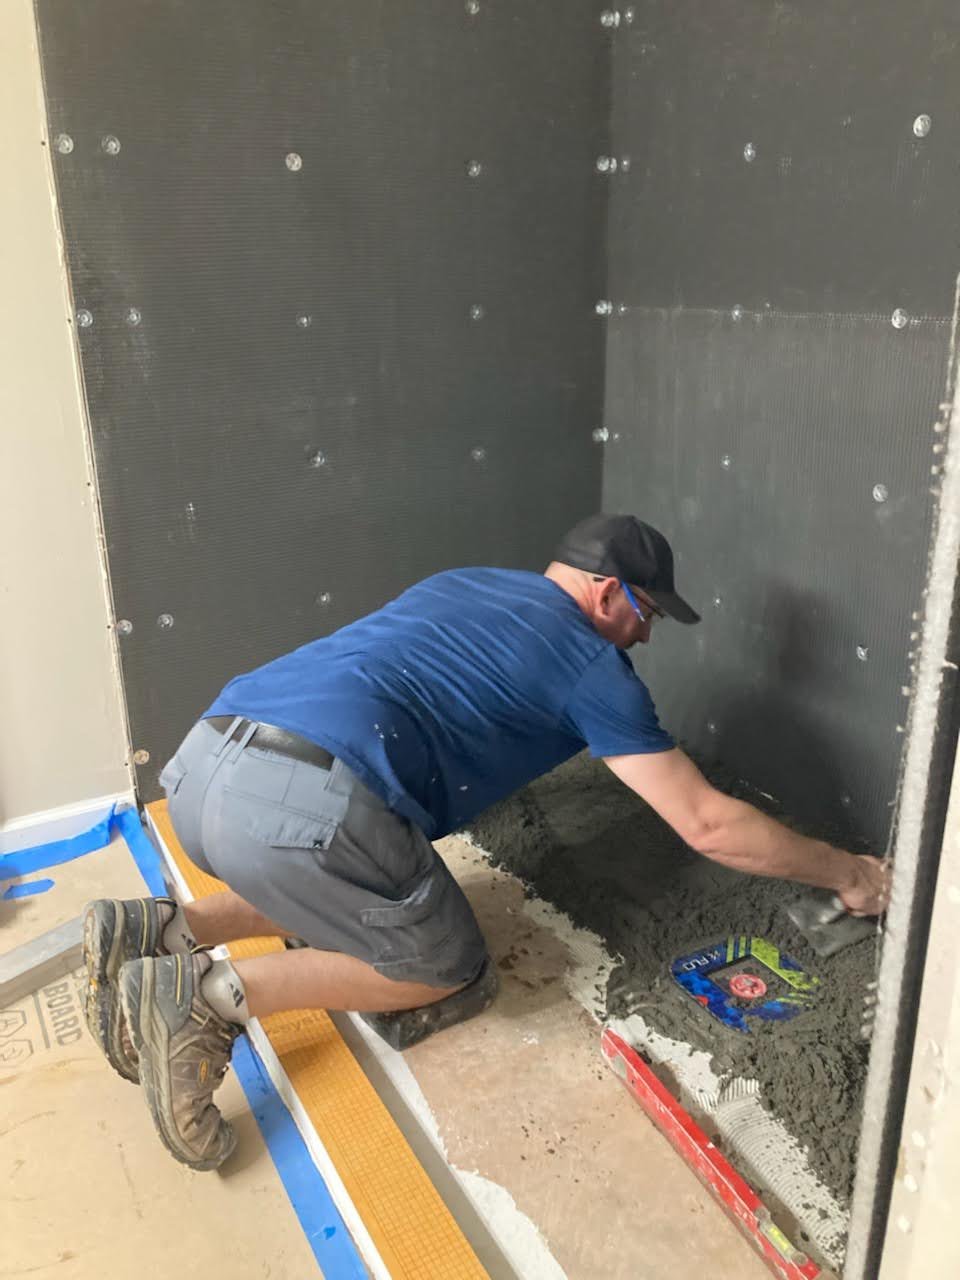
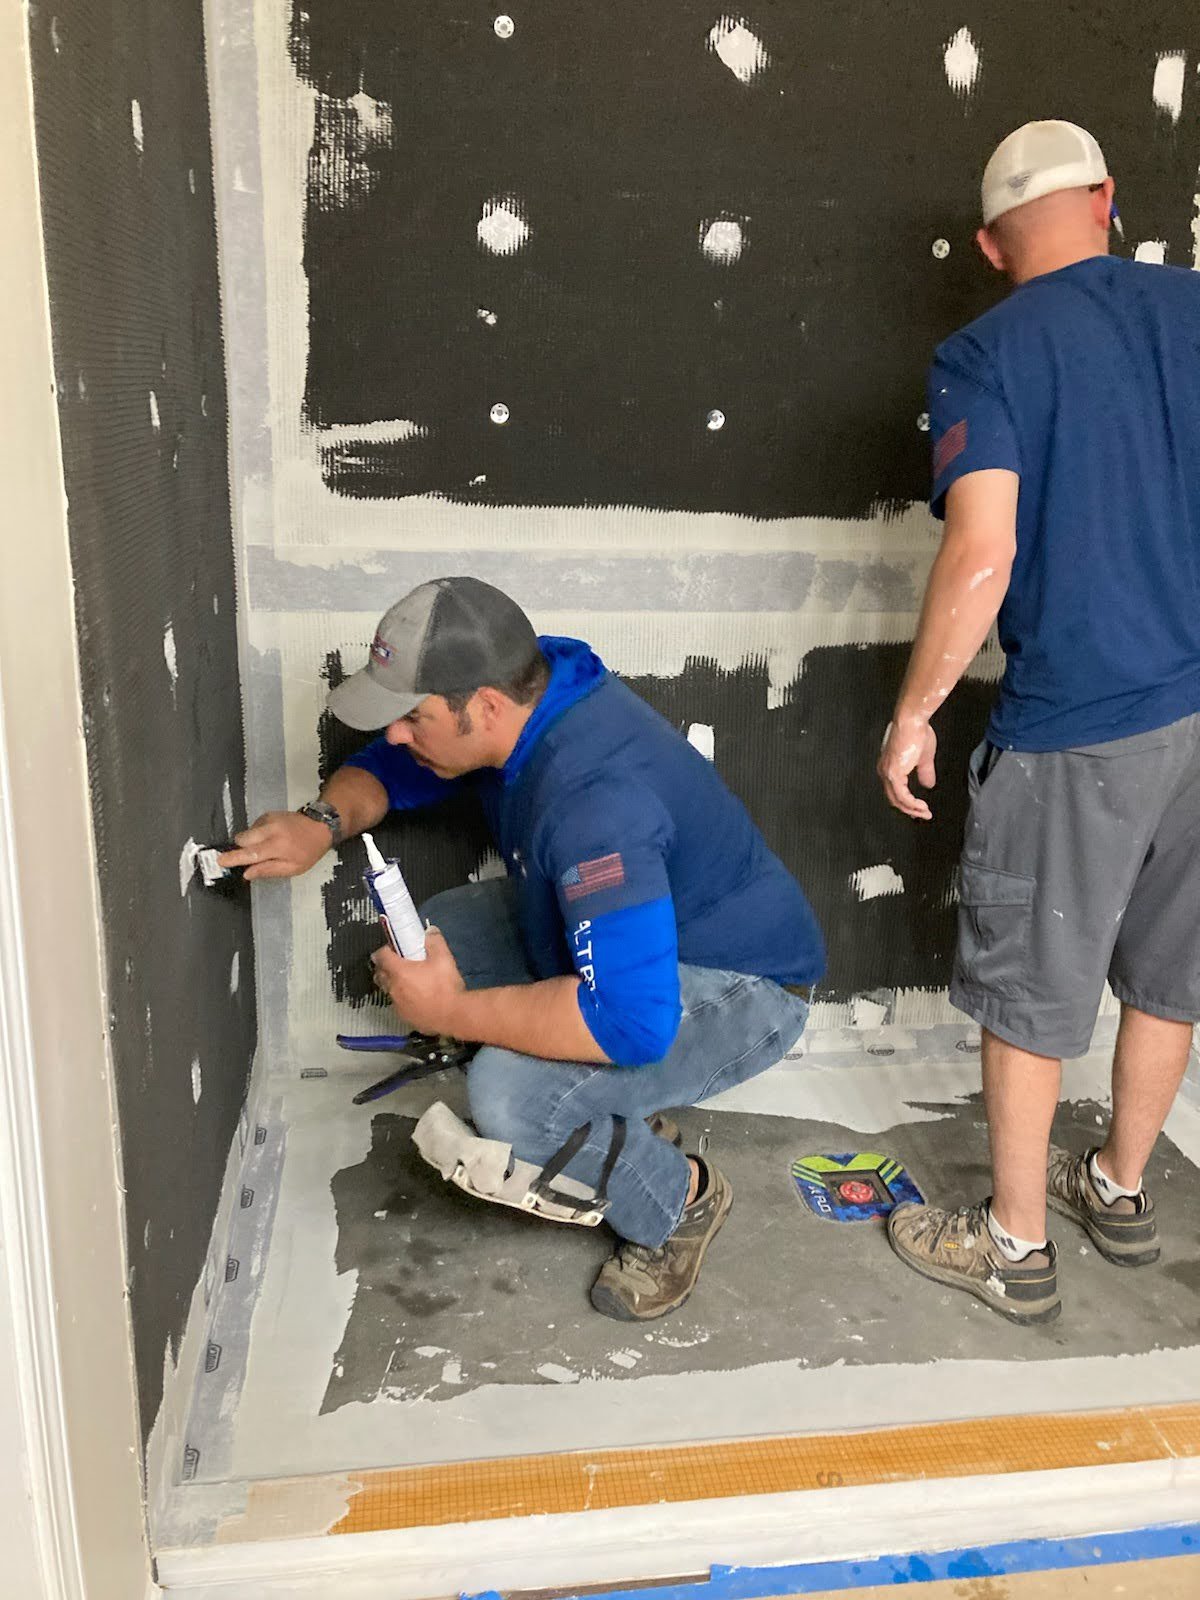
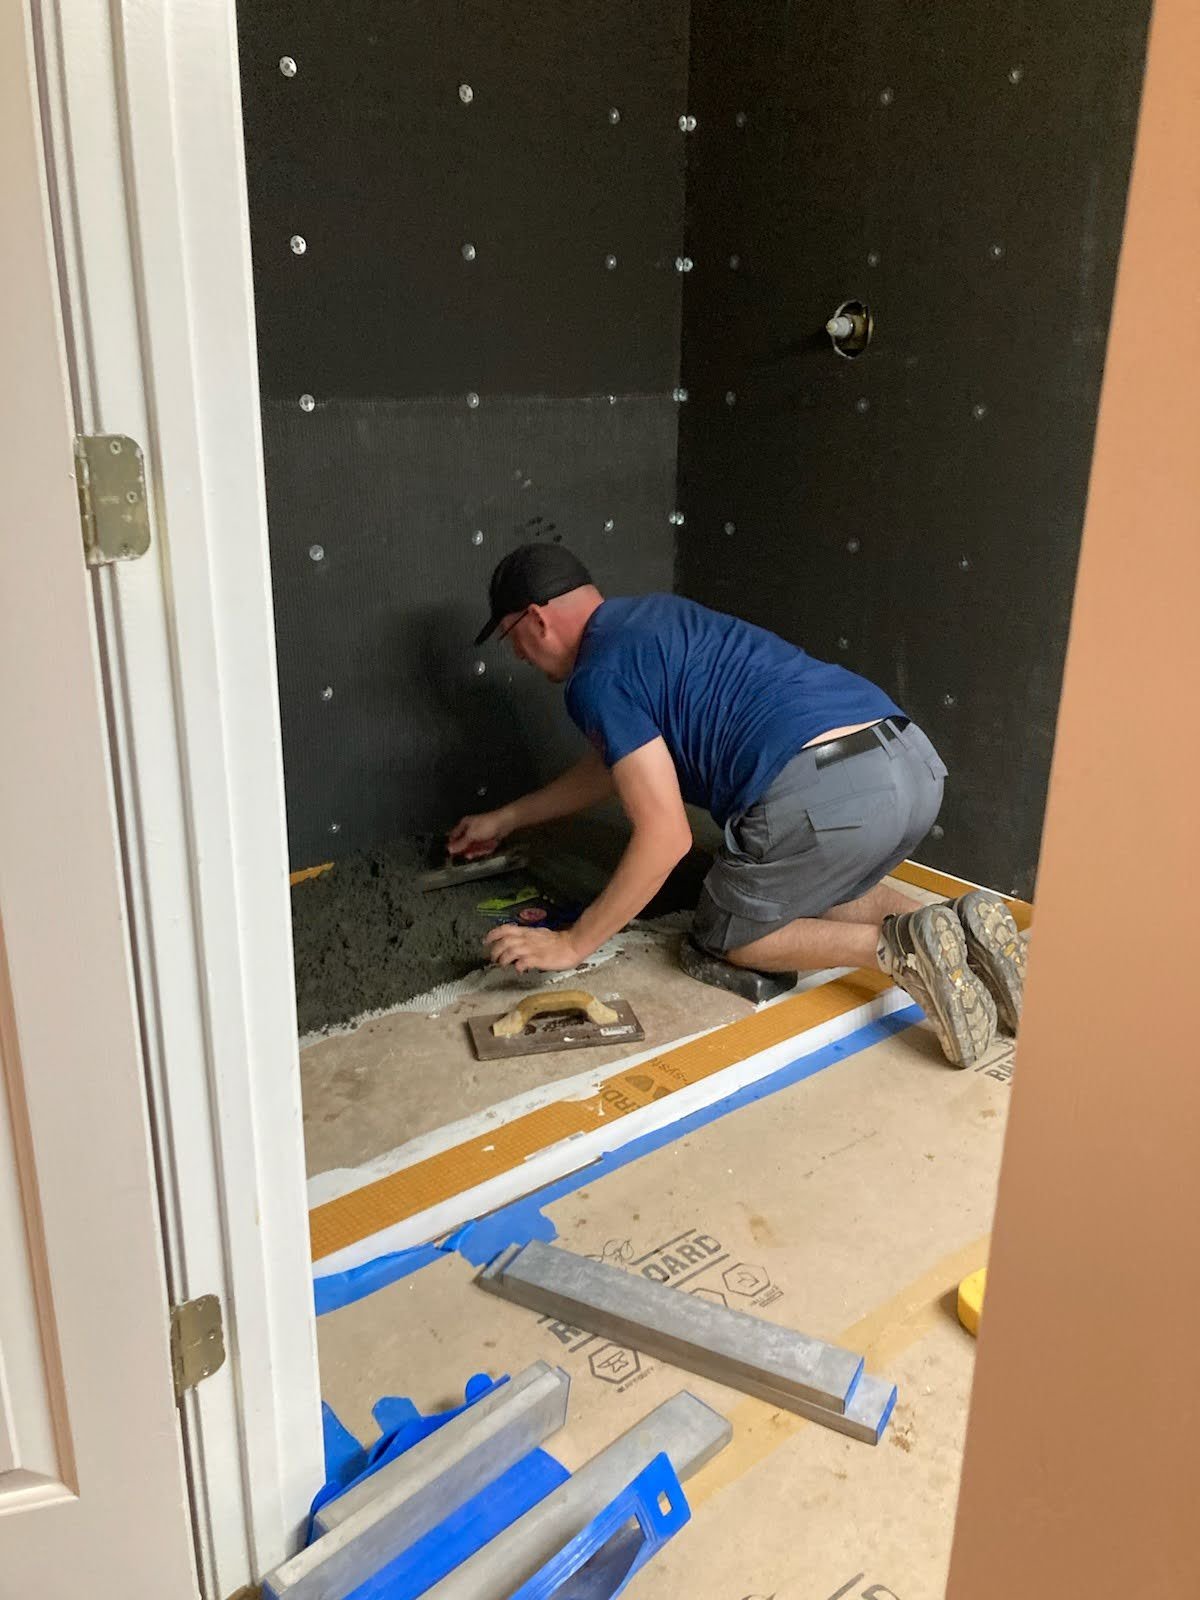
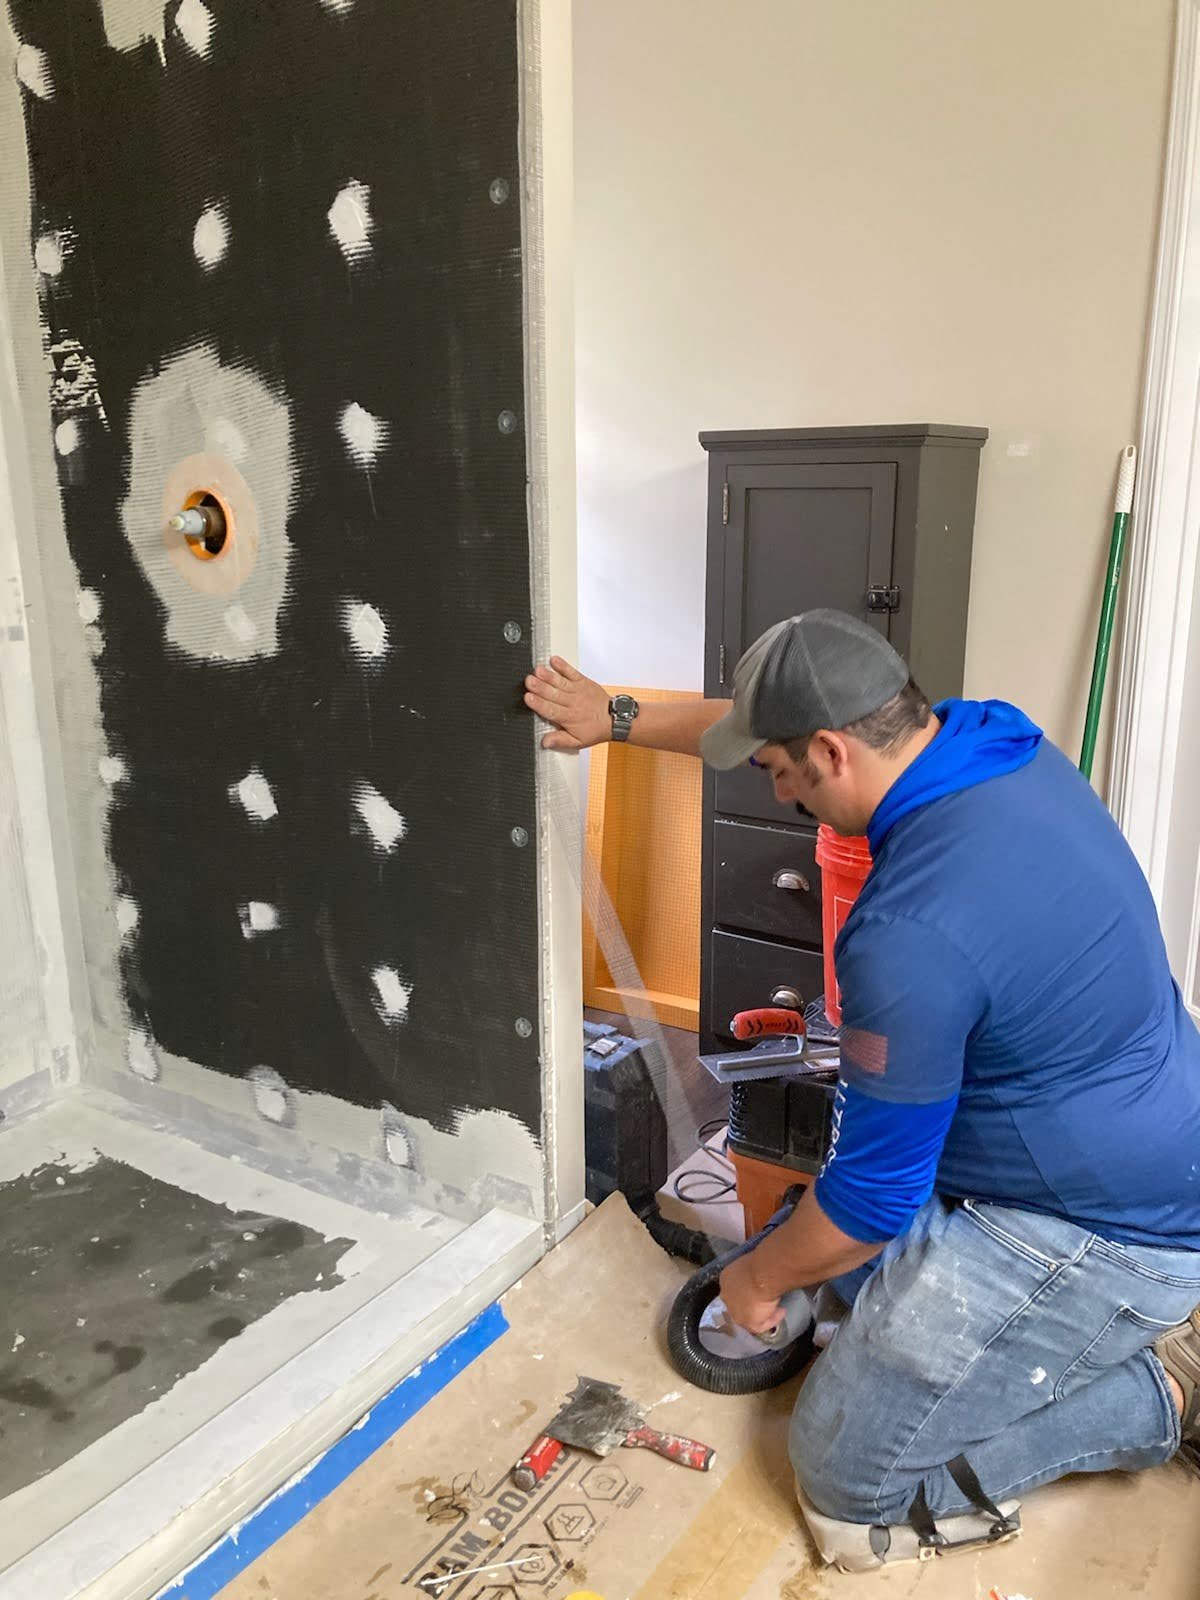
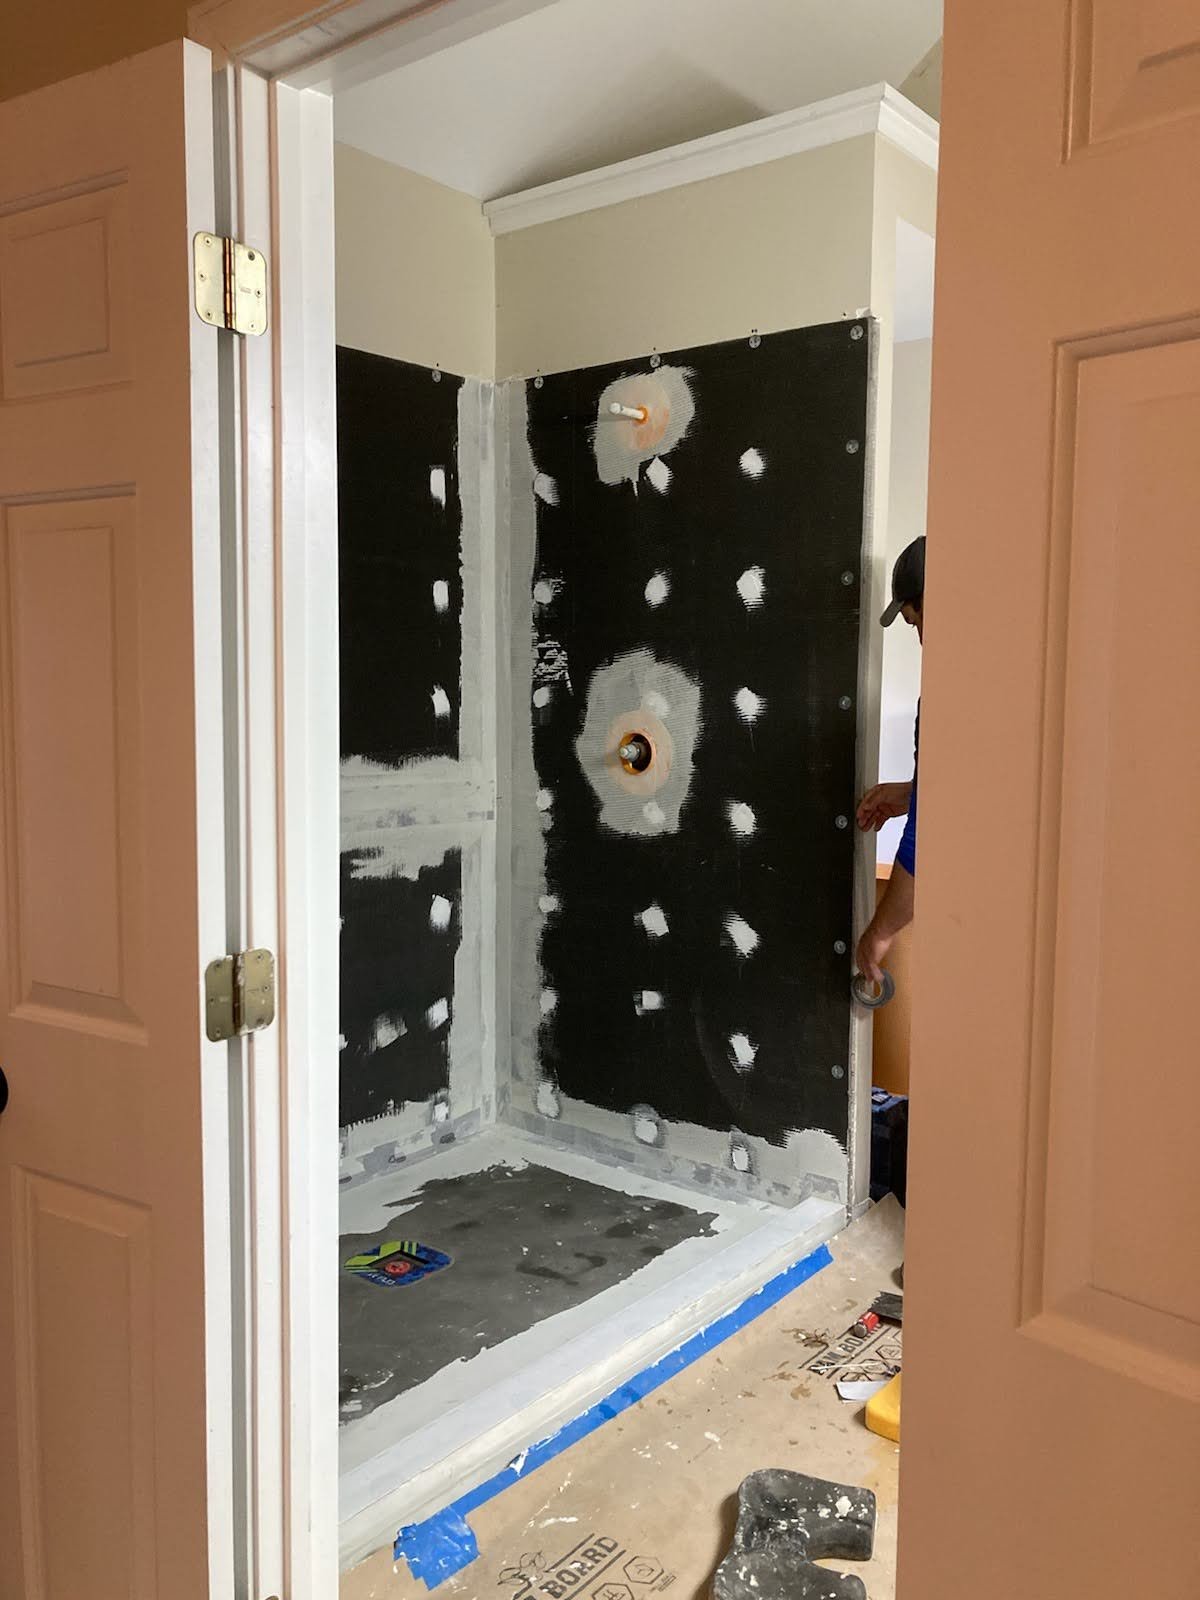
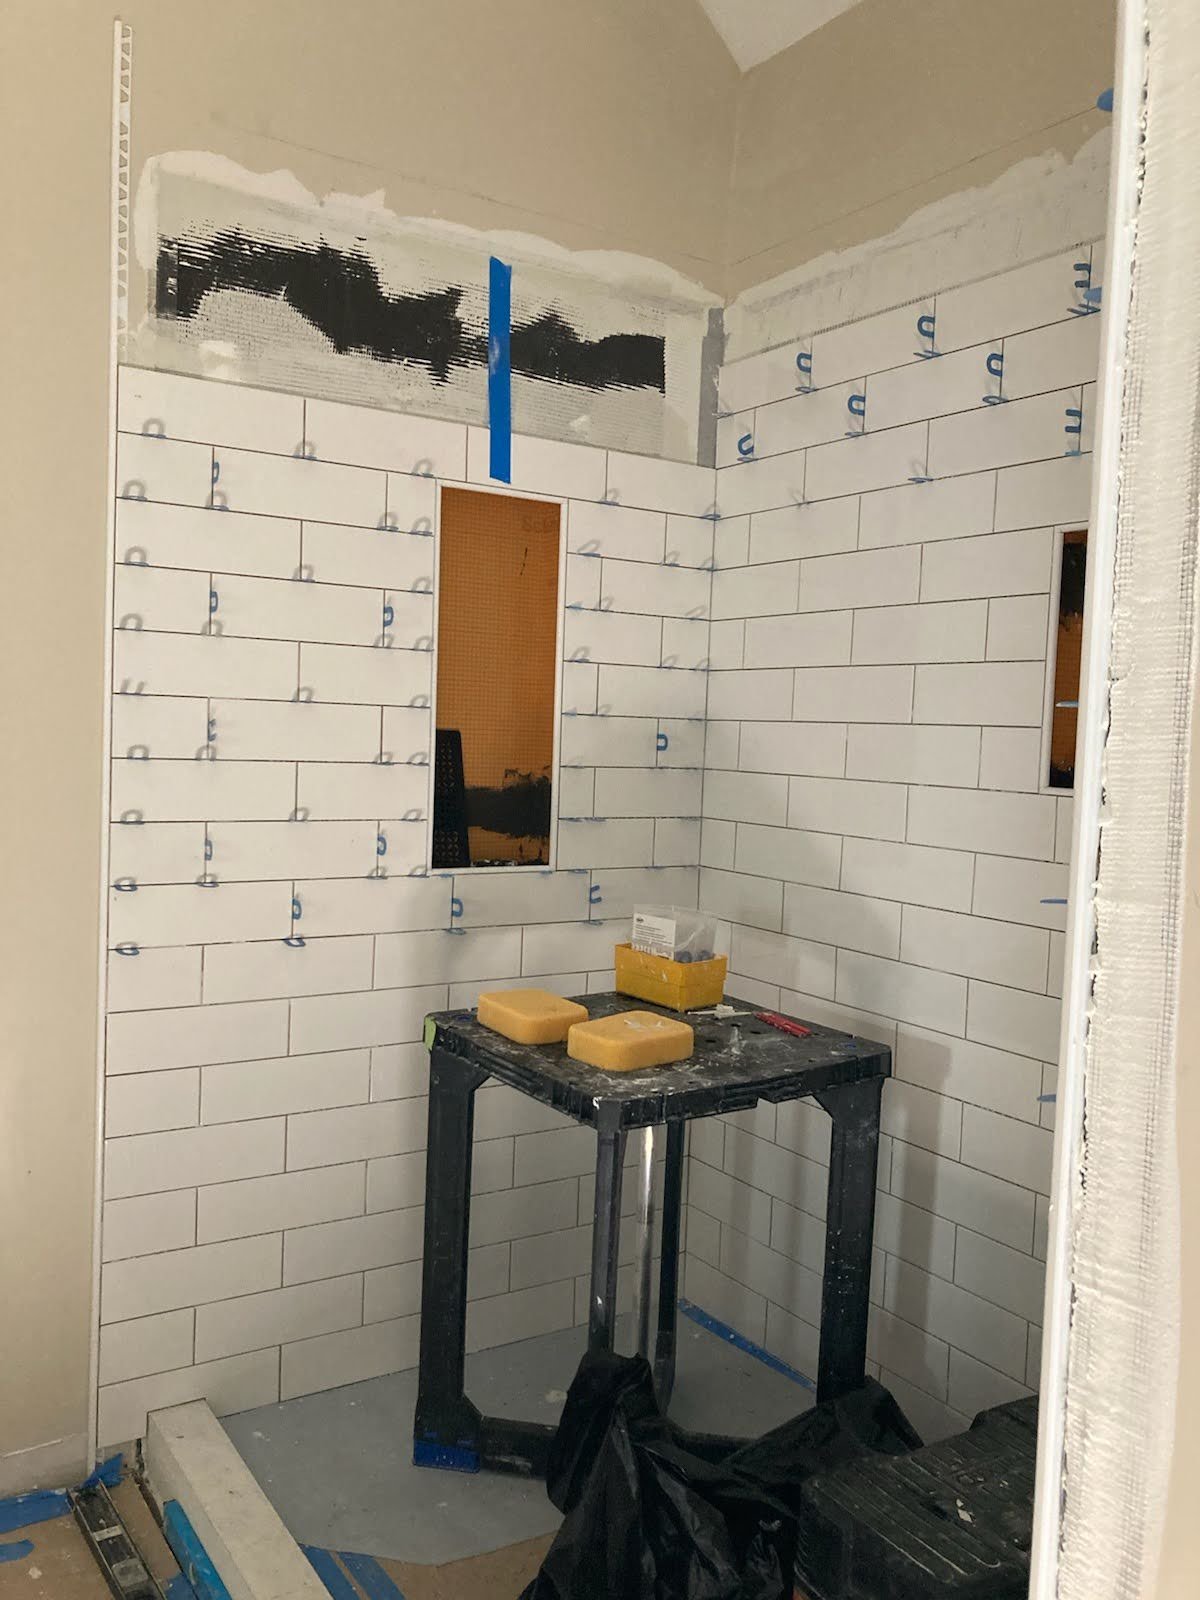
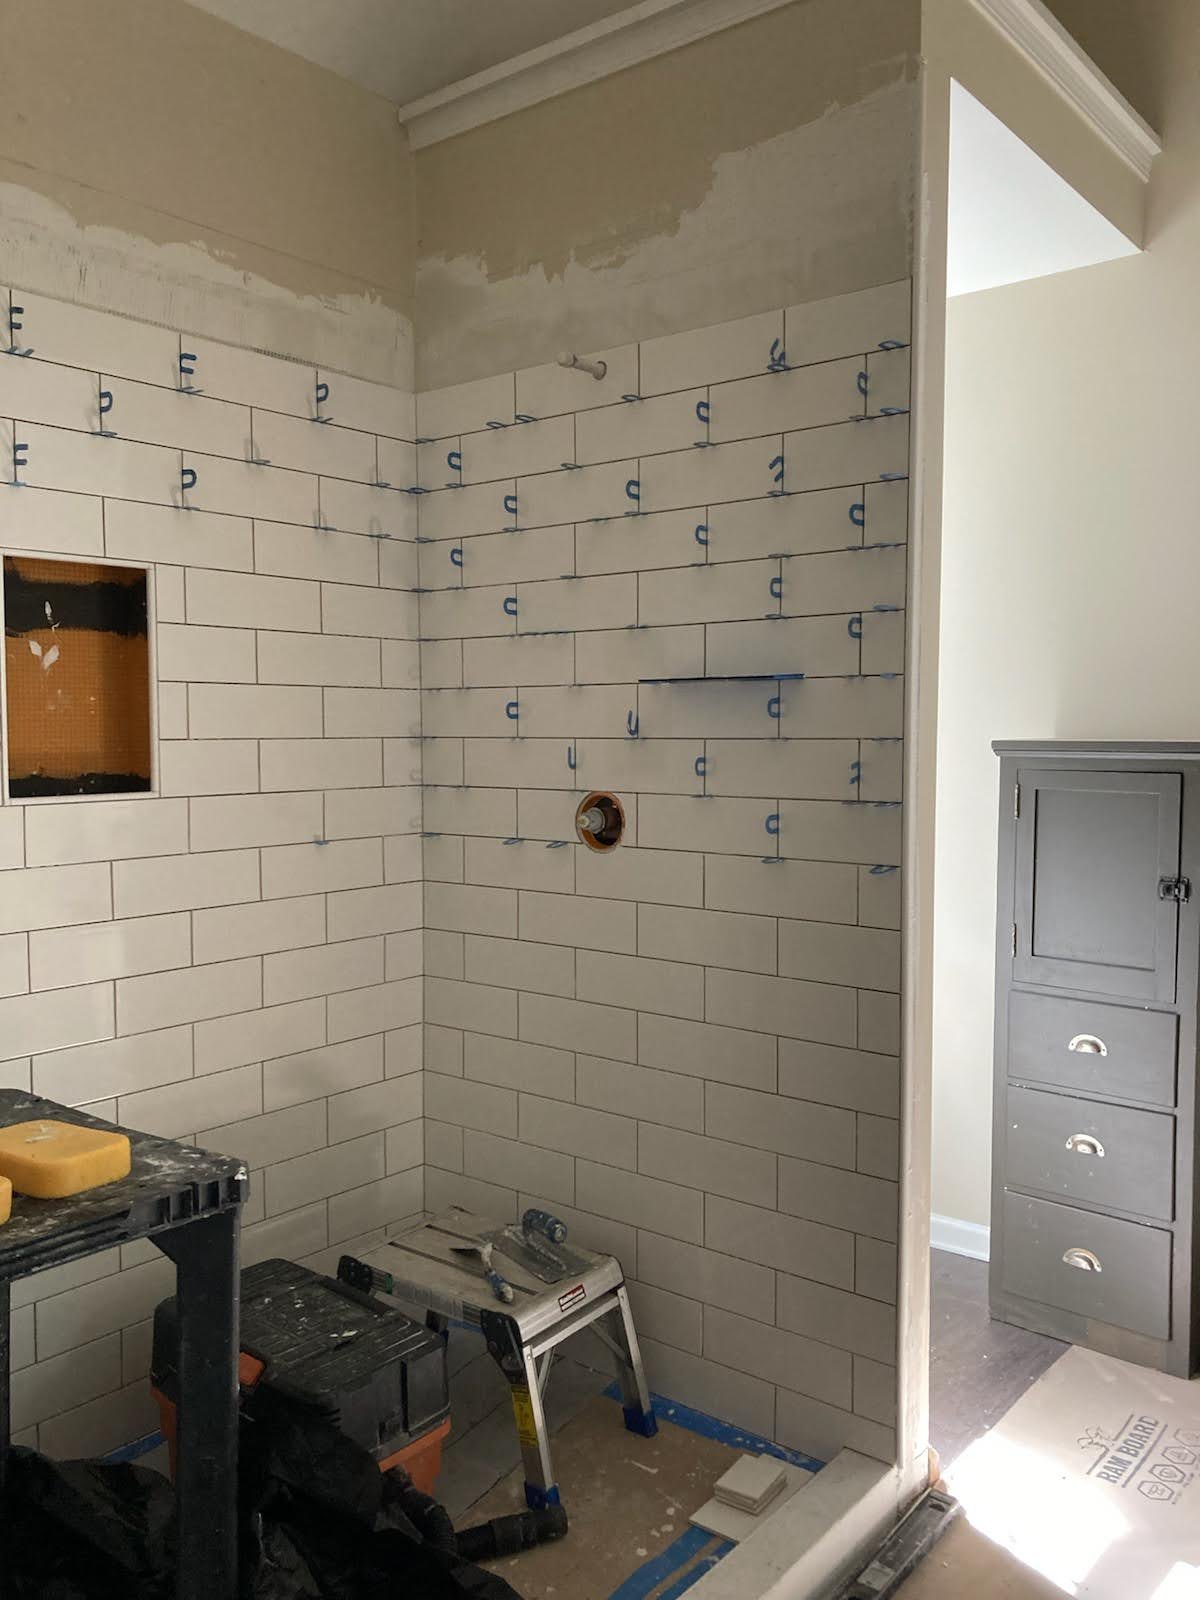
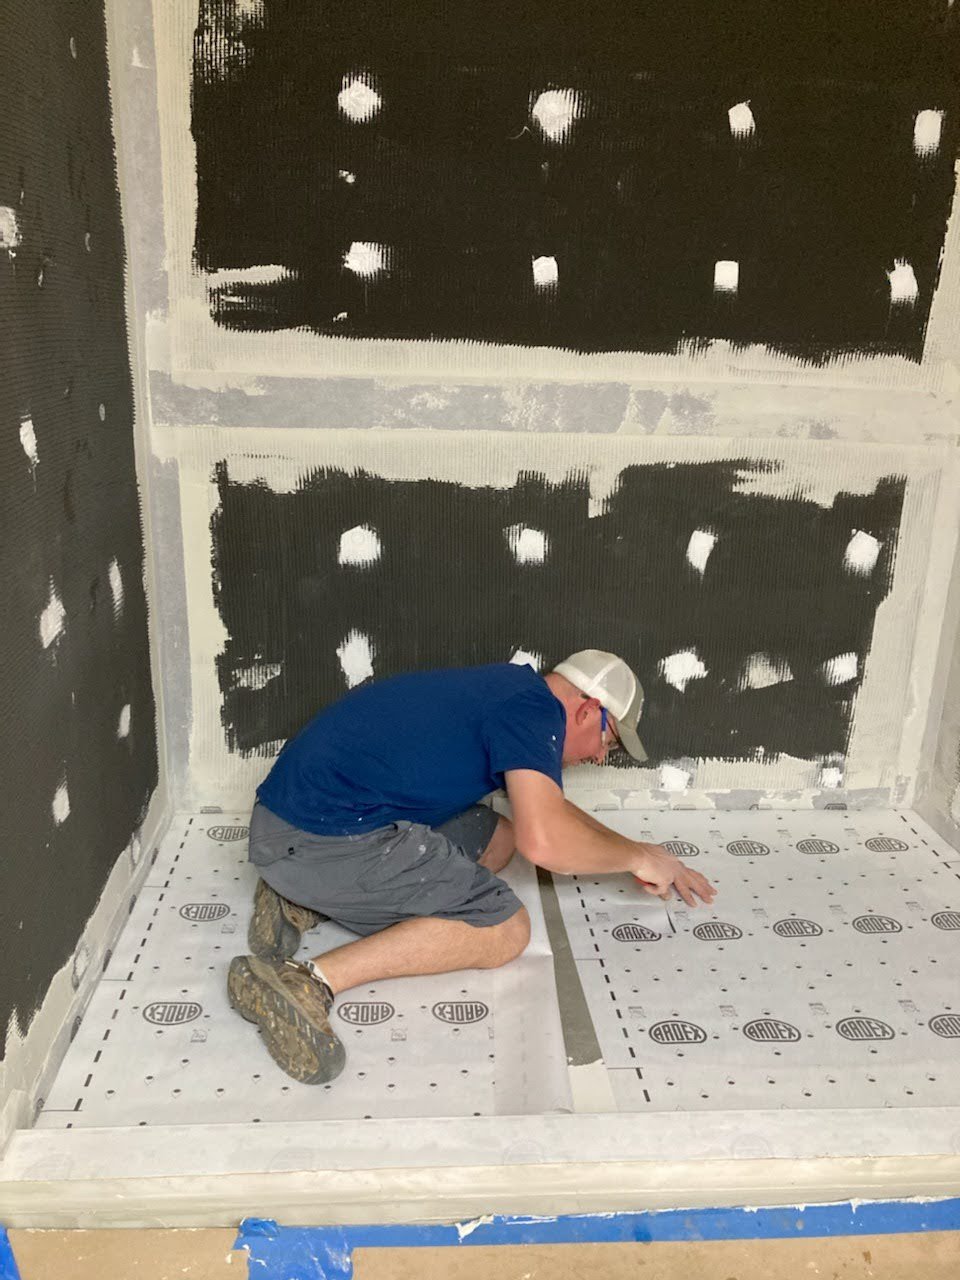
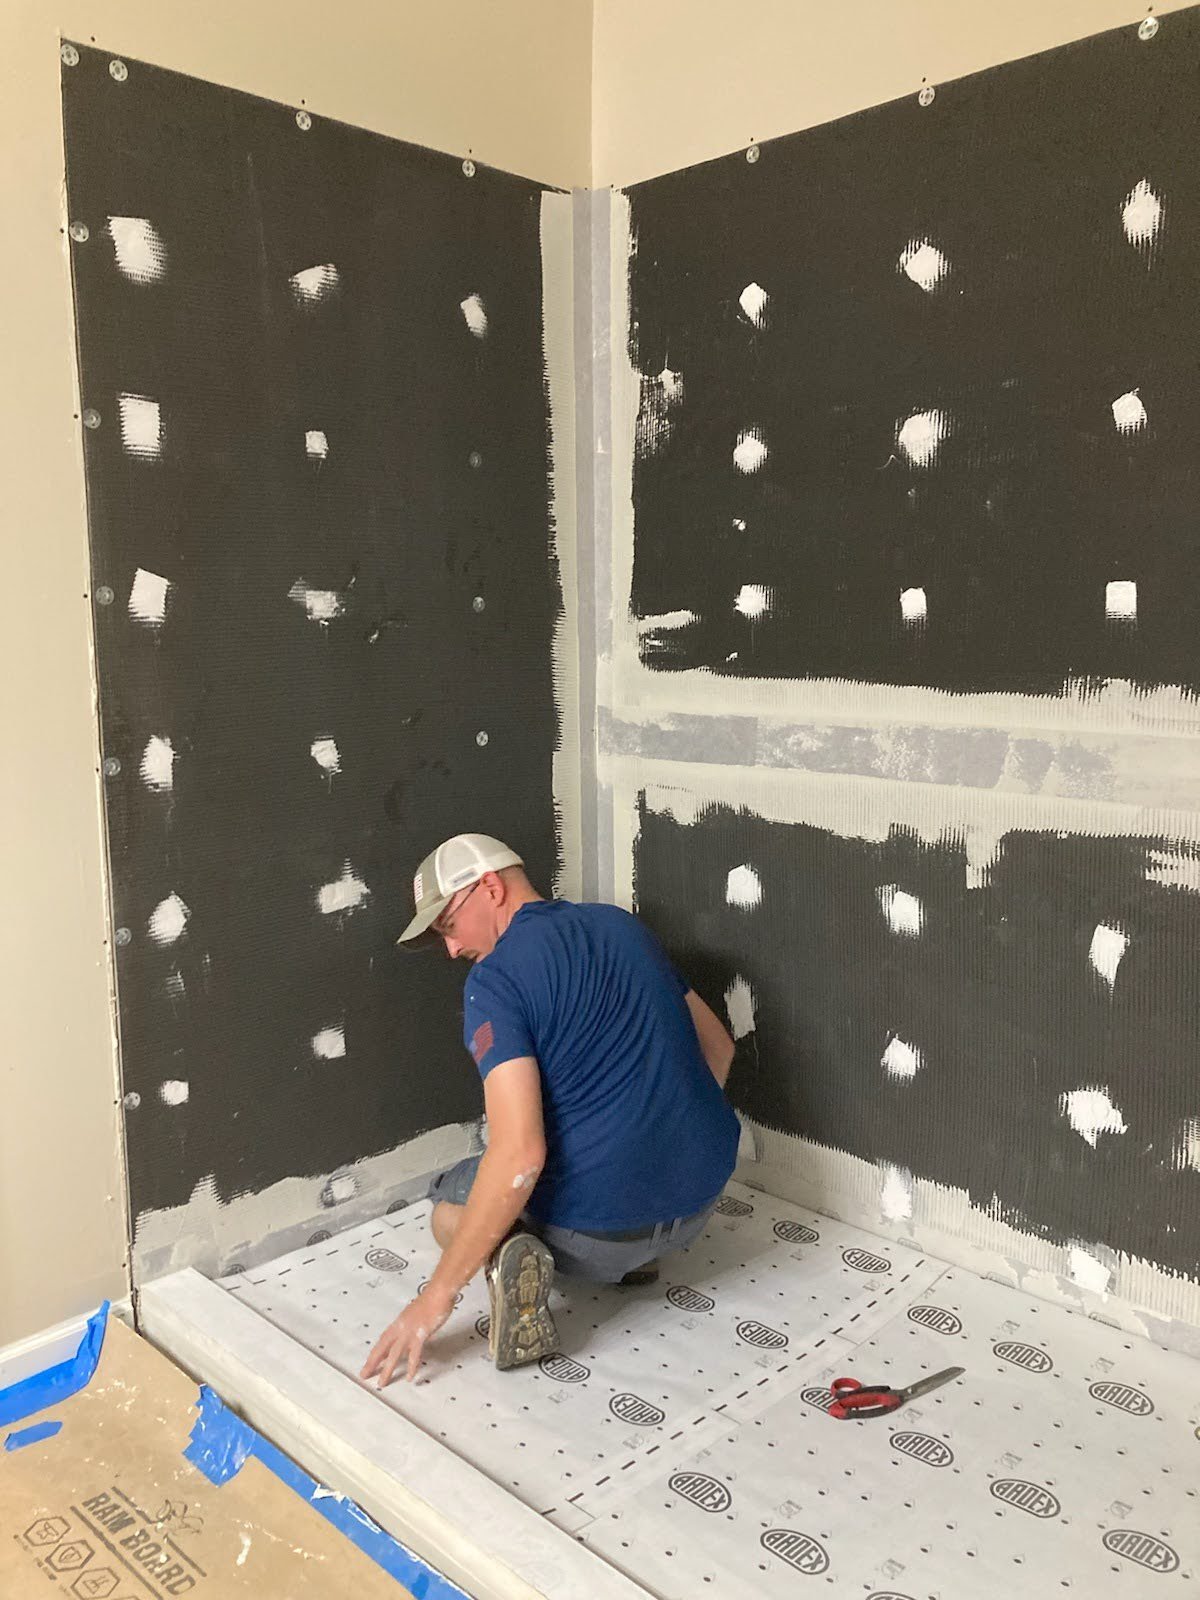
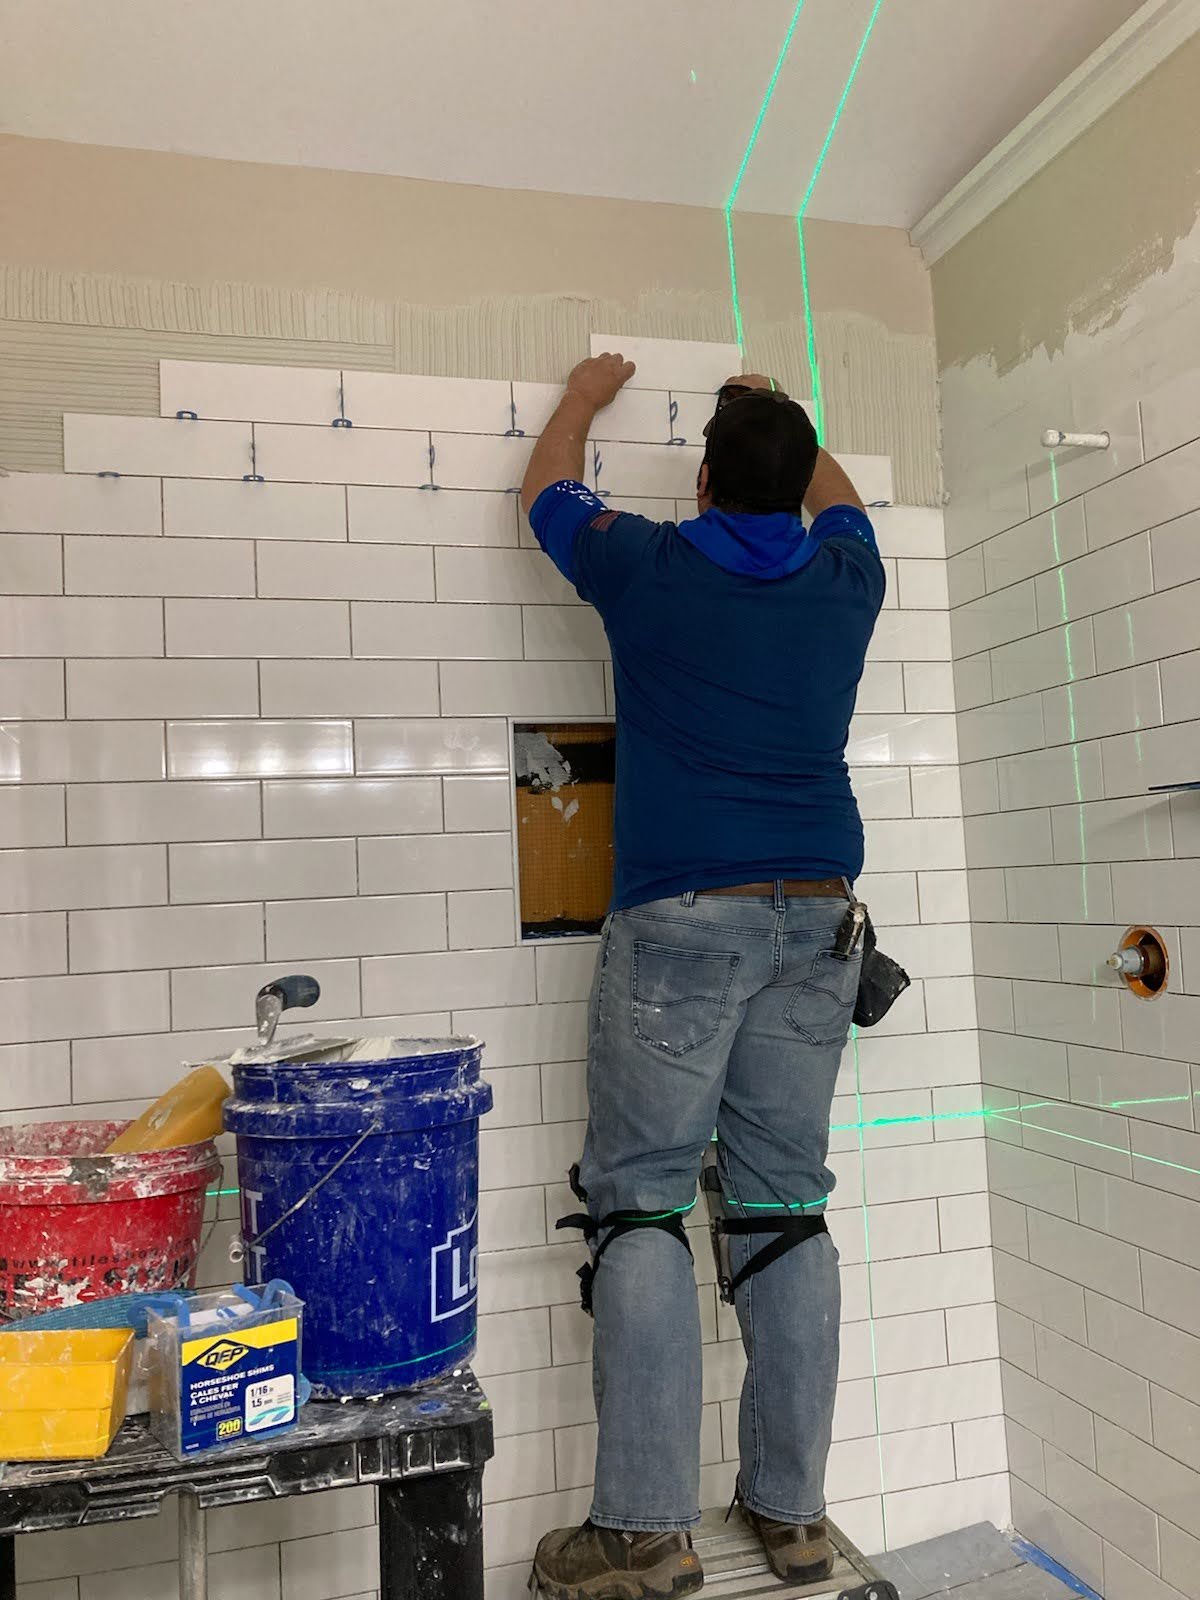
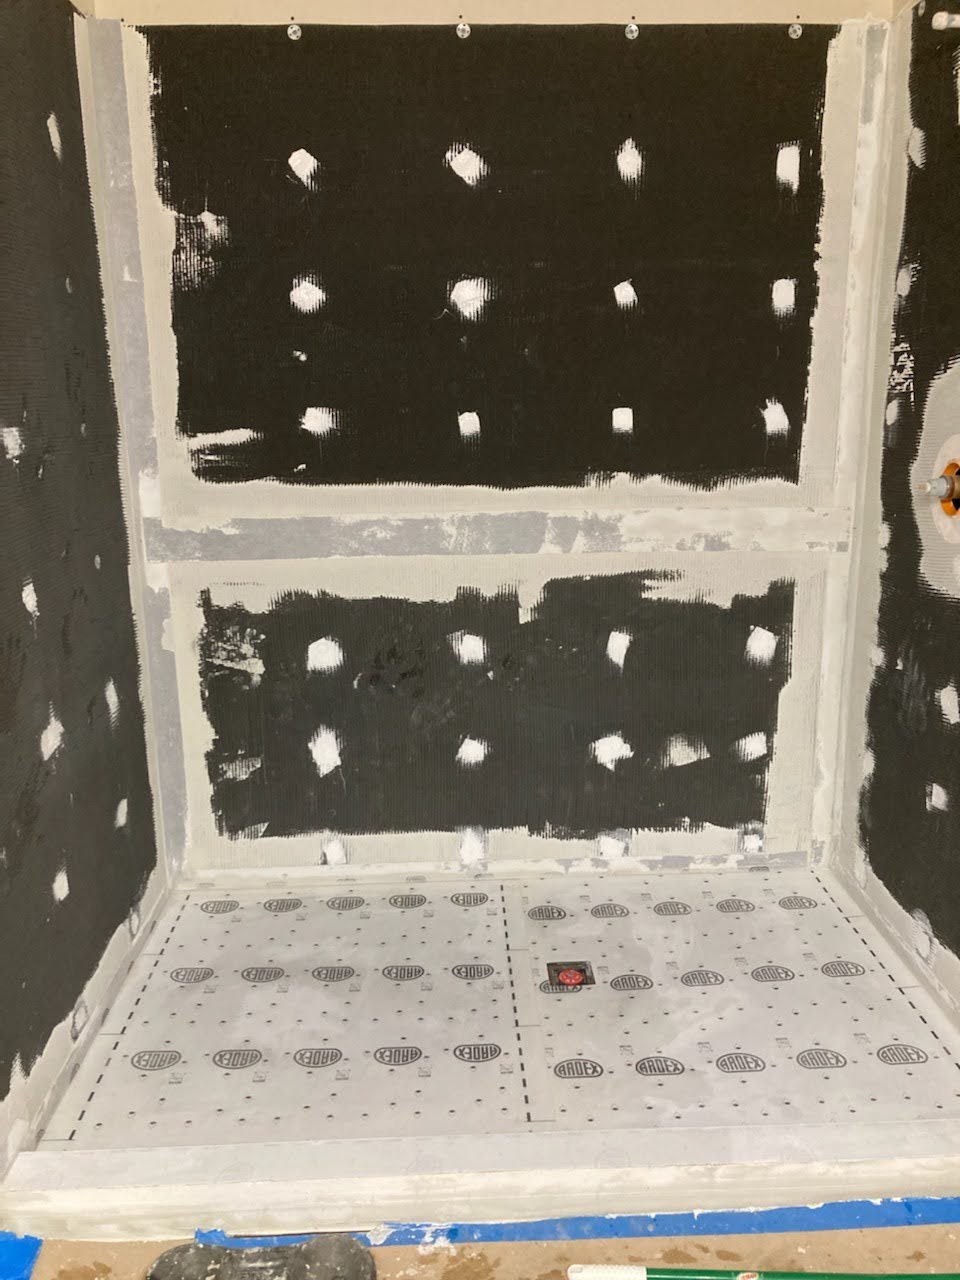
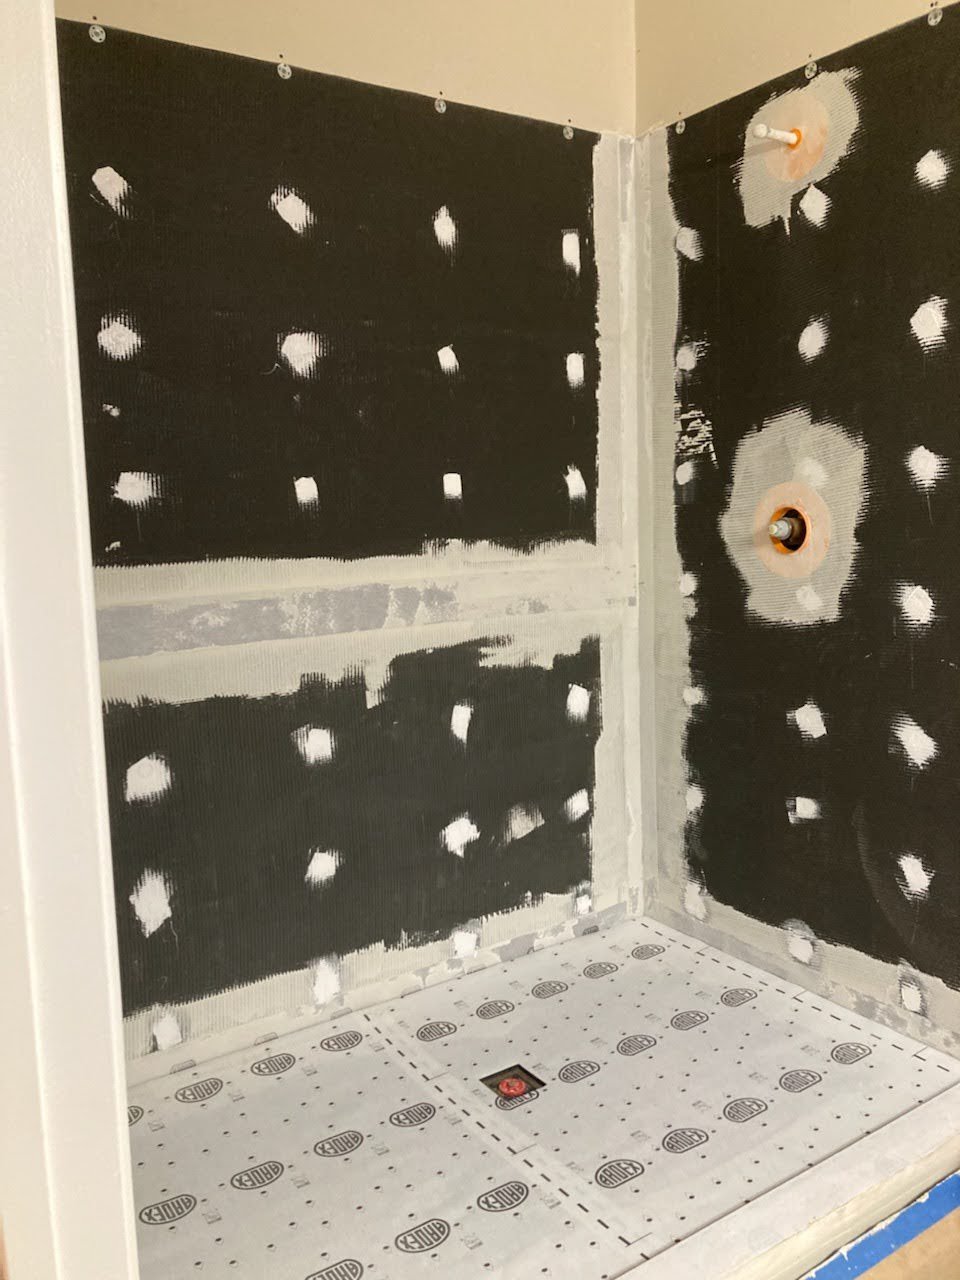
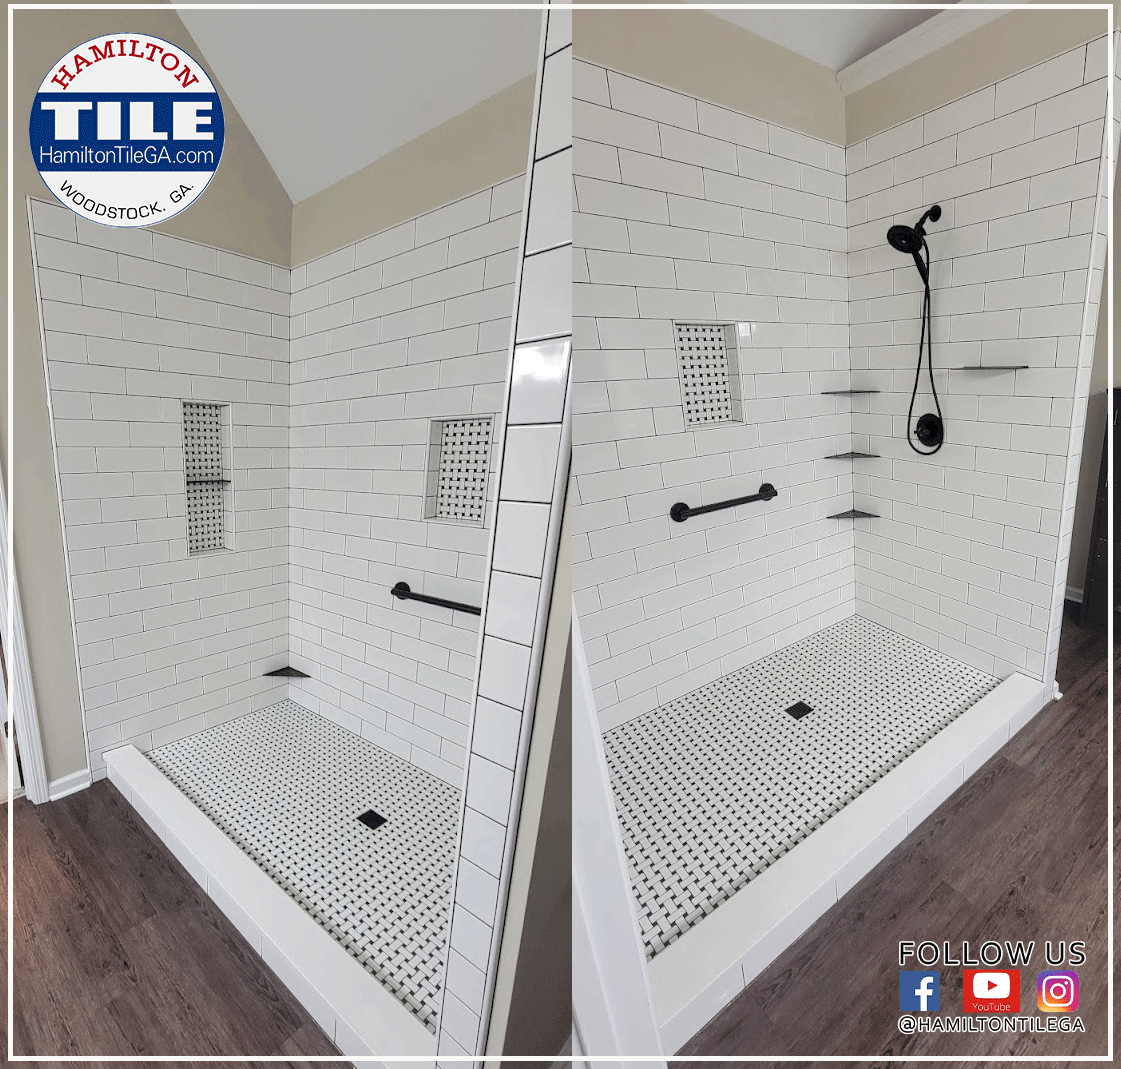
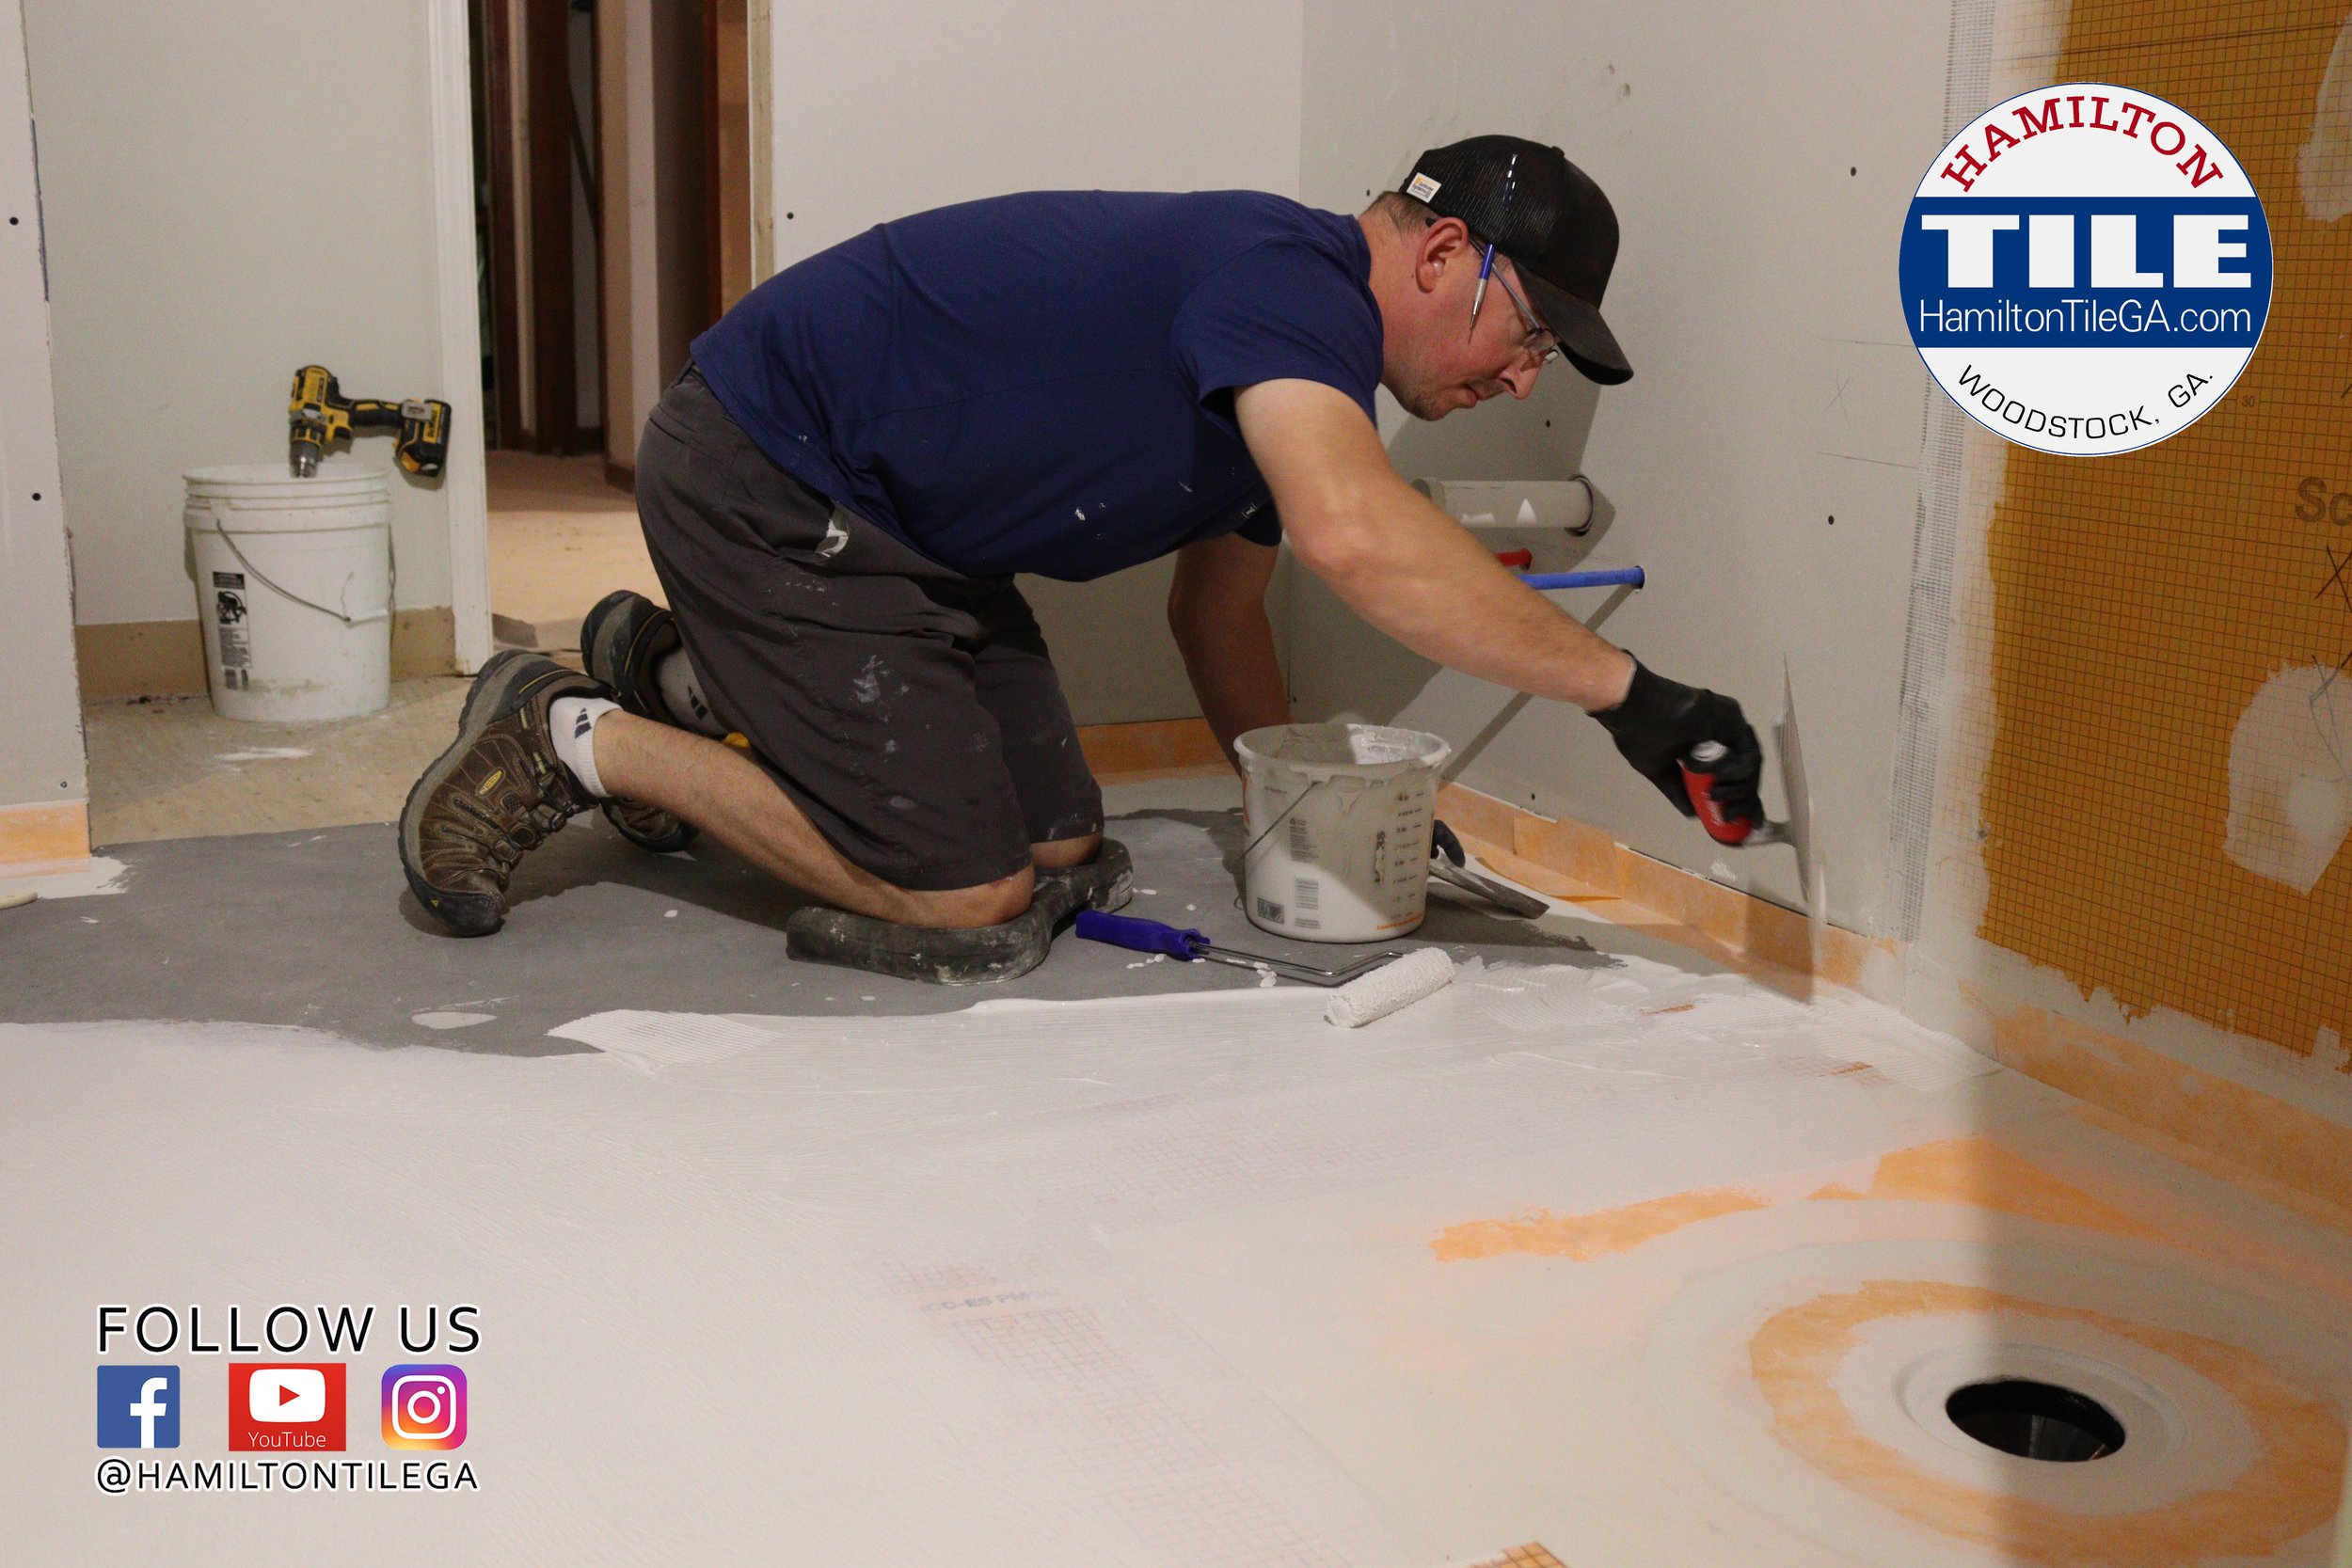
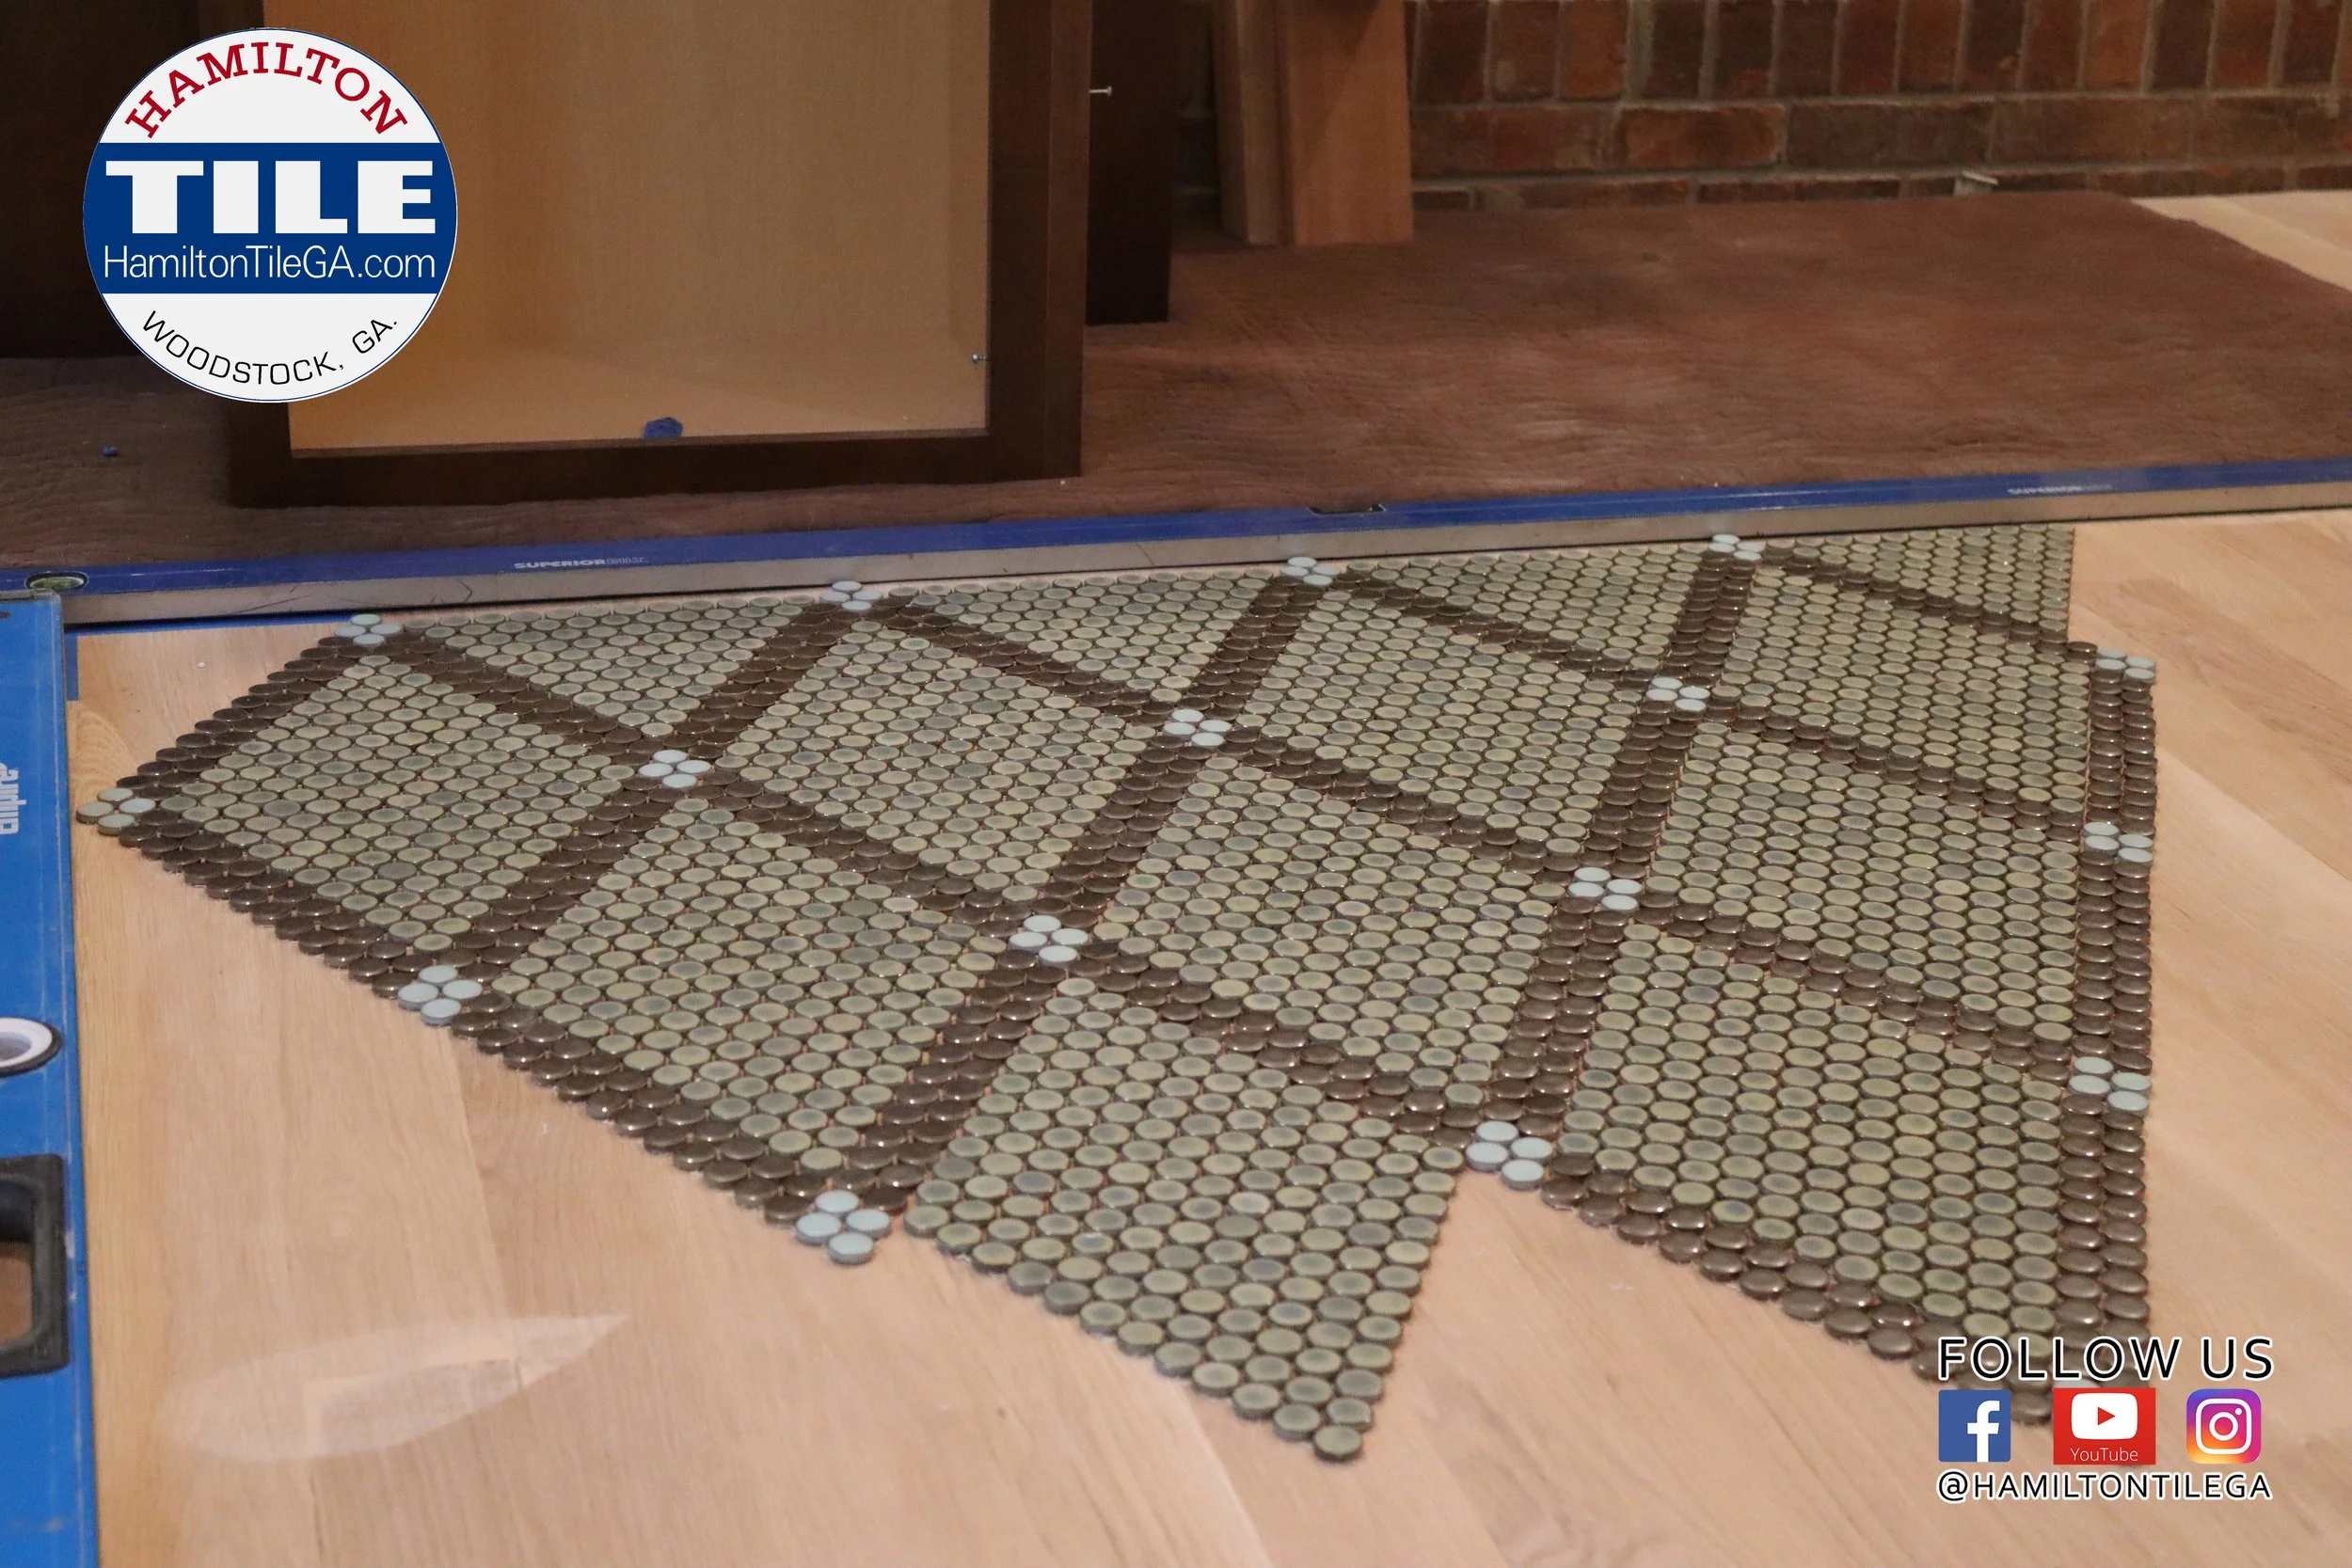
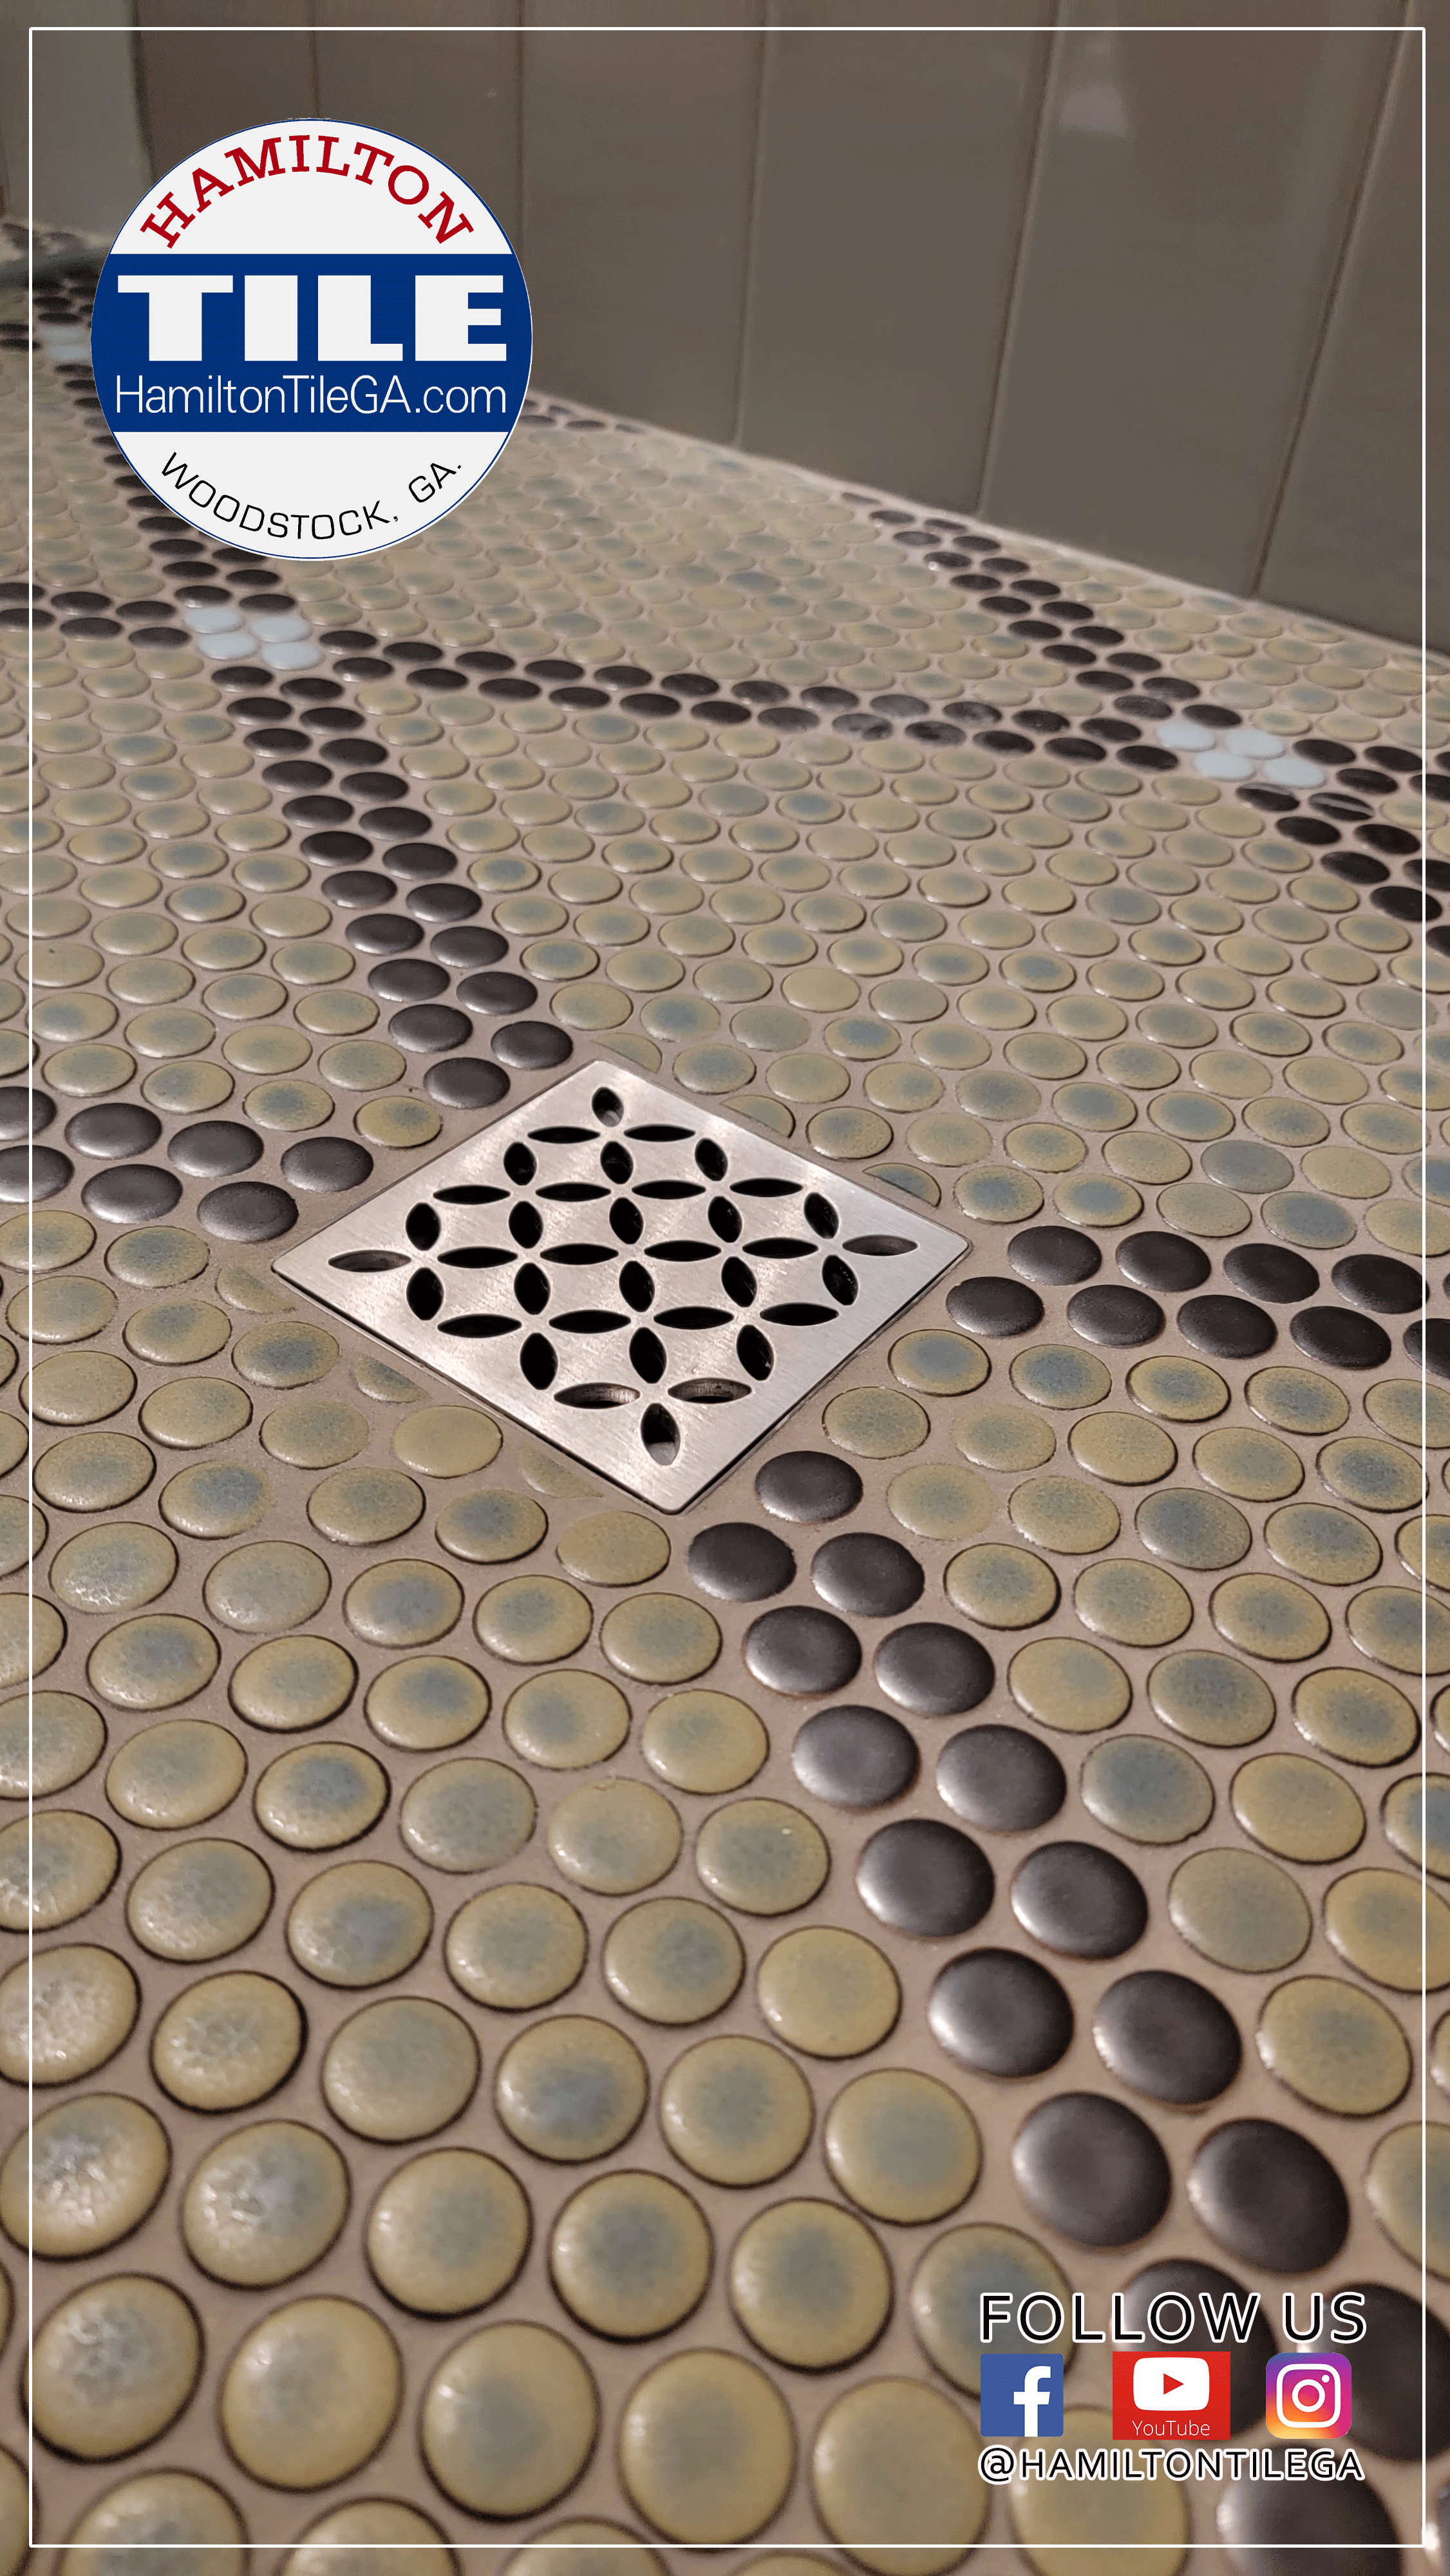
 4.      Real Time verification – Imagine hiring a contractor, pulling up their social media accounts or website and seeing YOUR project BEING BUILT. Not the fancy finished photos, but the GUTS of how your project was put together. Seeing the pride taken in the project, verifying that value is being added to your home.

 Our homeowners can do that!


5.      Comparison – Often, when hiring contractors, homeowners may not know the difference between one and the other. Again, this is why what we do with our content is a SERVICE---our homeowners or potential homeowners can CLEARLY compare and contrast and know the difference.


 With all this being said, I’ve come to the realization over the years that much of what we see online is FAKE. You may have that opinion as well.

 “They only show the good stuff.”

 While, we don’t often show the mess ups or the unflattering stuff---I feel that our homeowners can get the overall idea.

 We produce this content and to me, that’s better than what most contractors do---NOTHING!

What we do is the most authentic way that I know how.

 I suppose I’ll point back to the INTENT of these videos---to help our homeowners understand WHO and WHAT they are getting. To show how the sausage is made, so they can make an informed decision.

Our goal is not to become online celebrities…


Our belief is PUBLIC CONTRACTOR CONTENT benefits our homeowners and that is why we will continue to put our time and energy into creating it. It is part of our service!


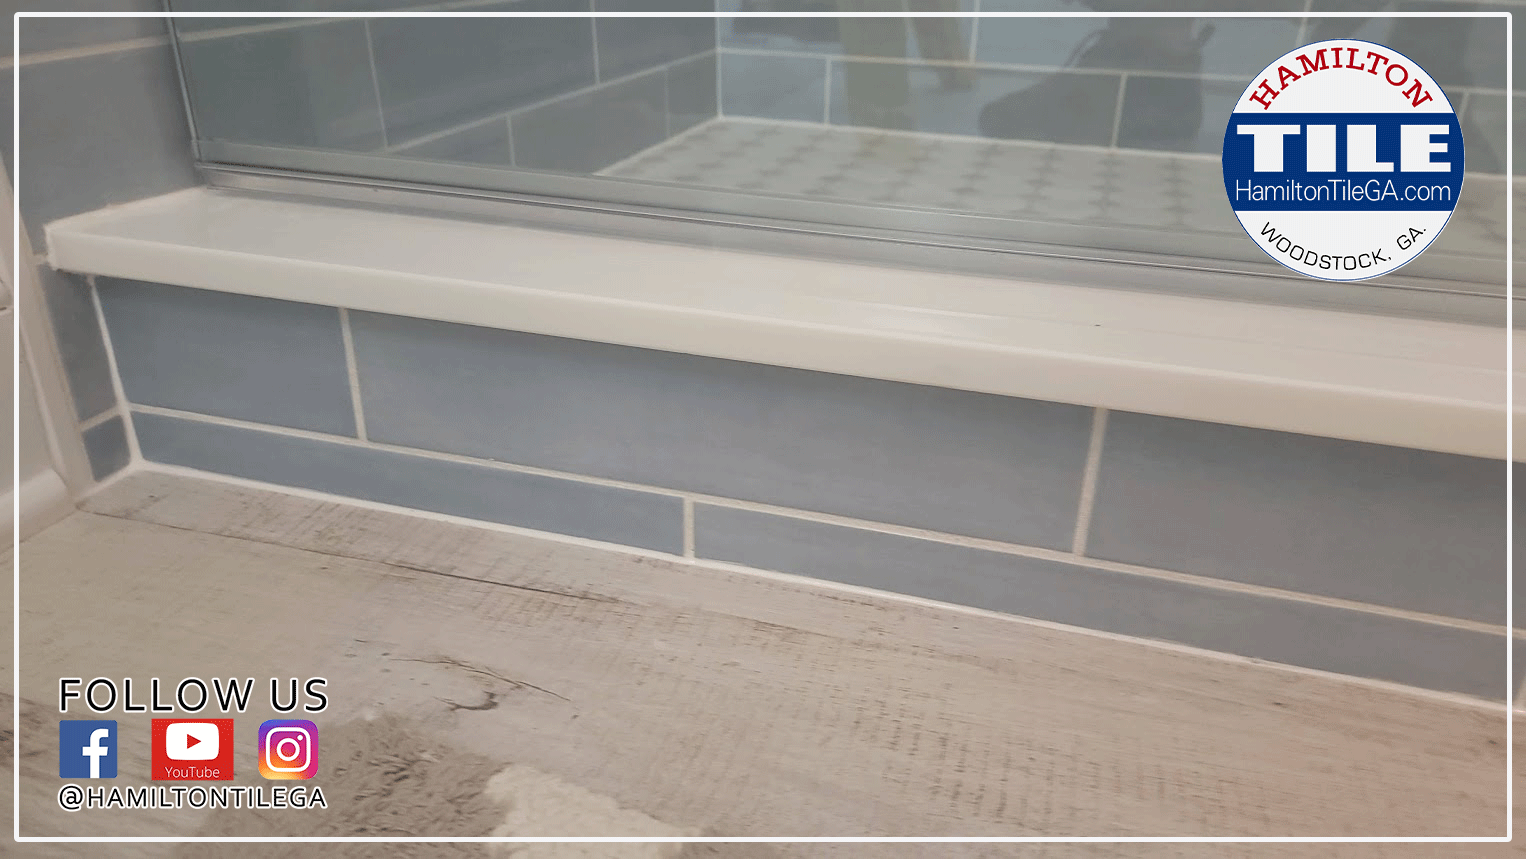
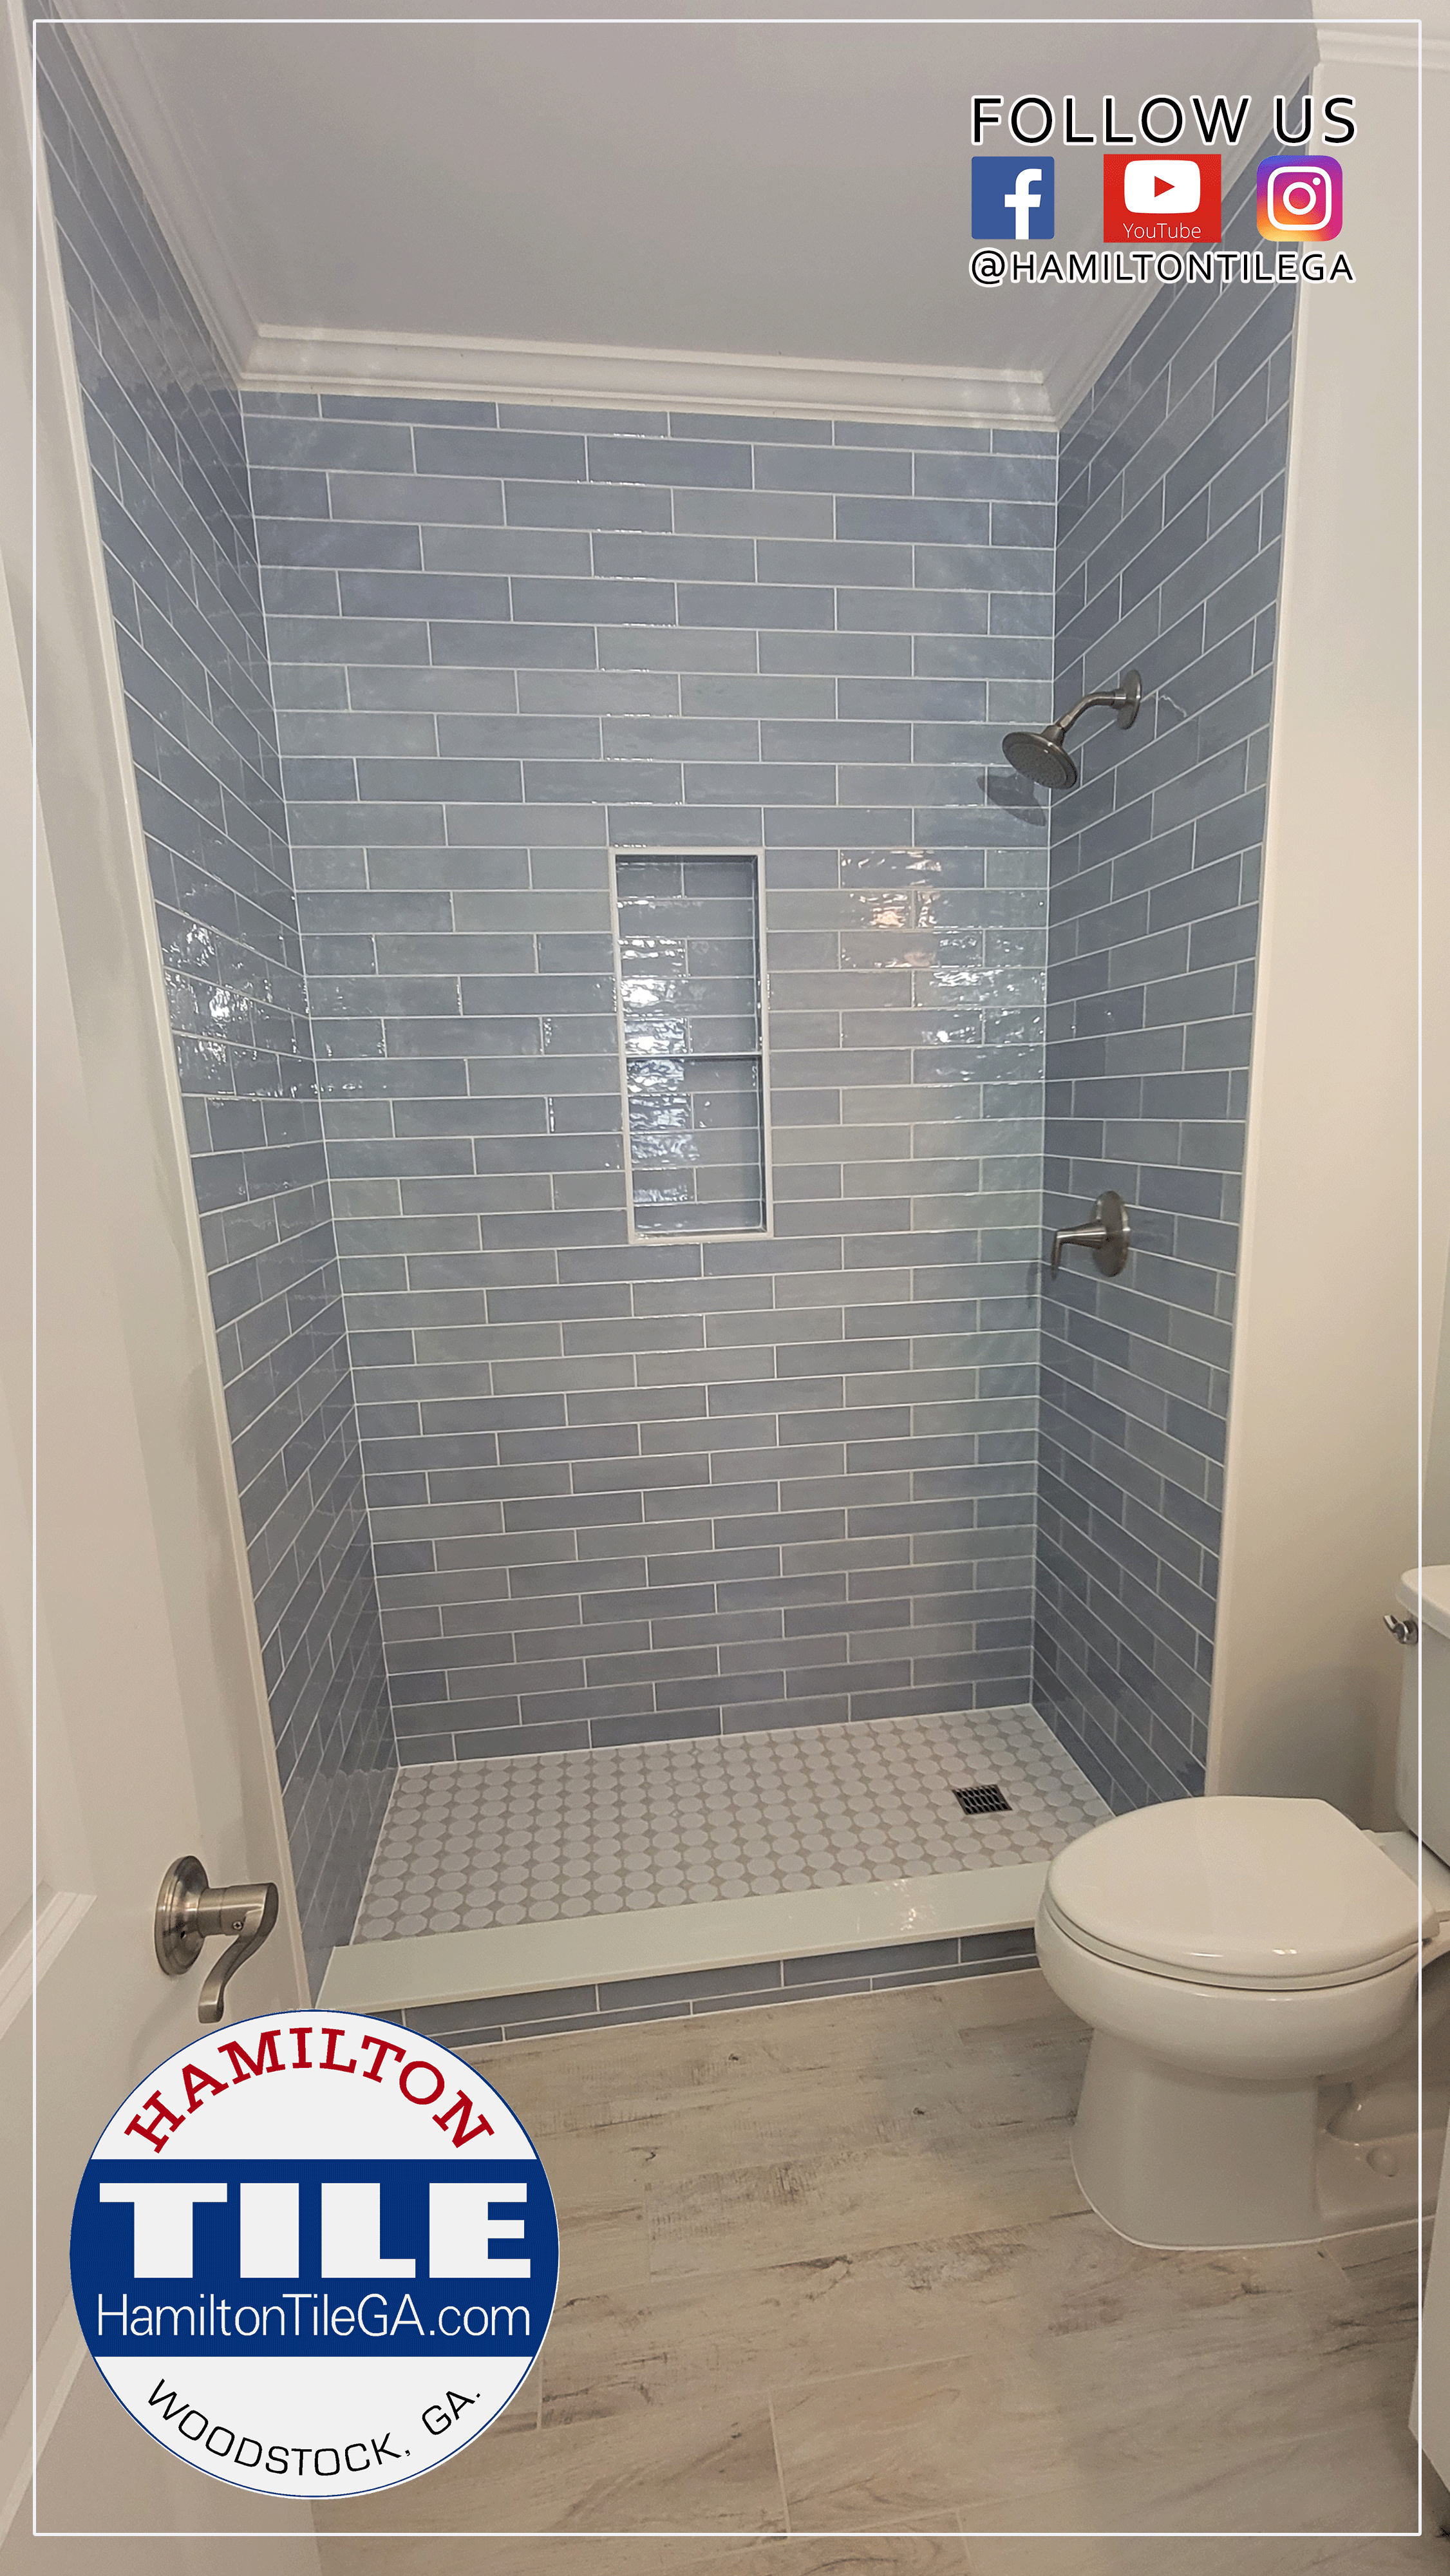
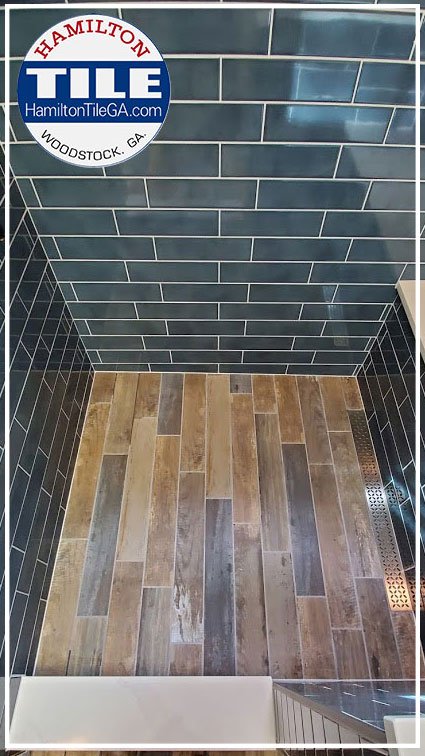
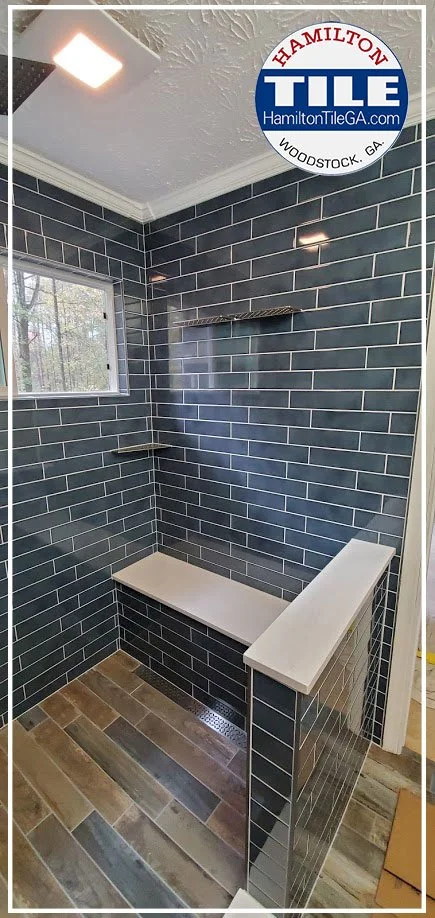
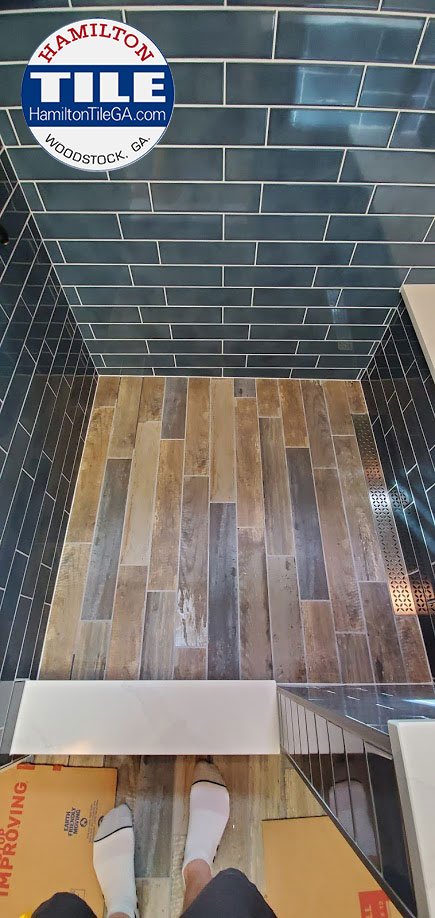
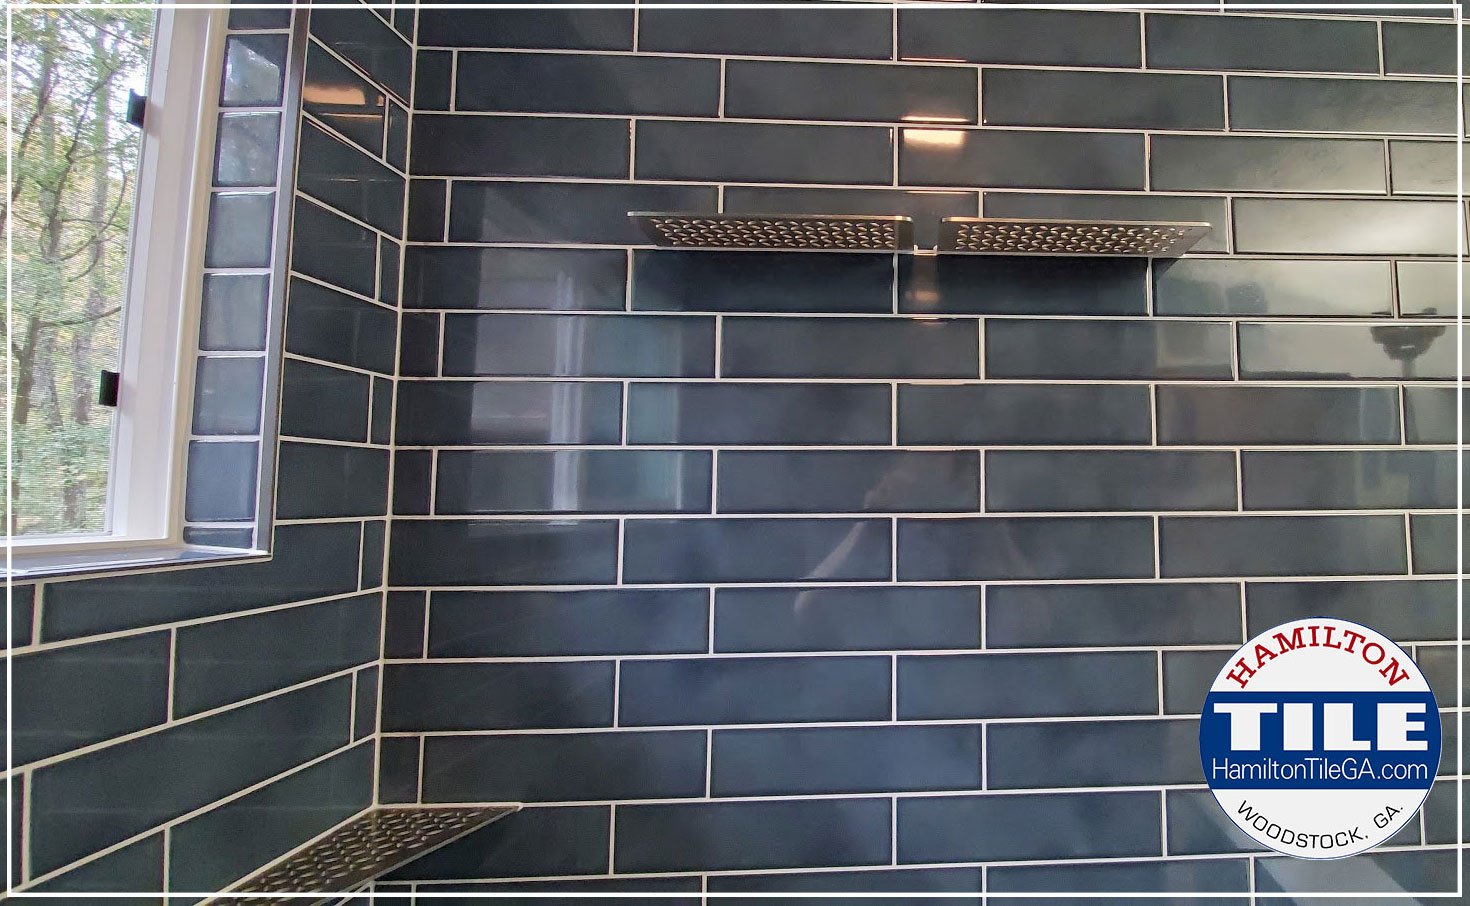
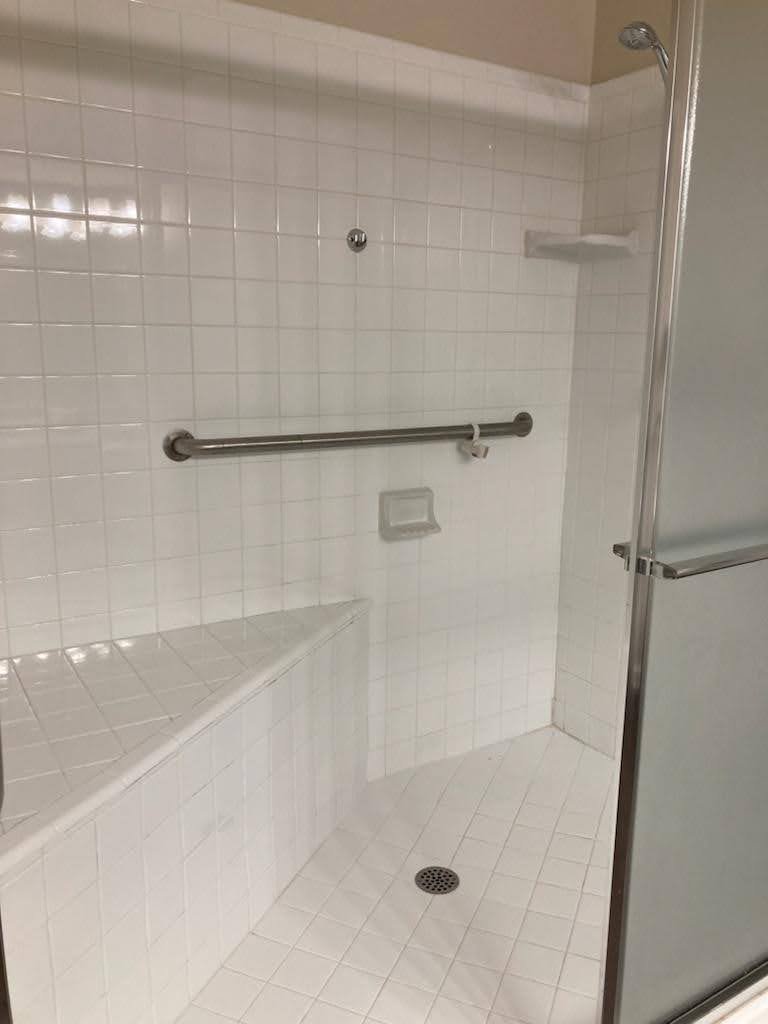
The videos I’ve attached to this journal post is a great example of what I’m writing about here. There are multiple videos of this sunroom project from beginning to end.

Say you wanted to hire us for a project similar to this, here we go again---this is what you can expect.

Embed Block
Add an embed URL or code. Learn more
Embed Block
Add an embed URL or code. Learn more

© 2023 HamiltonTileGA.com

Ben here, the curator of this site. This site is here not only as an informational tool for you, but also a promotional tool for our company Hamilton Tile, LLC. Tile and bathroom remodeling is what we do for a living, it’s how we support our families. If you are in our local area and you have a project that you think we would be a good fit for, please contact us. My e-mail is Ben@HamiltonTileGA.com and our office number is 770-675-6916. We would love to display our brand of quality and service in your home. Please follow us on Instagram and Facebook @hamiltontilega . Thanks for being here. For podcast or radio interviews contact us using the contact info above. Please consider DONATING BELOW. THANKS! Just click the photo.

🔥| The Built with Foam Shim System |How to flatten and plumb walls for tile! 🔥 | Instructional Video | 23 year Pro Testimonial #DIY #homeimprovement

A lesson I’ve learned over a decade of tiling:

👍What’s BEHIND the tile determines the overall finish of a tile project!👍

“Get your wall framing and backerboard FLAT and PLUMB!”

That will be the biggest challenge when tiling a wall in your home.

Whether that’s a shower or a back splash…it will be your steepest hill to climb.🏔

Most residential or commercial interior walls are not FLAT.

What do I mean by flat?

When you put a straight edge (level) across all the wall studs, they should all be IN PLANE. Every wall stud should touch the edge of your level. Tile DOES NOT BEND, so, when backer board is installed on wood framed walls, it must be FLAT.

Tile in general, especially rectified edge, large format tile has stiff requirements for installation.

ANSI 108.02 Section 4.1.4.3.2

Vertical Surfaces: For tiles with all edges shorter than 15 inches the maximum allowable variation is no more than 1/4” in 10ft and no more than 1/16 in in 1 ft from the required plane, when measured from the high points in the surface. For tiles with at least one edge 15 in or longer, the maximum allowable variation is no more than 1/8th inch in 10ft and no more than 1/16 in in 2 ft from the required plane, when measured from the high points in the surface.

Your walls MUST be flat in the prep stage. “Fixing” walls with thin set while installing tile is not the way to go.

Tile is FUN when installing on flat walls and that is what I want for you.💃

Your walls should also be PLUMB meaning your framing is PERFECTLY VERTICAL.

This system will help you get your walls FLAT AND PLUMB.

We are proud to be a Built With Foam Affiliate, it’s a product we use and support!

Please be sure to use our link for 10% off anything on BuiltWithFoam.com https://builtwithfoam.com/?ref=3238

What is the Built with Foam SHIM?

The Built with foam shims range from 1/16” - 1/2” in thickness and are made of water resistant, recycled foam. They are light weight and easy to cut and position. They are color coated according to size.

Foam shims from Built With Foam offer an array of benefits that make them a smart choice for any wall tiling project. From their uniformity and durability to their ease of use and environmental friendliness, these foam shims help you achieve professional-grade results without breaking the bank or using a lot of time. For those keen on a flawless tiling outcome, foam shims are an indispensable tool in your tiling arsenal. 💣💣

A construction worker checks to see that his walls are flat before he sets tile.

A “flat” wall means all studs are in plane and there is very little VARIATION in the wall.

It's important to have a plumb wall when setting tile and the Built with Foam shim helps with that.

Using a long level is a great way to check your work, but we will show you how to do all of this with a laser line!

The BUILT WITH FOAM WALL SHIM KIT is a very fast and effective way to PREP your wood framed walls for TILE if you are a DIYer OR a Pro tiler.:🔑

How to use the Built With Foam Shim system.

〰️

How to use the Built With Foam Shim system. 〰️

I’d like to start this tutorial by stating that this wall prep technique is classified as ADVANCED but I believe there is NO REASON a DIYer with some basic skills can’t pull this off. 💪

YOU NEED a good laser. CANNOT do this process without it.

To use this system, understand what you’re dealing with:

Your framed wall either leans IN or OUT. It’s out of plumb one way or another.

The shims will help you PLUMB the wall by adding the thickness you need, top or bottom.

🛑⤵⤵Study the graphic below.⤵⤵🛑

In the above scenario, the example on the left…we’ll add a half inch shim to the bottom. Now the wall is plumb and we’ll fill in with the necessary shim every 12 inches.

The example on the right, we’ll add a half inch on the TOP to make our numbers the same. The wall is now plumb and we’ll fill in with the necessary shim every 12 inches.


You now have a basic understanding of what we’re wanting to accomplish and what the issues are, here’s a step by step process explaining how to install the Built with Foam wall shim system.

Put glue on the back of your Built With Foam shim to stick it to your framing on the 12” mark.

  1. Clean all the junk off of your studs. Get your framing COMPLETELY clean. No glue, no nails, no screws. We like to use a planer to get our studs very clean.

  2. Mark the studs with a marker on the wall that you want to plumb and flatten every 12” from the top. We take our laser and pole and set that up to aid in this process.

  3. Take your laser and set it up in a corner, or in the middle of the wall on the floor, (depending on your laser). Turn it on. It will shoot a line parallel with the bottom plate of your wall. You want that line perfectly parallel with the bottom plate We set ours up at 2”, but that number can be any number under 6”. We’re going to do 2”. Laser line 2” parallel with the bottom plate of the wall.

  4. Now, take your folding rule and on every stud, every 12” mark, take a measurement. Find your HIGH spot or the spot on the wall that sticks out the FURTHEST. We set our laser up at 2” parallel with the bottom plate…Our highest spot will be our LOWEST number. Our high spot is 1 1/2” .

  5. Subtract 1 1/2” from 2”. That gives you 1/2”. Get two 1/2” shims from your kit and put them on the bottom plate. One on one end of the wall and one on the other. Your green parallel line is now at 1 1/2”.

  6. This step is to make for easy math. Take your laser and make it parallel with the base AND the added shim at 2”. So, your laser was at 1 1/2” with the shim. Now it’s at 2” with the shim.

  7. Your laser is set up at 2” again. Go around at every 12” mark on the studs and take a measurement. If the measurement says 1 3/4” you glue and staple a 1/4” Built with Foam shim to that mark. If another mark says 1 7/8” you add an 1/8” shim to that mark with glue and staples to make the measurement 2”. EVERY MARK YOU’RE MAKING 2” with the right size Built With Foam shim.

  8. Repeat the process on every 12” mark. Remember at your transition from backerboard to sheet rock…the “edge transition” (if you have one) put the shim under the edge of the sheetrock so the backerboard and the sheetrock are sitting on the same shim. This way, you’ll have a smooth transition!

  9. When you have your shims up, fill the space in between the shims with low expanding spray foam. This will help stiffen up the install and decrease deflection.

  10. Install your board remembering to put the screw on the 12” mark. You must put the screw through the foam spacer.

  11. Put a level on the installed backerboard and check for plumb and flat. There should be no space between the edge of the level and the backerboard. The level should lay FLAT on the backerboard with no voids.

Click here to download these instructions to use as a checklist.

We put spray foam between the spacers to fill the gap so the board has less deflection.

You can get the gun we use by using this link: https://amzn.to/3qLB4Ty

That’s it! If you follow this walk through exactly, you will be on the road to FLAT and PLUMB walls. 🆒

When using the built with foam shim and shower grab bar blocking...wet shim the area with thin set to stiffen it up.

When you have BLOCKING for glass doors or grab bars, use thin set to WET SHIM the void between the blocking and the spacers to stiffen it up!

This system has been a game changer for us, in helping prep our wood framed walls.

We’ve tried many ways: sistering studs, using spacers and drywall shims, but all of them have their challenges.

The Build with Foam Shim kit solves the specific problem of flattening and plumbing walls and it comes in an easy to use package.

This system is just so CONVENIENT. That’s the point.

On average this process takes us about 3 hours. It took longer when we first started but now that we have done so many, this process has become very efficient. ⏰

It’s great that they are color coated. You learn what color corresponds to what size very quickly.

We get around 4 showers out of each box. The box of spacers is around $100.

Transitioning between sheet rock and tile backerboard is tricky. The built with foam spacer makes it so you have a flawless transition.

Built with Foam shims help you get a very smooth transition between your shower backerboard edge and the sheetrock edge outside the shower.

Good news: Often you will use MANY more of ONE type of shim, say the 1/16”. It’s very common.

Built with Foam will send you more of ONE SPECIFIC size if needed.

Have some sort of cleaner and rag near by to clean the little bit of glue off your hands. (Tub o Towels)

We also find that these shims have many uses around a tile job. They make for great stops, so we can get the proper slope. Its great to have a kit of shims at set thicknesses to use.

Jason Hamilton, a 23 year veteran TILE INSTALLER and BATHROOM REMODELER gives the Built with Foam Shim System his full endorsement.


A brand new box of the Built with Foam shim.

I hope you found this post and video useful and we were able to teach you how to use these shims.🙏

Maybe we helped get you out of your comfort zone to try something new; a new way.

🌟🌟If this was the case, please consider using our affiliate link. It will get you 10% off your order on Built With Foam.com.🌟🌟www.builtwithfoam.com

We fully endorse this product. We use this product. We love this product and we are happy to finally have something like this that we can stand behind as a really USEFUL system that makes our wall prep much more convenient.

PLEASE CONSIDER USING OUR AFFILIATE LINK TO PURCHASE YOUR BUILT WITH FOAM SHIM KIT.💙

© 2023 HamiltonTileGA.com

Ben here, the curator of this site. This site is here not only as an informational tool for you, but also a promotional tool for our company Hamilton Tile, LLC. Tile and bathroom remodeling is what we do for a living, it’s how we support our families. If you are in our local area and you have a project that you think we would be a good fit for, please contact us. My e-mail is Ben@HamiltonTileGA.com and our office number is 770-675-6916. We would love to display our brand of quality and service in your home. Please follow us on Instagram and Facebook @hamiltontilega . Thanks for being here. For podcast or radio interviews contact us using the contact info above. Please consider DONATING BELOW. THANKS! Just click the photo.

The CLEANEST remodeling company: Woodstock, GA. #whitegloveservice🧹🧼

Funny thing, after all these years, we are in a routine…”It’s just how we do things!”

It’s at that point where things are habitual.

We don’t even really think about it.

But recently starting a new project with a massive, messy tearout (demolition) and ALSO working with other, new remodelers as a subcontractor— I see our level of cleanliness when working IS NOT the norm in home remodeling.

You have to understand, we’re working…hammering, cutting, opening walls and floors…inside someone’s LIVED IN home.

I suppose I’ve always known workers were terrible about being neat, tidy and clean but I’ve added experiences that confirm things are worse than I thought amongst my peers.

I want to point out to homeowners—IT DOES NOT HAVE TO BE THIS WAY.

I really get the impression, homeowners figure “This is how remodeling is! There’s just going to be a big mess!”

NONSENSE!

Even our work area, when we are physically working: If you look at the photos I post “during” construction…I don’t set those up for the picture. That’s how we are. Neat and Tidy.

I’ve known for years that I can be a bit clumsy, SO I TIDY EVERYTHING. Constantly. That’s a part that folks may not think about, A messy jobsite is a breeding ground for accidents.

Additionally, our homeowners take an active part in decisions while construction is happening; they are always in and out of our project.

We are BUILDING where they are LIVING. Our homeowners live in our construction site. We SHARE space with our homeowners in the most conscientious fashion.

We’ve made the commitment to have a SAFE work environment for us as well as them.

We are FANATICAL “clean as you go” types…so NEVER a BIG MESS at the end to clean up.

This is not a new construction zone, going to the bathroom in buckets or listening to loud music.

Here are some tangible examples:

We use REAL cardboard when we cover floors and surfaces. (Yes, we do that) Not paper. Paper gets wet and disintegrates. Using cardboard protects against DROPS as well.

We use carpet plastic, wide swathes for work areas and to protect carpet.

We use an AIR CLEANER. I’m shocked to find out this is not STANDARD PRACTICE.

PPE. We’re committed to PERSONAL PROTECTION EQUIPMENT. NO INJURIES on our DEMO DAYS! No cleaning up blood!

Another part of this, is being THOROUGH at what you do. I’m not leaving staples in the floor after demo day. I’m not leaving nails in the walls. The plumbing is safely buttoned up and secured. We grind down the floors. We wash with water to eliminate dust.

We are lovers of wide open space, plenty of room to move…Things we don’t need aren’t on the job site. They are tucked away. Swept up, wiped up. As a rule.

When we do demolition dust control is top priority.

Zip walls, a plastic wall to section off where we are working…habitual.

Our saw tent, ensures no overspray or mess on your cars or garage when we are using our wet saw! Rubber mats always on the ground to put things on and work on.

We are the cleanest remodeling crew out there and it’s not even close!

It’s how we are, it how we think…our whole mentality.

We don’t just care about getting the work DONE, we care about HOW the work is done.

That’s what being a “craftsmen” means to us.

Thought and ACTION into HOW things are done.

Our work can be esthetic. Our work can be discreet. Our work can be compassionate to your living space. We can SHARE space together. It’ll be great.

Yes, that is possible.

I have a saying, “Homeowners will settle for a lot of unsavory finishes and behavior for the right price.”

DON’T SETTLE.

It’s not about what you pay—-it’s about what you GET.

Clean, tidy, organized comes standard when you go with the guys from Hamilton Tile of Woodstock, GA. Fill out our Proposal Request Form by clicking here.

Update on what we’re up to: We’ve been working on a project in the Towne Lake area of Woodstock, GA and it’s been great to put our system to work for the homeowners. We are at the peak of our professional lives, our system and process dialed in, confident in our techniques and skills. The economy, from my perspective, is insane, cost of living and prices out of control. We continue to stay stable and focused, adapting and improving. We’ve completely neglected our podcast on YouTube and you can expect another one of those pretty soon. Lots to talk about.

© 2023 HamiltonTileGA.com

Ben here, the curator of this site. This site is here not only as an informational tool for you, but also a promotional tool for our company Hamilton Tile, LLC. Tile and bathroom remodeling is what we do for a living, it’s how we support our families. If you are in our local area and you have a project that you think we would be a good fit for, please contact us. My e-mail is Ben@HamiltonTileGA.com and our office number is 770-675-6916. We would love to display our brand of quality and service in your home. Please follow us on Instagram and Facebook @hamiltontilega . Thanks for being here. For podcast or radio interviews contact us using the contact info above. Please consider DONATING BELOW. THANKS! Just click the photo.

❤🗝EPOXY grout is the answer! #loveyourgrout

Why do we love EPOXY GROUT and consider it the INCOMPARABLE upgrade to your custom shower or new tile work?

I’ll answer that with a question:

What do tile detractors use as ammunition?

“YOU CAN’T KEEP THE GROUT CLEAN!”

Epoxy solves that problem.

A regular old, run of the mill grout is called a CEMENTITIOUS grout. Some of it is better than others. The cheap stuff, that is widely used, is SAND and COLORANT. Junk gets forced down into the cementitious grout because it is soft and not very DENSE. Once the everyday GUNK gets forced into the grout, there’s no hope of getting it clean. There was no hope of KEEPING it clean in the first place!🤮🤮

I want our homeowners to LOVE their new tile and I know based on experience homeowners HATE GROUT.

A lot of that revolves around how much CHEAP, TERRIBLE grout is used in much of the tile work out there!

I imagine folks would have a much different take on grout if they had experienced EPOXY GROUT more often.

Epoxy is different because of it’s TOUGHNESS. It’s extremely dense and hard which makes it impervious to everything you can throw at it in your bathroom, INCLUDING dirt and GRIME.

Using epoxy isn’t going to make it so the bathroom doesn’t have to be cleaned, it will simply allow you to always get your bathroom looking like new. 💎💎

Our entire tile outlook revolves around building LASTING and FUNCTIONAL spaces. We want them as LOW MAINTENANCE as possible. EPOXY helps us get our homeowners to that space.💖

When I think of “Never having to do it again.” I think of a bathroom grouted with epoxy.

Enjoy the video below to get an idea of what it’s like to install EPOXY GROUT.👍👍

© 2023 HamiltonTileGA.com

Ben here, the curator of this site. This site is here not only as an informational tool for you, but also a promotional tool for our company Hamilton Tile, LLC. Tile and bathroom remodeling is what we do for a living, it’s how we support our families. If you are in our local area and you have a project that you think we would be a good fit for, please contact us. My e-mail is Ben@HamiltonTileGA.com and our office number is 770-675-6916. We would love to display our brand of quality and service in your home. Please follow us on Instagram and Facebook @hamiltontilega . Thanks for being here. For podcast or radio interviews contact us using the contact info above. Please consider DONATING BELOW. THANKS! Just click the photo.

Level and FLAT. Foundational tile PHILOSOPHY.

Foundation (n) the basis or groundwork of anything.

Whenever we think of tile, the first thought should be the foundation.

A proper foundation UNDER a tile installation is what secures the lasting qualities of tile.

The foundation also determines whether you’ll have a good LOOKING tile project, as well!

A framed wall with studs that are NOT IN PLANE or PLUMB will make the tile job at the end look WRONG.

A subfloor with dips and dives, mountains and valleys, will manifest a tile floor that has lips and that will soon FAIL.

Our philosophy revolves around building the MOST SOLID foundation for our tile, so, we therefore attain a lasting tile job and a great looking tile project.

It’s a joy to think about installing tile on a flat and solid foundation.

It’s FUN to install tile on a flat surface.

That’s why we LEVEL the vast majority of our floors. Because we know that making a solid, flat and level foundation improves our tile installation.

Leveling a bathroom floor is a bit of a process with very specific steps to take.

We use a product called Ardex Liquid backerboard to level our floors. This is a leveler that does not require lathe. We apply a primer to ¾” plywood subfloor and pour our leveler from a wheeled mixing container onto the floor.

We have previously installed screws to the level we need to pour, so we know exactly how much leveler to put down.

The leveler, as it’s setting up, creates tremendous HEAT as it is hardening, 12 hours later we have the flattest and best surface to set our tile.

Often we’ll put an uncoupling membrane on top of this leveler (Ditra) but for this example we painted the leveler with Ardex 8+9 waterproofing and set a Victorian style mosaic tile on 12” sheets.

Installing tile to a FLAT surface ensures FULL THIN SET COVERAGE under the tile with very little effort on the part of the installer. Spread thin set with our trowel at a set thickness, put the tile down, wiggle or vibrate the tile and like magic, COLLAPSED TROWEL RIDGES and FULLY SUPPORTED tile---which will prevent cracking and movement.

A proper tile job!

In our video examples below, we level this jack and jill bathroom floor with Ardex Liquid Back board.

The stuff comes out like water, so we SEAL everything with caulking.

We use sill seal around the perimeter for expansion and contraction.

You CAN NOT pour this material and leave it tight against walls.

We leave the sill seal up around the perimeter until after grouting…why not? We are guaranteed perimeter expansion zones using this method!

Blue foam sill seal around perimeter.

It’s fun to think Jason and I have become experts at leveling floors. If you’ve done enough of it, you know how it can be hit or miss. Ten years ago, I remember making floors WORSE messing with this leveler!

Our experience has really solidified effective leveling techniques.

We now put a large straight edge on the floor and get to say “perfect”!

With bigger tile becoming the norm, with construction timelines and costs getting crunched…MORE AND MORE bathroom floors are having to be LEVELED.

Houses JUST ARENT built that great.

Builder grade finishes make it so leveling can be skipped. With the modern, high end finishes going in today, with most remodels, leveling is a must.

Check out this tool video I put together to see all the stuff we use to do a professional leveling job:

Last but not least, I can’t leave you without a look at us installing the floor. This one was LOTS of little pieces but I’ve grown to enjoy installing mosaics.

Anywho, Thanks for being here and I hope you found some of this useful and or entertaining. - Ben

Enjoy this Victorian mosaic tile install mash up:

© 2023 HamiltonTileGA.com

Ben here, the curator of this site. This site is here not only as an informational tool for you, but also a promotional tool for our company Hamilton Tile, LLC. Tile and bathroom remodeling is what we do for a living, it’s how we support our families. If you are in our local area and you have a project that you think we would be a good fit for, please contact us. My e-mail is Ben@HamiltonTileGA.com and our office number is 770-675-6916. We would love to display our brand of quality and service in your home. Please follow us on Instagram and Facebook @hamiltontilega . Thanks for being here. For podcast or radio interviews contact us using the contact info above. Please consider DONATING BELOW. THANKS! Just click the photo.

🧼How to frame and build a CURBLESS SHOWER: new construction.🔨 #curblessshower

The video above shows how to Frame and BUILD a CURBLESS SHOWER on a new build.

Building a curbless shower is SHOCKINGLY easy when they are planned from the beginning, during a new build.

This method works with TOPICAL waterproofing, otherwise known as a CONTAINED waterproofing system.

A contained system uses waterproofing like Schluter Kerdi membrane or Redgard, using a bonding flange drain.

This method of building and framing a curbless shower works best with a CENTER DRAIN.

Believe it or not, this is a BUDGET BUILD that makes a curbless shower MUCH more affordable!

This is also the ONLY approved method for building a curbless shower, according to the TCNA handbook.

It’s quite simple, during the framing stage:

Simply DROP the subfloor where the shower will be 2” and make your sloped pan up to the level of the outside floor.

Now, each step has to be followed in a specific order:

First, work on your walls and get your waterproof board up.

Second, install a waterproof uncoupling membrane, like Ditra, on the outside floor…

Third, Pack your shower pan to the level of the outside floor.

Fourth, Waterproof everything. A minimum of 3 feet outside the shower. Flood test.

A waterproofed curbless shower done with Ardex 8+9 and Schluter Kerdi Membrane. Remember, THIS IS A WET ROOM! Waterproofing is ESSENTIAL to longevity and functionality!

Fifth, Install the main outside floor tile.

Sixth, Make a screed stick and ramp down slightly into the shower pan to account for the different thickness of the MAIN FLOOR TILE and the SHOWER FLOOR TILE. (if applicable.)

Seventh, Set your inside shower floor.

At this point, if you did everything right, you will have a SMOOTH TRANSITION from the shower pan to the outside floor.

Eighth: Install wall tile and install all other products like you would usually.

The big challenge has been accomplished, a SMOOTH TRANSITION from the shower floor to the main floor.

You get the point!

If you’re wanting a curbless shower, this is a great way to do it!

If you plan it from the beginning stages, this is a sure way to success!

What do you think? Leave a comment below and BE SURE to SHARE this article if you know of someone who it may help!

Any questions be sure to contact me!

A brand new curbless, barrier free shower in Woodstock, GA perfect for an elderly homeowner.

Don’t forget to flood test your showers! 24hrs to check for leaks!

The final product.

© 2023 HamiltonTileGA.com

Ben here, the curator of this site. This site is here not only as an informational tool for you, but also a promotional tool for our company Hamilton Tile, LLC. Tile and bathroom remodeling is what we do for a living, it’s how we support our families. If you are in our local area and you have a project that you think we would be a good fit for, please contact us. My e-mail is Ben@HamiltonTileGA.com and our office number is 770-675-6916. We would love to display our brand of quality and service in your home. Please follow us on Instagram and Facebook @hamiltontilega . Thanks for being here. For podcast or radio interviews contact us using the contact info above. Please consider DONATING BELOW. THANKS! Just click the photo.

💩WARNING! Mixing waterproofing systems: IT DOES NOT WORK!👎

I started this blog many years ago primarily to help homeowners through the remodeling process.

Over the years I’ve noticed a trend.

I see many installers MIXING WATERPROOFING SYSTEMS.

It is a terrible practice and leads to MANY shower failures.

What does it mean to “mix” waterproofing systems?

There are two types of water proofing systems.

A water in, water out system…where the water soaks through the tile and the mud bed. It hits a rubber liner under everything that is sitting on top of an additional slope that allows that water to get to weep holes at the bottom of a three piece clamping drain and evacuate the system.

Water in water out system with 3 piece clamping drain.

A three piece clamping drain. For a water in- water out waterproofing system.

It’s a perfectly good system but has to be done EXACTLY. No skipped steps.

Then there is a CONTAINED system where a TOPICAL waterproofing is applied to the TOP of the mud bed. The water soaks through the tile and grout, hits a waterproof membrane or paint on waterproofing (like Red Gard) and goes to the drain.

With a contained system, there is no rubber liner and no water contacts the mud bed.

This is the type of waterproofing system we use. Schluter, Wedi, etc are contained systems.


Contained waterproofing system with a waterproof membrane and a bonding flange drain.

A bonding flange drain. Used with TOPICAL waterproofing.

The problem arises when installers start MIXING waterproofing systems.

They will use a 3 piece clamping drain and paint on a topical waterproofing on top of the mud bed that has a rubber liner underneath.

With this type of drain, there is no place for the waterproofing to BOND like on a BONDING FLANGE DRAIN where the drain body itself has 3” of area for the membrane or paint on waterproofing to make a substantial connection.

Installers will build a water in water out shower system and then paint on red gard or another topical water proofing, creating a MOISTURE SANDWICH. Because this topical waterproofing has no place to connect to the drain, it forces its way BETWEEN the layers, causing BIG PROBLEMS.

The worst part is often, because they painted a topical waterproofing on the pan itself, they think it’s okay to skip putting a PRE SLOPE under the rubber liner and they won’t keep the weep holes in the 3 piece clamping drain free, which in short order causes that shower to become a sewer.

MANY showers are built like this due to poor instruction and lack of understanding.

When building a shower, YOU CHOSE ONE OR THE OTHER.

WHAT TO LOOK OUT FOR:

If you see a 3 piece clamping drain (GENERALLY) It should be a water in water out system.

If you see a bonding flange drain…It’s a contained system.

The key is —-what DRAIN is being used?

A water in- water out system OR a contained system. NEVER BOTH.

Keep your eye out!

In the video below, Jason gives a very concise explanation of this phenomenon while standing in a failed shower that we were called in to inspect.

If you see this variety of shower, it is not being built using approved methods and it is waiting to fail!

Observe the issues system mixing caused in short order in the video below:

© 2023 HamiltonTileGA.com

Ben here, the curator of this site. This site is here not only as an informational tool for you, but also a promotional tool for our company Hamilton Tile, LLC. Tile and bathroom remodeling is what we do for a living, it’s how we support our families. If you are in our local area and you have a project that you think we would be a good fit for, please contact us. My e-mail is Ben@HamiltonTileGA.com and our office number is 770-675-6916. We would love to display our brand of quality and service in your home. Please follow us on Instagram and Facebook @hamiltontilega . Thanks for being here. For podcast or radio interviews contact us using the contact info above. Please consider DONATING BELOW. THANKS! Just click the photo.

💦💙What is a FLOOD TEST?! Why & how is it DONE?💦💙

It’s the most important factor in a shower build…

Is it water proof?

If you haven’t had a flood test, you don’t truly know.

💭What is a flood test?💭

Fill the water proof pan, before tile, with water. Take a measurement of the water level. Let the water set for 24hrs. Take another measurement. If the measurements are the same…you have a water proof shower.

After the flood test, you start to set tile.

We do flood tests so that our homeowners can KNOW WITHOUT A DOUBT, that their new shower does not leak.

We created a "Flood Test Certificate” signed by Jason and I to confirm a flood test was completed and that can be saved as part of the “service history” of the home.

Flood tests are included with every shower produced by Hamilton Tile.

For you, our homeowner.

If you are curious, here is the ASTM (American Society for Testing and Materials) guideline for a flood test:

https://www.intertek.com/building/standards/astm-d5957-98/

Thank you for your confidence in us and enjoy the video below.⏬⏬

© 2023 HamiltonTileGA.com

Ben here, the curator of this site. This site is here not only as an informational tool for you, but also a promotional tool for our company Hamilton Tile, LLC. Tile and bathroom remodeling is what we do for a living, it’s how we support our families. If you are in our local area and you have a project that you think we would be a good fit for, please contact us. My e-mail is Ben@HamiltonTileGA.com and our office number is 770-675-6916. We would love to display our brand of quality and service in your home. Please follow us on Instagram and Facebook @hamiltontilega . Thanks for being here. For podcast or radio interviews contact us using the contact info above. Please consider DONATING BELOW. THANKS! Just click the photo.

This Shower Bench Design Makes your shower FEEL BIGGER!✔

In the world of showers, the bench design is quite important!

Our Shower bench design makes your shower feel BIGGER!

What I see a lot out there are the big, ugly, obstructive corner benches similar to the one below:

This type of bench makes your shower look and feel much smaller— because of the front!

The question is, where do you put your feet?

It also messes up the SLOPE of your shower, as well adding more waterproofing!

Why are you paying more for something that is TERRIBLE?!

The way we make OUR shower benches is with a piece of 2” Kerdi foam board. It’s structural so it’s extremely STRONG.

We don’t have to mess with any of our waterproofing, as we tile the Kerdi board into the wall. Put a support U-channel in and it can hold an ELEPHANT, or your big wet BOTTOM!

The big question is ALWAYS…IS IT STRONG?!

Well, Look at this photo below:

When we get calls for leaking, failed showers, we regularly see the leaks are coming from around the BENCH AREA.

We have this problem solved with our shower bench building methods.

This method is also less labor intensive and less expensive.

Some of the traditional bench building methods use CONCRETE BLOCKS or WOOD FRAMING.

That takes time and material!

Some box benches make it so the glass installer has to customize the GLASS PANEL and make them into and “L” cut which WEAKENS the GLASS PANEL.

All of that is solved with a simple 2” piece of Kerdi board. This method has been tried and true for us over the course of 10 years.

IT WORKS.

Compare this to other methods. Our vote has been consistently, THIS.

© 2023 HamiltonTileGA.com

Ben here, the curator of this site. This site is here not only as an informational tool for you, but also a promotional tool for our company Hamilton Tile, LLC. Tile and bathroom remodeling is what we do for a living, it’s how we support our families. If you are in our local area and you have a project that you think we would be a good fit for, please contact us. My e-mail is Ben@HamiltonTileGA.com and our office number is 770-675-6916. We would love to display our brand of quality and service in your home. Please follow us on Instagram and Facebook @hamiltontilega . Thanks for being here. For podcast or radio interviews contact us using the contact info above. Please consider DONATING BELOW. THANKS! Just click the photo.

Your TILE JOB may not SURVIVE!👎🤷‍♂️ #wayabovestandard #nodoubt

What is the difference between TEMPORARY and PERMANENT tile work? It’s stuff like THIS!

Hypothetical world,
SAME tile, SAME house,

BUT

2 DIFFERENT installers. 🏘

What will make one tile job LAST and the other one NOT?

What's the difference between a 3 year tile job and a 25 year tile job?

👇👇👇👇👇👇👇👇👇👇

It's what Jason is talking about in this video….😇

I've spoken with many contractors, I am a LIFETIME construction worker.

I've never personally spoken to anyone else as SMART with this stuff as Jason.🤓

Here's why YOU as a homeowner should CARE about this stuff:

📌You WANT your tile job to last. It's why people USE tile, the lowest cost covering BECAUSE of how LONG it's SUPPOSED to LAST...(when installed PROPERLY) Tile is the LEAST expensive covering.

📌You WANT your tile job to last because it's the RIGHT thing to do!

How AWFUL is it for me to see PERFECTLY GOOD MATERIAL torn out OVER AND OVER AND OVER x100+?

How DESTRUCTIVE is it for our planet? Our CIVILIZATION?!

THE WASTE! IT'S IMMENSE!!!!🤮

How TAXING is it that in another 5 years, you have to go through another INVASIVE remodel?

How TERRIBLE is it to have BROKEN things THAT DON'T WORK, soon after you supposedly had it "FIXED"?

Losing that hard earned money?

👹This isn't to SCARE you. 👹

📣🎤THIS SHOULD BE SEEN AS A PEP TALK!🎤📣

The SOLUTION to this is the HOMEOWNER, the person paying the money, has to be a better JUDGE OF CHARACTER.

The homeowner needs to DO THEIR RESEARCH on HOW the renovation is done.

The homeowner needs to CARE.
& show your CARE by how you REWARD the folks working in your home!🎁🎁

🥰🥰Ours do ---- and I'd like for you to become one.👍

I KNOW our company will do a GREAT JOB for you.

If you want people who KNOW and BELIEVE it,💯
WHO DISPLAY IT,
WHO SHOW IT,
WHO'VE DONE IT,
and CONTINUE to DO IT...


Give us a call, I'd be honored for the opportunity.

Ben and Jason: Hamilton Tile.

© 2023 HamiltonTileGA.com

Ben here, the curator of this site. This site is here not only as an informational tool for you, but also a promotional tool for our company Hamilton Tile, LLC. Tile and bathroom remodeling is what we do for a living, it’s how we support our families. If you are in our local area and you have a project that you think we would be a good fit for, please contact us. My e-mail is Ben@HamiltonTileGA.com and our office number is 770-675-6916. We would love to display our brand of quality and service in your home. Please follow us on Instagram and Facebook @hamiltontilega . Thanks for being here. For podcast or radio interviews contact us using the contact info above. Please consider DONATING BELOW. THANKS! Just click the photo.

👣The sloped thing with a drain under your feet. #showerpan

As verified tile geeks, we really dork out about our shower pans.

That sloped thing under your feet, that goes to a drain—-Where all the action happens!!!

The functionality of your shower is built upon the shower pan.

Have you wondered how one is built?

Today, I’ve posted a quick video, FYI.

I hope all is well and see you for the next one!

Let’s check out a video of the tile going in:

© 2023 HamiltonTileGA.com

Ben here, the curator of this site. This site is here not only as an informational tool for you, but also a promotional tool for our company Hamilton Tile, LLC. Tile and bathroom remodeling is what we do for a living, it’s how we support our families. If you are in our local area and you have a project that you think we would be a good fit for, please contact us. My e-mail is Ben@HamiltonTileGA.com and our office number is 770-675-6916. We would love to display our brand of quality and service in your home. Please follow us on Instagram and Facebook @hamiltontilega . Thanks for being here. For podcast or radio interviews contact us using the contact info above. Please consider DONATING BELOW. THANKS! Just click the photo.

🐳A couple BLUE TILE bathroom ideas!👖 #bluetilebathroomideas

Are these ideas enough BLUE for your tile bathroom?

A couple BLUE TILE bathroom ideas!

A custom tile bathroom can be WHATEVER you want it to be, so why not make it BLUE.

All sorts of INCREDIBLE things are BLUE: the sky on a peaceful day, the Caribbean off a white sand beach, freshly picked blue berries, this BLUE POISON DART FROG…(I went down a rabbit hole)

Heck, I bet BLUE is your favorite color.

Blue doesn’t mean SAD, it means it’s time to relax, get clean (or whatever else you do) in your DECKED OUT custom bathroom!

Listen to ol’ Ben—- now’s the time. It’s time to bring it into your life, EVERYDAY.

BUT WAIT, A JOKE:

What is blue and not heavy?

😂Light blue.😂

Okay, now down to BUSINESS:

You’re here searching for inspiration —-

I present to you a couple of BLUE TILE bathroom ideas!


Our first showcase was built in Cumming, GA as a more comfortable and usable shower for an elderly parent.

It was originally a bathtub and we tiled the shower as a way of helping an elderly family member feel more comfortable and safe when they were visiting…Thoughtful idea!

One design feature was the contrasting white grout and white Schluter Quadec profiles. To me, it’s a classic look while not being “dated”. It’s a classic look, while not appearing like it belongs in a senior living facility.

We also put in a really sharp white mosaic tile floor peppered with grey accents.

On the floor OUTSIDE the shower was a 6” x 36” white themed hand hewed plank tile by SAVOIA Italia.

It’s a great BLEND of different materials and colors! It looks FRESH!

Here’s a great tip:

Remember your curb when building a shower like this. It’s where A LOT of the water action happens and you don’t want to be cleaning GROUT JOINTS down there! A SOLID PIECE of stone on the curb will reduce cleaning and maintenance, while looking cleaner, longer. THANK ME LATER!

You came for blue tile bathroom ideas, let’s get started:

This tile is CARMEN APE GRUPO Handmade tile purchased from our tile supplier, Tile House of Marietta.

It’s a Spanish tile with the “hand made” look. Inconsistent edges, different shades. Very intriguing!

I also made a video walk through of this shower right after we finished it. Take note, the glass doors have not been installed. Watch the video BELOW! ⏬⏬


Our next BLUE TILE bathroom idea is a bit DARKER, a bit DUSKY —- I LOVE IT!

This bathroom is located in Marietta, GA and it couples the navy blue tile with a PLANK tile on the shower floor. Coupled with a 3’ Schluter Linear drain, this thing is custom and ready for action!

Again, we contrasted the blue tile with white grout.

All the edging (profiles) we used to cover the naked tile edges were the powder coated Schluter profiles. The Schluter shelves were brushed nickel. Someone had an EYE for DESIGN!

Check out this link to read about the interesting powder coated color profiles we use all the time!

Blue tile bathroom ideas in Marietta, GA.


Well, blue fanatics, I’ll end it there!

I’m hoping you found my work informative and a bit entertaining.

FOR THE TIP TOP, HIGHEST RANKING BLOG VISITORS:

🤝Please, consider sharing with a friend or acquaintance who likes this kind of stuff!🤝

Thanks again and good luck,

your Tile Guy,

BEN.

© 2023 HamiltonTileGA.com

Ben here, the curator of this site. This site is here not only as an informational tool for you, but also a promotional tool for our company Hamilton Tile, LLC. Tile and bathroom remodeling is what we do for a living, it’s how we support our families. If you are in our local area and you have a project that you think we would be a good fit for, please contact us. My e-mail is Ben@HamiltonTileGA.com and our office number is 770-675-6916. We would love to display our brand of quality and service in your home. Please follow us on Instagram and Facebook @hamiltontilega . Thanks for being here. For podcast or radio interviews contact us using the contact info above. Please consider DONATING BELOW. THANKS! Just click the photo.

🚿How do you waterproof a tile shower in 2022? Woodstock, GA #tileshower #diy🚿

Schluter systems coupled with Ardex 8+9 will ensure a waterproof, LIFETIME tiled shower. We’re building them, Woodstock, GA.

How many times can a man say "waterproof" in one video?😂

This is how we waterproof a tile shower:

A tile shower using Schluter Kerdi foam board and fabric put together with water proof glue Ardex 8+9. The ultimate WATERPROOF TILE SHOWER in Woodstock, GA.

We're tilers out of Woodstock, GA and waterproofing tile showers is and will always be, very important to us.

Because the waterproofing is what makes any tile shower LAST.

After all, why do we use tile?

We use and love tile because it is a LIFETIME finish. One and done. Comfortable and relaxing, utilitarian, functional.👍👍

That's why tile is considered one of the lowest cost finishes, BECAUSE IT'S SUPPOSED TO LAST A VERY, VERY LONG TIME.

The cost is spread out over many, many years of use.💲

That's why "HOW DO YOU WATERPROOF?" is such an important question when buying a shower:

📢Because without protecting the wooden GUTS from the buckets and buckets of water processed everyday during a shower, your shower will fail PREMATURELY.📢

Wood and water don't mix!

I always say: TILER ERROR EQUALS TILE FAILURE!💩💩

Get it waterproofed. It's so important.

Verify how it's being done.

Get a FLOOD TEST.

Read about the products we use in the below links:

Ardex 8+9

Schluter System Kerdi fabric

Schluter Systems Kerdi Board

I hope this helps!

MANY THANKS, Ben (And Jason) 💪

#wayabovestandard #movingforward #tiler

🚿Follow: 🚿 FACEBOOK, INSTAGRAM - @HamiltonTileGA


© 2023 HamiltonTileGA.com

Ben here, the curator of this site. This site is here not only as an informational tool for you, but also a promotional tool for our company Hamilton Tile, LLC. Tile and bathroom remodeling is what we do for a living, it’s how we support our families. If you are in our local area and you have a project that you think we would be a good fit for, please contact us. My e-mail is Ben@HamiltonTileGA.com and our office number is 770-675-6916. We would love to display our brand of quality and service in your home. Please follow us on Instagram and Facebook @hamiltontilega . Thanks for being here. For podcast or radio interviews contact us using the contact info above. Please consider DONATING BELOW. THANKS! Just click the photo.

🔴Why is there a big crack in my shower tile?💭 #diy #tileinstallation

Why is there a big crack in my shower tile?

So, your shower tile is cracked.

What could be the culprit?

Here's an educated guess as to why your shower tile is cracked, based on my experience:

Behind your shower tile is some sort of backer board. It could be a foam product, it could be mud, it could be cement board. You put the tile on it with thin set, the material that makes tile stick.

Where two sheets of backer board come together, it's advisable to have a building product called SEAM TAPE in order to make a monolithic substrate for setting tile. You’re making two sheets of backer board into one.

Seam tape embedded in thin set makes the joint MUCH MUCH STRONGER.

In fact, backer board manufacturers want you to use seam tape when joining two backer boards. (page 5)

I see MANY tile installers skip this small detail, weakening a shower installation, sometimes causing tile to CRACK.

Believe it or not, this one small detail skipped, causes cracked tile.

Unfortunately, it's not something that can be remedied after the fact, so it is CRUCIAL that you install SEAM TAPE at all joints.

Tile installer error = premature shower failure.

I hope this helps!

MANY THANKS to all, Ben (And Jason) 💪 #wayabovestandard #movingforward #tiler

🚿Follow: 🚿

FACEBOOK, INSTAGRAM - @HamiltonTileGA

PS: Thanks to Elmer Bernstein for the use of the inspiring, aspirational music used in the video!

PPS: I saw the typo at the beginning of the video, I missed it and now it lives. As a warning. Revise, edit, revise! 😌😌

Please, 💯SHARE 💯 this article with ANYONE WHO NEEDS TO SEE IT!💪💪

© 2023 HamiltonTileGA.com

Ben here, the curator of this site. This site is here not only as an informational tool for you, but also a promotional tool for our company Hamilton Tile, LLC. Tile and bathroom remodeling is what we do for a living, it’s how we support our families. If you are in our local area and you have a project that you think we would be a good fit for, please contact us. My e-mail is Ben@HamiltonTileGA.com and our office number is 770-675-6916. We would love to display our brand of quality and service in your home. Please follow us on Instagram and Facebook @hamiltontilega . Thanks for being here. For podcast or radio interviews contact us using the contact info above. Please consider DONATING BELOW. THANKS! Just click the photo.

🛀What Schluter edging is right for my bathroom tile remodel?🔑 #bathroomdesign #bathroomremodel

What's the best Schluter edging (profile) for your bathroom?

Lots of options with tile, that's part of the game.🏈

What we are showing you here is what NOT to do.

We are seeing A LOT of this in our local area, JUST STOP!

This could have been done a lot cleaner (and safer) with the right choice of Schluter edging, otherwise known as profiles.

What we are seeing in our local area is SUPER SLOPPY WORK and the use of the wrong material for the application. 🤔

"Jolly" profiles are primarily meant for FLOORING applications.

In certain situations you CAN use them on walls, but in some situations they will cause NIGHTMARES.

This scenario, a 90 degree corner where two walls come together to form a point; where THREE tile edges need to be covered...in this scenario there is NO WAY to make "Jolly" profiles work, as Jason explains in the video.

🛑The solution to this problem, if you are only wanting to use Schluter edging (profiles) is to use a QUADEC or RONDEC profile. 🛑


Schluter Quadec profile corner example with porcelain tile and oil rubbed bronze finish edge.

These have CORNERS that you install WITH the profiles.

It makes a MUCH CLEANER LOOK. You can see an example of this at the end of our video and in the photo below:

What’s the right Schluter edging for your tile bathroom remodel? The answer: Rondec or Quadec.

That's the solution if you're using profiles...FOR WALL APPLICATIONS, use Schluter's QUADEC or RONDEC profiles. NOT JOLLY.

👍

———————————————————————————————————

I wish you all the best!

I also Hope you find this helpful.😀

Subscribe to our YouTube Channel if you found this helpful and give us a thumbs UP!

STOP

I know someone will say it, so here is a little addition to this article:

“But Ben, what about bending your profiles?”

Yes, this is one way to still use Jolly profiles and accomplish the task safely and esthetically.

BUT…this is not going to be the best in a situation like a TILED KNEE WALL OR PONY WALL…

I still stand by Quadec or Rondec profiles as the BEST OPTION for you tiled bathroom walls.

Check out the example below:

One way to accomplish this with “Jolly” profiles is to bend them. This, to me, is an acceptable corner but Quadec and Rondec profiles are far nicer!

© 2023 HamiltonTileGA.com

Ben here, the curator of this site. This site is here not only as an informational tool for you, but also a promotional tool for our company Hamilton Tile, LLC. Tile and bathroom remodeling is what we do for a living, it’s how we support our families. If you are in our local area and you have a project that you think we would be a good fit for, please contact us. My e-mail is Ben@HamiltonTileGA.com and our office number is 770-675-6916. We would love to display our brand of quality and service in your home. Please follow us on Instagram and Facebook @hamiltontilega . Thanks for being here. For podcast or radio interviews contact us using the contact info above. Please consider DONATING BELOW. THANKS! Just click the photo.

🚽The UPDATE you've been waiting: FOR THE RECORD🔥

I’ll remember this day as the day I was “Going to make a You Tube video again” So, now it’s here.

Another contribution to the record books.

I’m a once in a while YouTuber, with these longer ones. 🙄

It’s a small floor and you’ll notice we did a flood test that day, as well. The floor is on concrete and had ceramic mosaic previously.

This large format, wood look, plank tile will definitely be an upgrade.

We’ve been loving this project, a real challenge as we are working outside, out of the van. 🚐🚐

How spoiled are we when we can set up in the garage!

This tile game isn’t just thata boys.😒

Sometimes you gotta clean the wet saw after using it for five jobs. Nothin fancy in that, just work.💩

Plank tile on a bathroom floor with a new fancy shower for an elder visiting parent. We’re HELPING OUT. Being useful, the inspiration built in! 💯

. . . So, how’d we do it and why?

What’s in these tile guys’ head??🤷

The QUESTIONS HAVE ANSWERS, the answers you have yearned for, today, on THE BIG PREMIERE of:

The update you’ve all been waiting FOR THE RECORD. July 2022 . . . .

This video creation is a riot to make because we’re dealing with a lot, even without the camera! TIMELAPSE, here we GO! 😂

Just know that we do this content as a service TO YOU, our homeowners, past, present and future!

So you know what we’re doing and who we are.

It’s all part of the service. . . . .

🖐Yes, we have a business called HAMILTON TILE in WOODSTOCK, GA.👍 . . . We’ll do a great job for you, move your project forward, make it easy.

We are TILE GUYS, if that’s what you need.

We have a good business going. 👀

Give us a try:✅

MANY THANKS, Ben (And Jason) 💪 #wayabovestandard #movingforward #tiler .

© 2023 HamiltonTileGA.com

Ben here, the curator of this site. This site is here not only as an informational tool for you, but also a promotional tool for our company Hamilton Tile, LLC. Tile and bathroom remodeling is what we do for a living, it’s how we support our families. If you are in our local area and you have a project that you think we would be a good fit for, please contact us. My e-mail is Ben@HamiltonTileGA.com and our office number is 770-675-6916. We would love to display our brand of quality and service in your home. Please follow us on Instagram and Facebook @hamiltontilega . Thanks for being here. For podcast or radio interviews contact us using the contact info above. Please consider DONATING BELOW. THANKS! Just click the photo.

We BUILT that BLACK AND WHITE subway tile shower.

Here it is, we actually did it. We built that BLACK AND WHITE subway tile shower you’ve always wanted. Boy, it turned out nicely.

Featuring tons of storage: One large soap niche with a black Schluter shelf, one average size soap niche, 3 black Schluter corner shelves, one black self supporting rectangular shelf near the shower head and one corner shaving shelf for good measure!

That’s a lot of STORAGE and USABLE SPACE.

Top it off with BLACK fixtures, a touch of BLACK tile in the shower floor, black grab bar, a black FLO FX drain cover, black glass panel hardware and the top top BLACK Laticrete Spectra lock PRO, 2 part EPOXY GROUT.

WOW.

That black and white subway tile shower you’ve always wanted: Dallas, GA.

We loved how it turned out and our homeowner did too, with an off-sized white 4 x 12” rectangular subway tile and a black and white basket weave mosaic in the back of the boxes and on the shower floor.

Speaking of our homeowner, they were the best! It was a mutual love fest with appreciation and gratitude all around and these are the type of people that make it fun and make our vocation worth it.

They really treated us TOP NOTCH with lunches, conversation and compliments throughout this 2 week process. In fact, the homeowner helped us with the tear out…lugging out concrete blocks. She is TOUGH!

Before this remodel there was a very unsafe, builder grade shower with subway tile on a shower floor with a considerable pitch, dangerous for the disabled veteran homeowner.

They nailed the design with the help of Cindy over at Tilehouse of Marietta and we built them a functional, long lasting shower.

Now if you’re looking to hire us to do work for you, you probably care most about “How’s it built”?

First, this is mostly an Ardex brand shower. Ardex is a German company that is comparable to Schluter Systems. The board you see on the walls in the prep picture is Ardex brand foam board, which is waterproof throughout with a cementitious outer coating that the tile gets stuck to.

We’ve been using a product by Built with Foam to flatten our walls and that is where the skill is. Jason has gotten to be quite good at fixing wonky framing over the years to get a FLAT and PLUMB substrate to work with. Here’s how we do it:

Once the walls are flattened the backer board goes up. We custom packed out shower pan with Laticrete’s dry pack, which we like the best…

You can see that we use 2” Schluter structural foam to build our curbs. We have more flexibility with the SIZE of the curb and it is more cost effective to get one sheet of the 2” foam and rip down MANY curbs this way.

We waterproofed on top of our pan and curbs and all seams with Ardex sheet membrane, then we FLOOD TESTED our shower for 24 hours and we came back and set our floor. We covered the floor with cardboard and started on our walls.

EVERY SINGLE TILE on this shower was “BACK BUTTERED” and had excellent coverage. Coverage means the thin set ridges behind the tile are COLLAPSED and covering the entire tile.

We sanded all cut edges.

We siliconed all plane changes inside the shower with Laticrete’s Latisil 100% silicone. That’s the good stuff, we have found.

So, you notice a bunch of different products used.

WE SIMPLY USE WHAT WE HAVE FOUND TO BE THE BEST PRODUCTS THROUGH OUR EXPERIENCE.

All of our jobs get a lifetime guarantee from Hamilton Tile that our showers WILL NOT LEAK or degenerate due to product or installer error.

That’s it, this is how we built our shower and we stand behind our work!

Check out the IN PROGRESS photos taken by our awesome homeowner:

The ultimate “BEFORE AND AFTER” I love these so much. Look at that contrast!

The last thing we do is clean the glass installed by Chattahoochee Shower doors of Johns Creek. You read that right, WE CLEAN THE GLASS and after that, this black and white subway tile shower was DELIVERED.

This tile is a 4x12” white Intercermic tile was set with a 1/6” grout joint. The layout worked best with mirrored tile corners. Check out this blog article on the topic of a “mirrored vs. wrapped tile corner”.

The shower floor was a White and Black Basketweave Ceramic Mosaic Tile coupled with a black FloFX drain which is, in our opinion, the best drain on the market. It is a PVC bond flange drain made by a company founded by a tiler. It really shows in the smart design, which seems like it was made by someone who has done a lot of tile!

Notice the drain is NOT CENTERED. We did it like this because the drain position was set without going into more major demolition. The homeowner elected to leave it where it was as not to add to the project.

Here are some closeups of the soap niches. These are edged with Schluter Rondec profiles. In fact, the entire shower was edged with Schluter Rondec profiles. We use profiles because there are less pieces, less grout lines than when you use bullnose tile. It’s a cleaner look, don’t you think?

We used the shower floor tile to spice up the back of the boxes. The big box is 12x28” and the smaller one is 12x 20”. The big one has a black Schluter shelf down the middle. Notice FULL PIECES at the top and bottom of the boxes. We make our boxes custom to accommodate the size of the tile and to allow for bigger pieces, no “L” cuts due to good layout and planning.

These WILL FIT even the BIGGEST soap bottles you have.

The change of planes inside the boxes are silicone, and you can see on this sites how we COMPLETELY waterproof with Ardex 8+9 and Kerdi membrane.

Here we have the finished product, without the glass panel that will stop the water.

How cool is this?!

I must say, when black grout is being used GREAT CARE must be used sustaining consistent grout joint sizes or inconsistencies will be noticeable. That’s why EVERY grout line received a spacer throughout the construction of the shower. We are SUPER CONSCIENTIOUS to grout line consistency. The results were excellent when everything was grouted up.

Check out the VIDEO below:

GROUTED UP by the way, with EPOXY GROUT.

Yup, we mixed one part with another part and made true epoxy grout. Laticrete Spectra Lock Pro.

The stuff is TOUGH and it will last a very long time and you can always clean it back to it’s original color. It’s more money, but you’re NEVER messing with grout again. Many showers get the BOTTOM OF THE BARREL grout and that is why people HATE grout so much!

On an investment like this, something you use everyday, we recommend pulling the trigger for the good stuff and we have a TON of experience putting it in. It’s nothing new for us.

We try to install single piece curb tops because of how much water action the top of a curb gets. This curb top is Quartz from Top South in Marietta, GA.

My word for our business lately is GRATITUDE. We’re so grateful to be where we are and Jason and I talk about it all the time. Most days are pretty awesome for us. We relax and do what we do for great people and we’ve been getting excellent results.

I hope you can see that in this post.

We are at the top of our game professionally, we are young, motivated, skilled and barring any catastrophic unforeseens we are going to keep improving on what we do and keep bringing a great service and product to the people who choose to use us.

THANK YOU to everyone that supports us. I wish you all the best from behind my keyboard. PROSPERITY, PEACE AND JOY to all.

-Ben

© 2023 HamiltonTileGA.com

Ben here, the curator of this site. This site is here not only as an informational tool for you, but also a promotional tool for our company Hamilton Tile, LLC. Tile and bathroom remodeling is what we do for a living, it’s how we support our families. If you are in our local area and you have a project that you think we would be a good fit for, please contact us. My e-mail is Ben@HamiltonTileGA.com and our office number is 770-675-6916. We would love to display our brand of quality and service in your home. Please follow us on Instagram and Facebook @hamiltontilega . Thanks for being here. For podcast or radio interviews contact us using the contact info above. Please consider DONATING BELOW. THANKS! Just click the photo.

Tricky Glass back splash install: Atlanta, GA

Alright, all. Here’s a fun one!

This glass splash was at a home in Atlanta, GA.

It was an odd shape, so we made a template and used the template to cut and place the glass tile.

Lots of cool techniques here. Check out the short video and see how we did it!

© 2023 HamiltonTileGA.com

Ben here, the curator of this site. This site is here not only as an informational tool for you, but also a promotional tool for our company Hamilton Tile, LLC. Tile and bathroom remodeling is what we do for a living, it’s how we support our families. If you are in our local area and you have a project that you think we would be a good fit for, please contact us. My e-mail is Ben@HamiltonTileGA.com and our office number is 770-675-6916. We would love to display our brand of quality and service in your home. Please follow us on Instagram and Facebook @hamiltontilega . Thanks for being here. For podcast or radio interviews contact us using the contact info above. Please consider DONATING BELOW. THANKS! Just click the photo.

The craziest bathroom floor we've ever done!

It’s been a long journey on this project and it seems we’re finally closing in on the finish line. This one was outside of our wheelhouse in many ways, as it was a whole house remodel.

Big projects aren’t something we traditionally do because we are two people. Most don’t want to wait months for us to complete our tasks. The public doesn’t understand that on projects like this one, they don’t go quickly…adding to the unlikelihood we participate in projects like these.

But this homeowner wanted things done right, he wasn’t in a rush and our personalities meshed. We “shared values” as I always like to say. That really is my number one qualifier.

Although this project wasn’t one we would usually take on, it was intriguing because we were able to work with some of the most interesting material and exercise our mental capabilities on some of the biggest tile installation challenges:

Multiple heated floors, multiple curb-less/zero entry showers, LARGE format tile, odd shaped glass tile, mosaic tile, LOTS of self leveling, rebuilding rot, custom made to order tile, “mud” work, SPECIFIC patterns…not to mention sheet rock, additional carpentry….we generally handled everything that had to do with the areas we were working on and things the homeowner couldn’t find anyone else to do.

Jason did a lot of consulting and helped the homeowner in many ways, bring this thing to the finish line.

We aren’t quite done at this house, but it seems to be almost there.

One of the most amazing projects we took part in was this custom, hand made mosaic penny round pattern floor.

We had 3 kinds of penny round tiles: blue, purple and green. We took them apart and re-assembled them to make a Victorian style pattern. A real CLASSIC look.

We made the pattern in a separate room and moved it into the bathroom to set.

But before we could do that, we “packed” the floor with a sand mix to make sure we got the level right.

The homeowner wanted a curb-less, zero entry shower, so we had to raise the level of the floor in order to get the slope for inside the shower.

The old school method of “Packing” this floor was the perfect candidate to accomplish this.

You see, there were 2 other floors and the homeowner wanted them to be at all the same level. The difficulty was that the hard wood floors were already in.

So, Jason did the math and used his skills to make it all work. No step up or step down transitions.

Everything had to be done METHODICALLY. This doesn’t get done until this over here is done…

A curb less or zero entry shower, in this scenario, meant EVERYTHING had to be waterproof.

We also added a small curb in order to contain water that could potentially escape because the bathroom was so small that there was a door VERY close to the shower.

We waterproofed the whole room using Schluter products put together with Ardex 8+9 and then painting everything with Ardex 8+9 for good measure.

We then set the penny round pattern, moving the penny rounds (which were laid out in the other room) into the bathroom.

By the time we were done we could repeat the pattern in our SLEEP!

The best part, is we grouted this whole project (including this floor) with epoxy grout.

We did this because epoxy needs the least amount of maintenance compared to cementitious or other grouts. It’s the toughest stuff out there.

We had never done a floor like this and we are quite proud of it. I think it will really be another fascinating finish in this home. THERE ARE SO MANY HERE!

I’m so happy to be able to get so much great content out of this project. We’re thrilled to see how it’s all turning out.

This project is a testament to Jason’s skill and mastery of the tile trade. To be able to see this project from tear out to completion, that is what I’m most impressed with. For him to have the vision to see how it will all turn out, IMPRESSIVE.

As always, grateful for the opportunities, happy to help another homeowner,

CHEERS,

Ben

Jason finishing up epoxy grouting with Laticrete’s Spectra Lock Pro Premium.

Packing the floor.

An “old school” technique that still has it’s place!

Waterproofing EVERYTHING.

Notice the smooth transition to the foyer floor…A lot of planning when into that!

© 2023 HamiltonTileGA.com

Ben here, the curator of this site. This site is here not only as an informational tool for you, but also a promotional tool for our company Hamilton Tile, LLC. Tile and bathroom remodeling is what we do for a living, it’s how we support our families. If you are in our local area and you have a project that you think we would be a good fit for, please contact us. My e-mail is Ben@HamiltonTileGA.com and our office number is 770-675-6916. We would love to display our brand of quality and service in your home. Please follow us on Instagram and Facebook @hamiltontilega . Thanks for being here. For podcast or radio interviews contact us using the contact info above. Please consider DONATING BELOW. THANKS! Just click the photo.

Epoxy Grout - The ULTIMATE upgrade.

The biggest criticism homeowners have about tile is THE GROUT.

It gets dirty. It loses that "brand new" feeling very quickly.

Well, a lot of the problem is that most of the grout that is being used is from the bottom of the product totem pole.

It's the cheapest stuff that you can get. It's the most available. It's the easiest to work with.

All the major grout brands have their low end grout and that is mostly what gets used.

The solution: EPOXY.

Epoxy is made with two parts and it's the BEST upgrade you can do to your tile project. It's hard as a ROCK, it's color consistent, it's a SERIOUS upgrade.

It's GROUT for the GROUT HATER. It's one and done, it's paying now rather than paying later.

Epoxy puts the grout cleaner/restoration dudes out of business!

Consider EPOXY on your next bathroom remodel for a lasting finish that will look the same 5 years down the road, as the day we left!

Watch the video below for 3 reasons why YOU should use EPOXY GROUT!

© 2023 HamiltonTileGA.com

Ben here, the curator of this site. This site is here not only as an informational tool for you, but also a promotional tool for our company Hamilton Tile, LLC. Tile and bathroom remodeling is what we do for a living, it’s how we support our families. If you are in our local area and you have a project that you think we would be a good fit for, please contact us. My e-mail is Ben@HamiltonTileGA.com and our office number is 770-675-6916. We would love to display our brand of quality and service in your home. Please follow us on Instagram and Facebook @hamiltontilega . Thanks for being here. For podcast or radio interviews contact us using the contact info above. Please consider DONATING BELOW. THANKS! Just click the photo.