
Kennesaw, GA master bathroom shower.
This is one of our latest bathroom remodels in Kennesaw, GA. I really enjoyed this one and I’m really proud of how it turned out. This homeowner was really our ideal customer. We have a bit of an unorthodox process when it comes to the initial phone call. We usually try to get the majority of the ‘discovery’ and ‘qualification’ (if you will) done over the phone and e-mail. We do this because we’re a two man crew and we’re extremely busy with the act of building showers and doing tile work. If we ran out and saw everything we received a call about we’d have no time for anything. I always say “You can just as easily tell me no over the phone!” Most people understand where we’re coming from and this homeowner was one of them. I usually start out by asking for some pictures of the space they want remodeled and for them to also choose out what kind of tile their interested in by visiting a couple tile stores we work with. The sales people at the stores help with design. When I show up for an in home consultation, I want people to have an idea of what they want, because pricing can vary so much based on what tile someone chooses. It works out great for everyone when our system is utilized. These folks were more than happy to collaborate with us and trust our expertise and we were able to produce a really great finished product for them. That’s what I love about this business, when you do things right, you know it, because you get happy customers and beautiful tile work.

The glass is attached to a membrane and that allows you to build it out to be flush with the outside field tile.
My favorite part of this job was putting all the parts together and saving the glass decorative band for last. It was the most technical part of the install and I saved it for last! I cut about 100 glass arabesque variations in half, and the trick with glass is to cut it so the colored paper on the back doesn’t blow out and cause a jagged edge when everything is grout up. So, I cut each piece of the glass, one by one, being sure not to mess up, and then I sanded the sharp edge on each and every one of the glass pieces. I then put all the sheets together with the halves and measured the height of it all and cut the length to fit. because the glass was thinner than the outside field tile, I had to install it on a membrane so I could build out the band to be flush with the field. I let that all dry over night, cut the length in half and then, the moment of truth…will it fit?! I put it all up, and guess what…DIDN’T FIT! So I had to cut the top 6 inches off and trim a quarter inch off, no biggie, right? Just for that one glass decorative band down the center of the shower, Two Days labor! Gosh.
The best part, though, was when it was all grouted up. I get why people want glass tile. It looks SMOKING when it’s done. Boy, it is hard to work with, but when it’s put together to a high level it is amazing.
Another neat part of the job was that we were able to use Schluter’s new foam pan that has the waterproofing already attached to it. It worked out really great. Schluter’s engineers really aced it! They pretty much solved all the issues with the old foams pans with this new one. It’s a lot more stiff/sturdy, it’s a bit bigger than the old pan and the slope is right on the money. Makes for a very nice shower floor because the slope is very consistent. Far less build up putting it all together as well. We ended up self leveling inside the shower pan, and when it was time to set tile, it was dead nuts level all the way around. Can’t ask for much more that that!
Good times.
BEFORE:

We took the wall out and the framed door. The homeowner had to duck his head to fit under the door frame. This thing was built before the sale of this house and looked and performed just well enough to sell the house.

I’ll never understand natural stone. I am not a fan, generally.


That drain was packed tight! The pan wasn’t draining correctly so the natural stone shower floor looked (and was) permanently wet.

This corner bench was a wood box built on top of the shower pan with tile set directly to wood. This shower had a permanent stink to it, and it was coming from the swamp that was inside and all around this corner bench.
AFTER:

The shower leaked and this persons insurance company paid for the bathroom floor. Not bad, all things considered. Straight set 12x24’s is always the way to go! Not only do you get a flatter floor, and the ability to get larger pieces everywhere in your layout, it’s also a more contemporary, modern look.

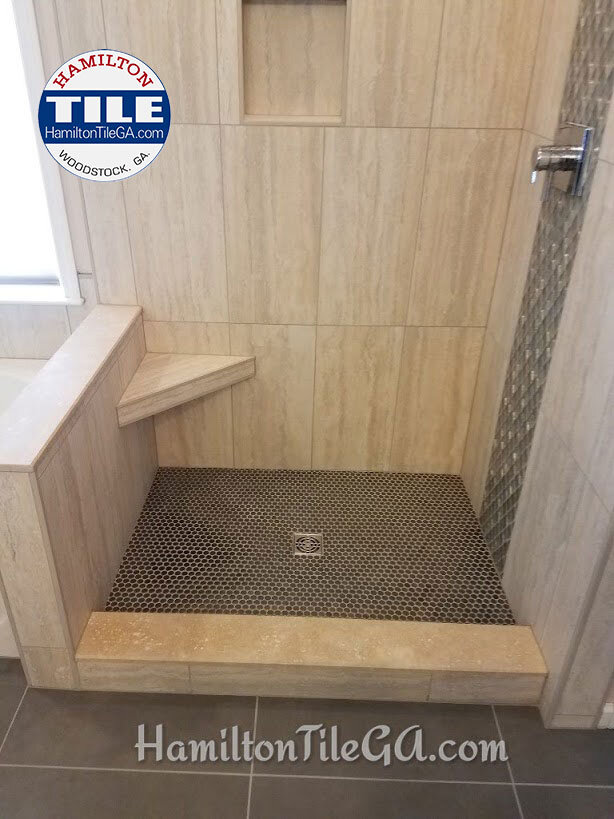
The corner bench was designed for leg shaving only. Generally, people don’t even sit on the big corner benches and simply use them for “stuff”…this one was made smaller for a singular purpose. We’ve been doing that a lot. so it may be a trend. We used color matched Schluter profiles to edge this tile. This is another trend, moving away from antiquated bull nose.
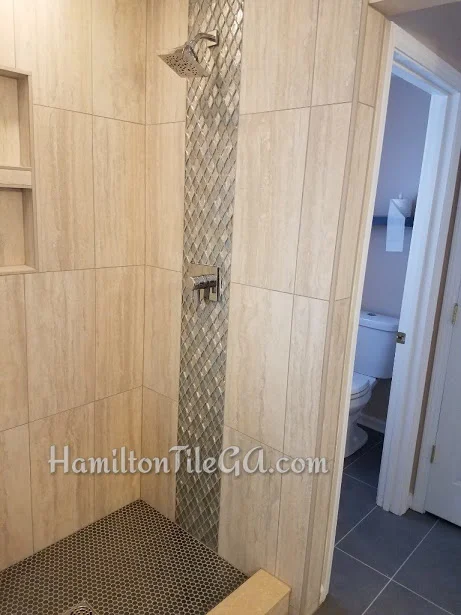
This is a glass band falling into a penny round floor. We used a hard surface curb for easy cleaning.

Originally, this floor had 12x12 porcelain tile…rounded edges. They upgraded to this large format, rectified edge tile. The difference in daily use is going to be astronomical. This is why we remodel, and why you want a new bathroom.