

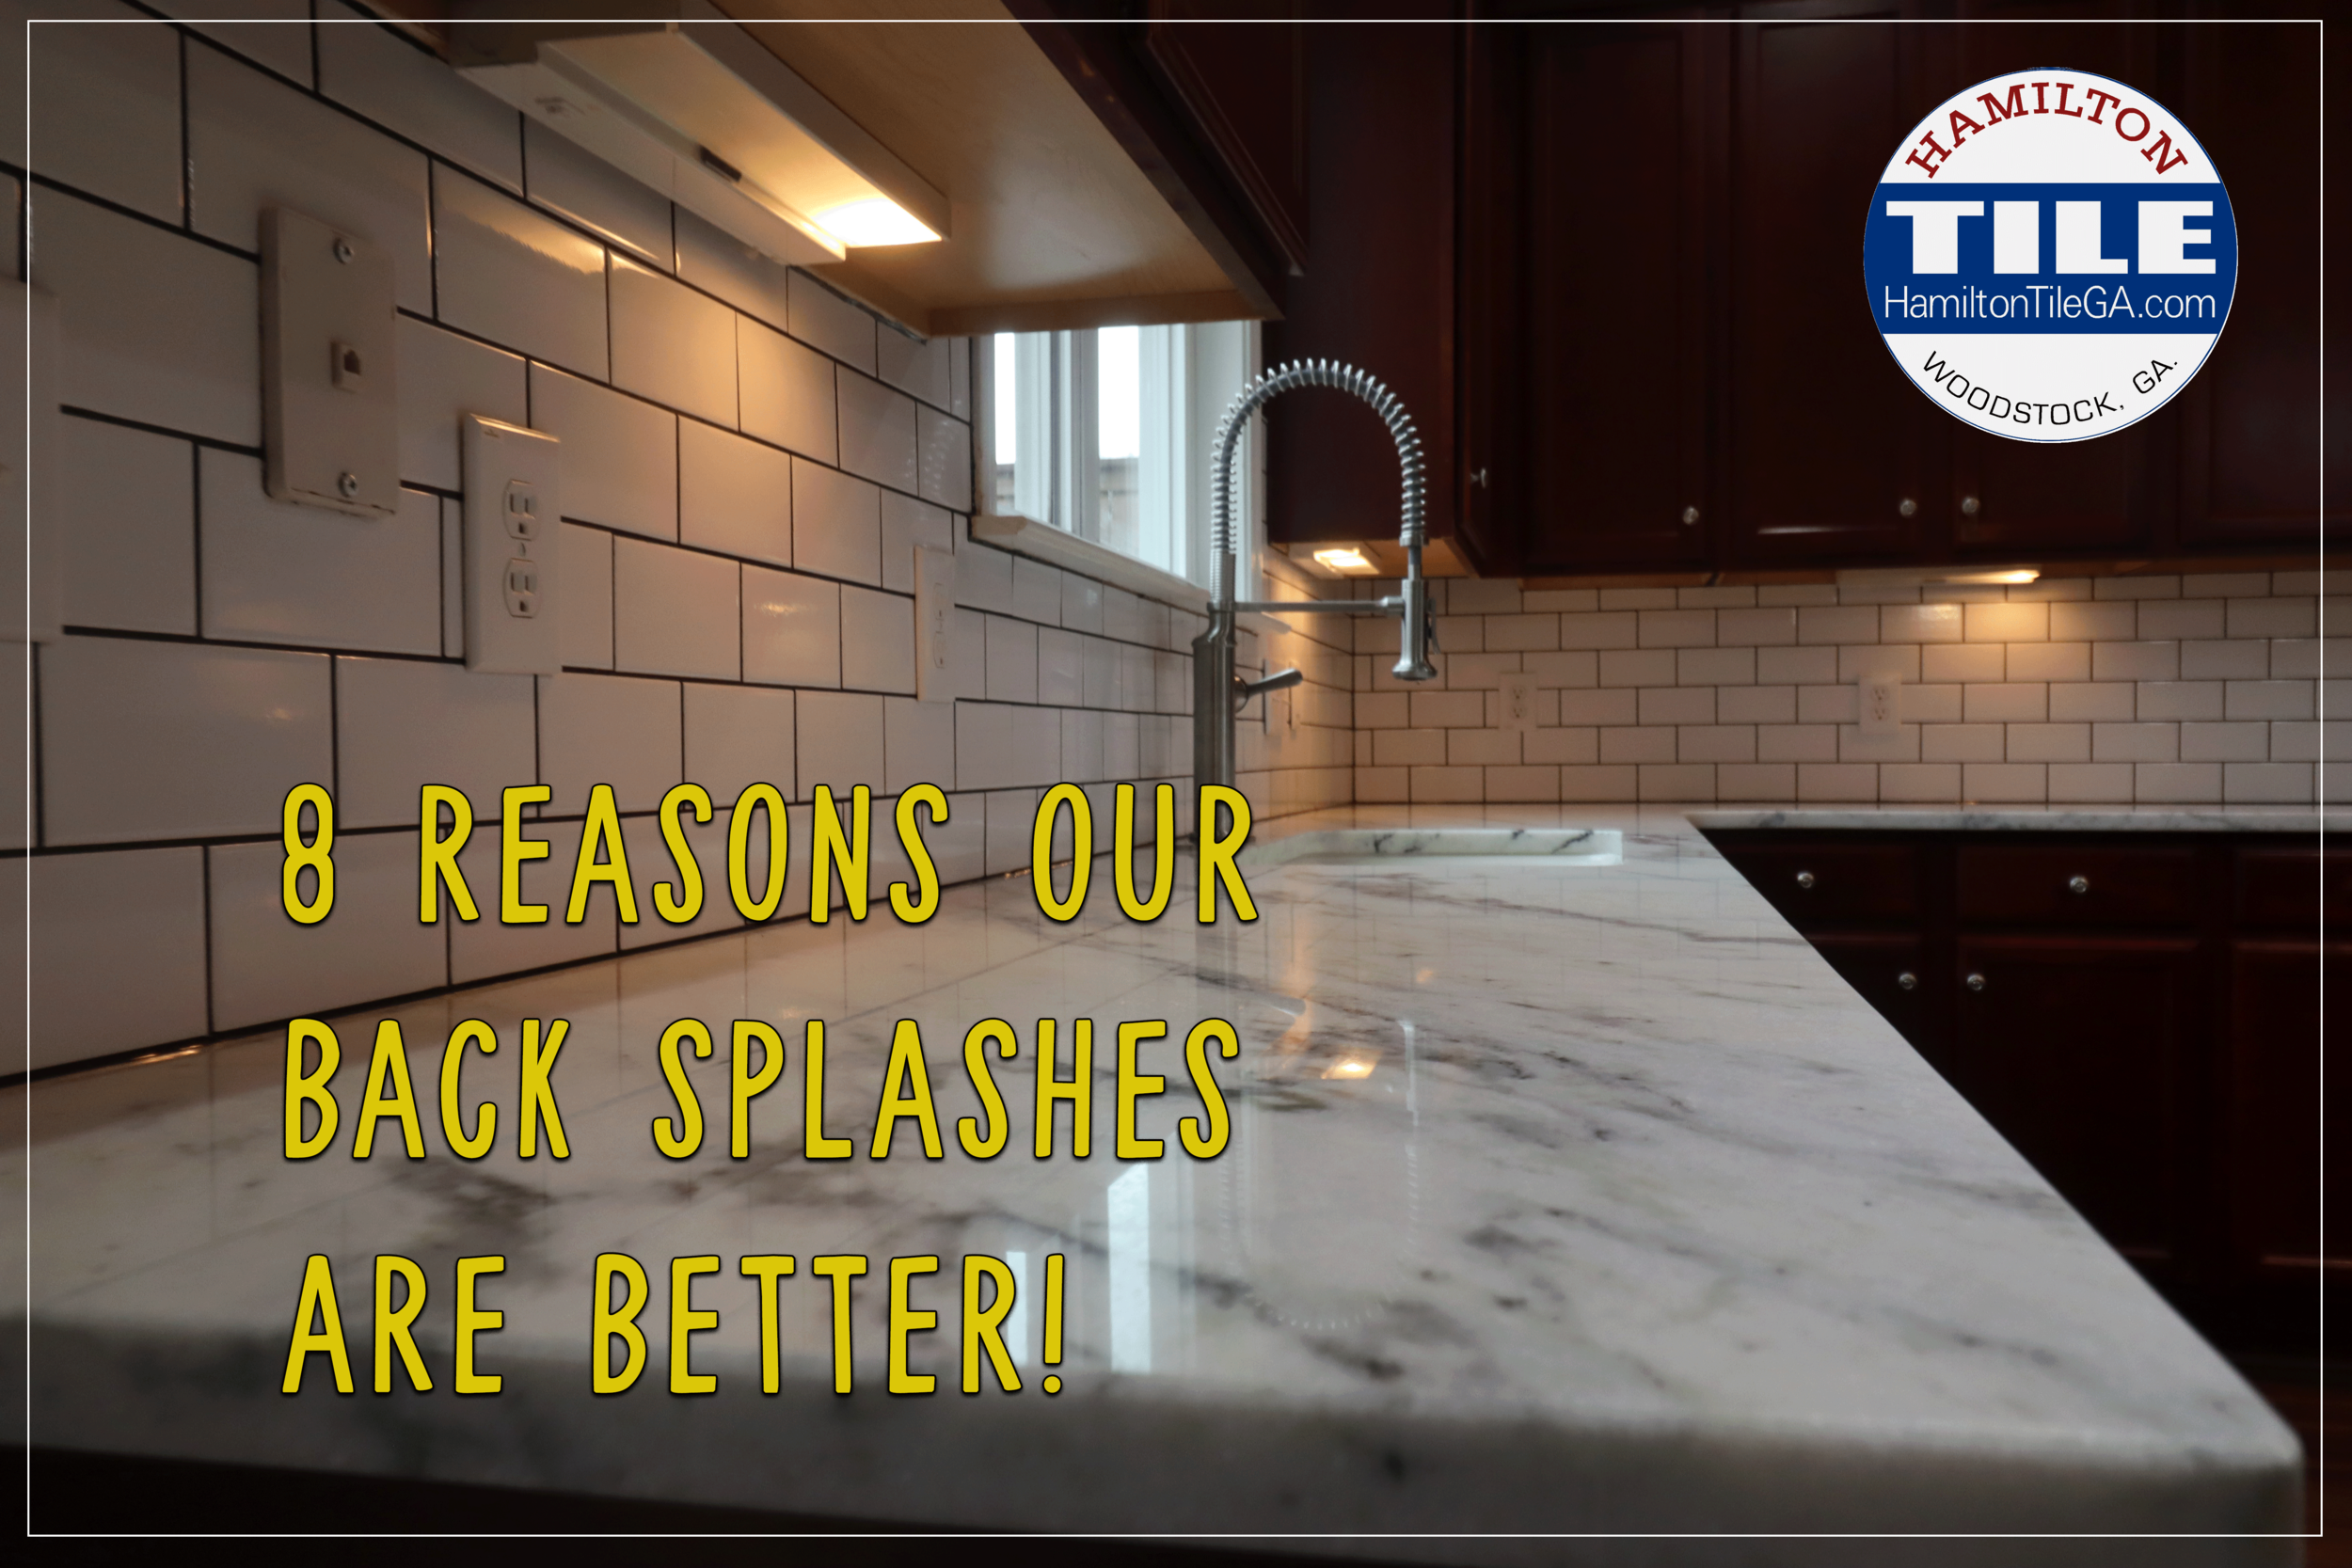
It’s a fact! We can prove it!
I receive many calls every month for kitchen back splash remodels.
Especially in the Greater Atlanta area because there is a lot of remodeling going on!
Homeowners find us online and they see something they like. They get our number from a neighbor.
These are folks who care about HOW your project is built and they want people who understand the SERVICE side of remodeling.
BUT:
Many homeowners are shocked by what a back splash costs to install. Why do our creations often cost double the “handyman” or the “builder”.
It’s because we are BETTER and I can show you how!
What are you paying more for when you hire Hamilton Tile to take on your new kitchen back splash?
It’s TANGIBLE, EVIDENT, OBVIOUS. Allow me to explain:
Give me the EASY button...
SMACK IT!!!!
Here are 8 reasons our back splashes are BETTER.
We use backer board meant for TILE.
If you’re serious about tile, you use products meant for tile.
Sheet rock works, but not as well. Therefore, we use tile specific backer boards.
Tile makes a better bond to tile specific backer boards and our backer boards are water proof. Kitchen areas can get WET. Waterproof therefore is BETTER.
They reduce inconsistencies on the substrate and also do not require mud, tape or paint, thus eliminating multiple steps.
Our backer boards also reduce the DUST in your house because they are foam based. There is less grit which may scratch your appliances or floors because they are not CEMENT based.
We use tile specific boards like Ardex board, GoBoard, Kerdi Board, Wedi board or Durel board.
Look them up online, they are great tile installation products.
All of which are SUPERIOR to sheet rock and cement board.

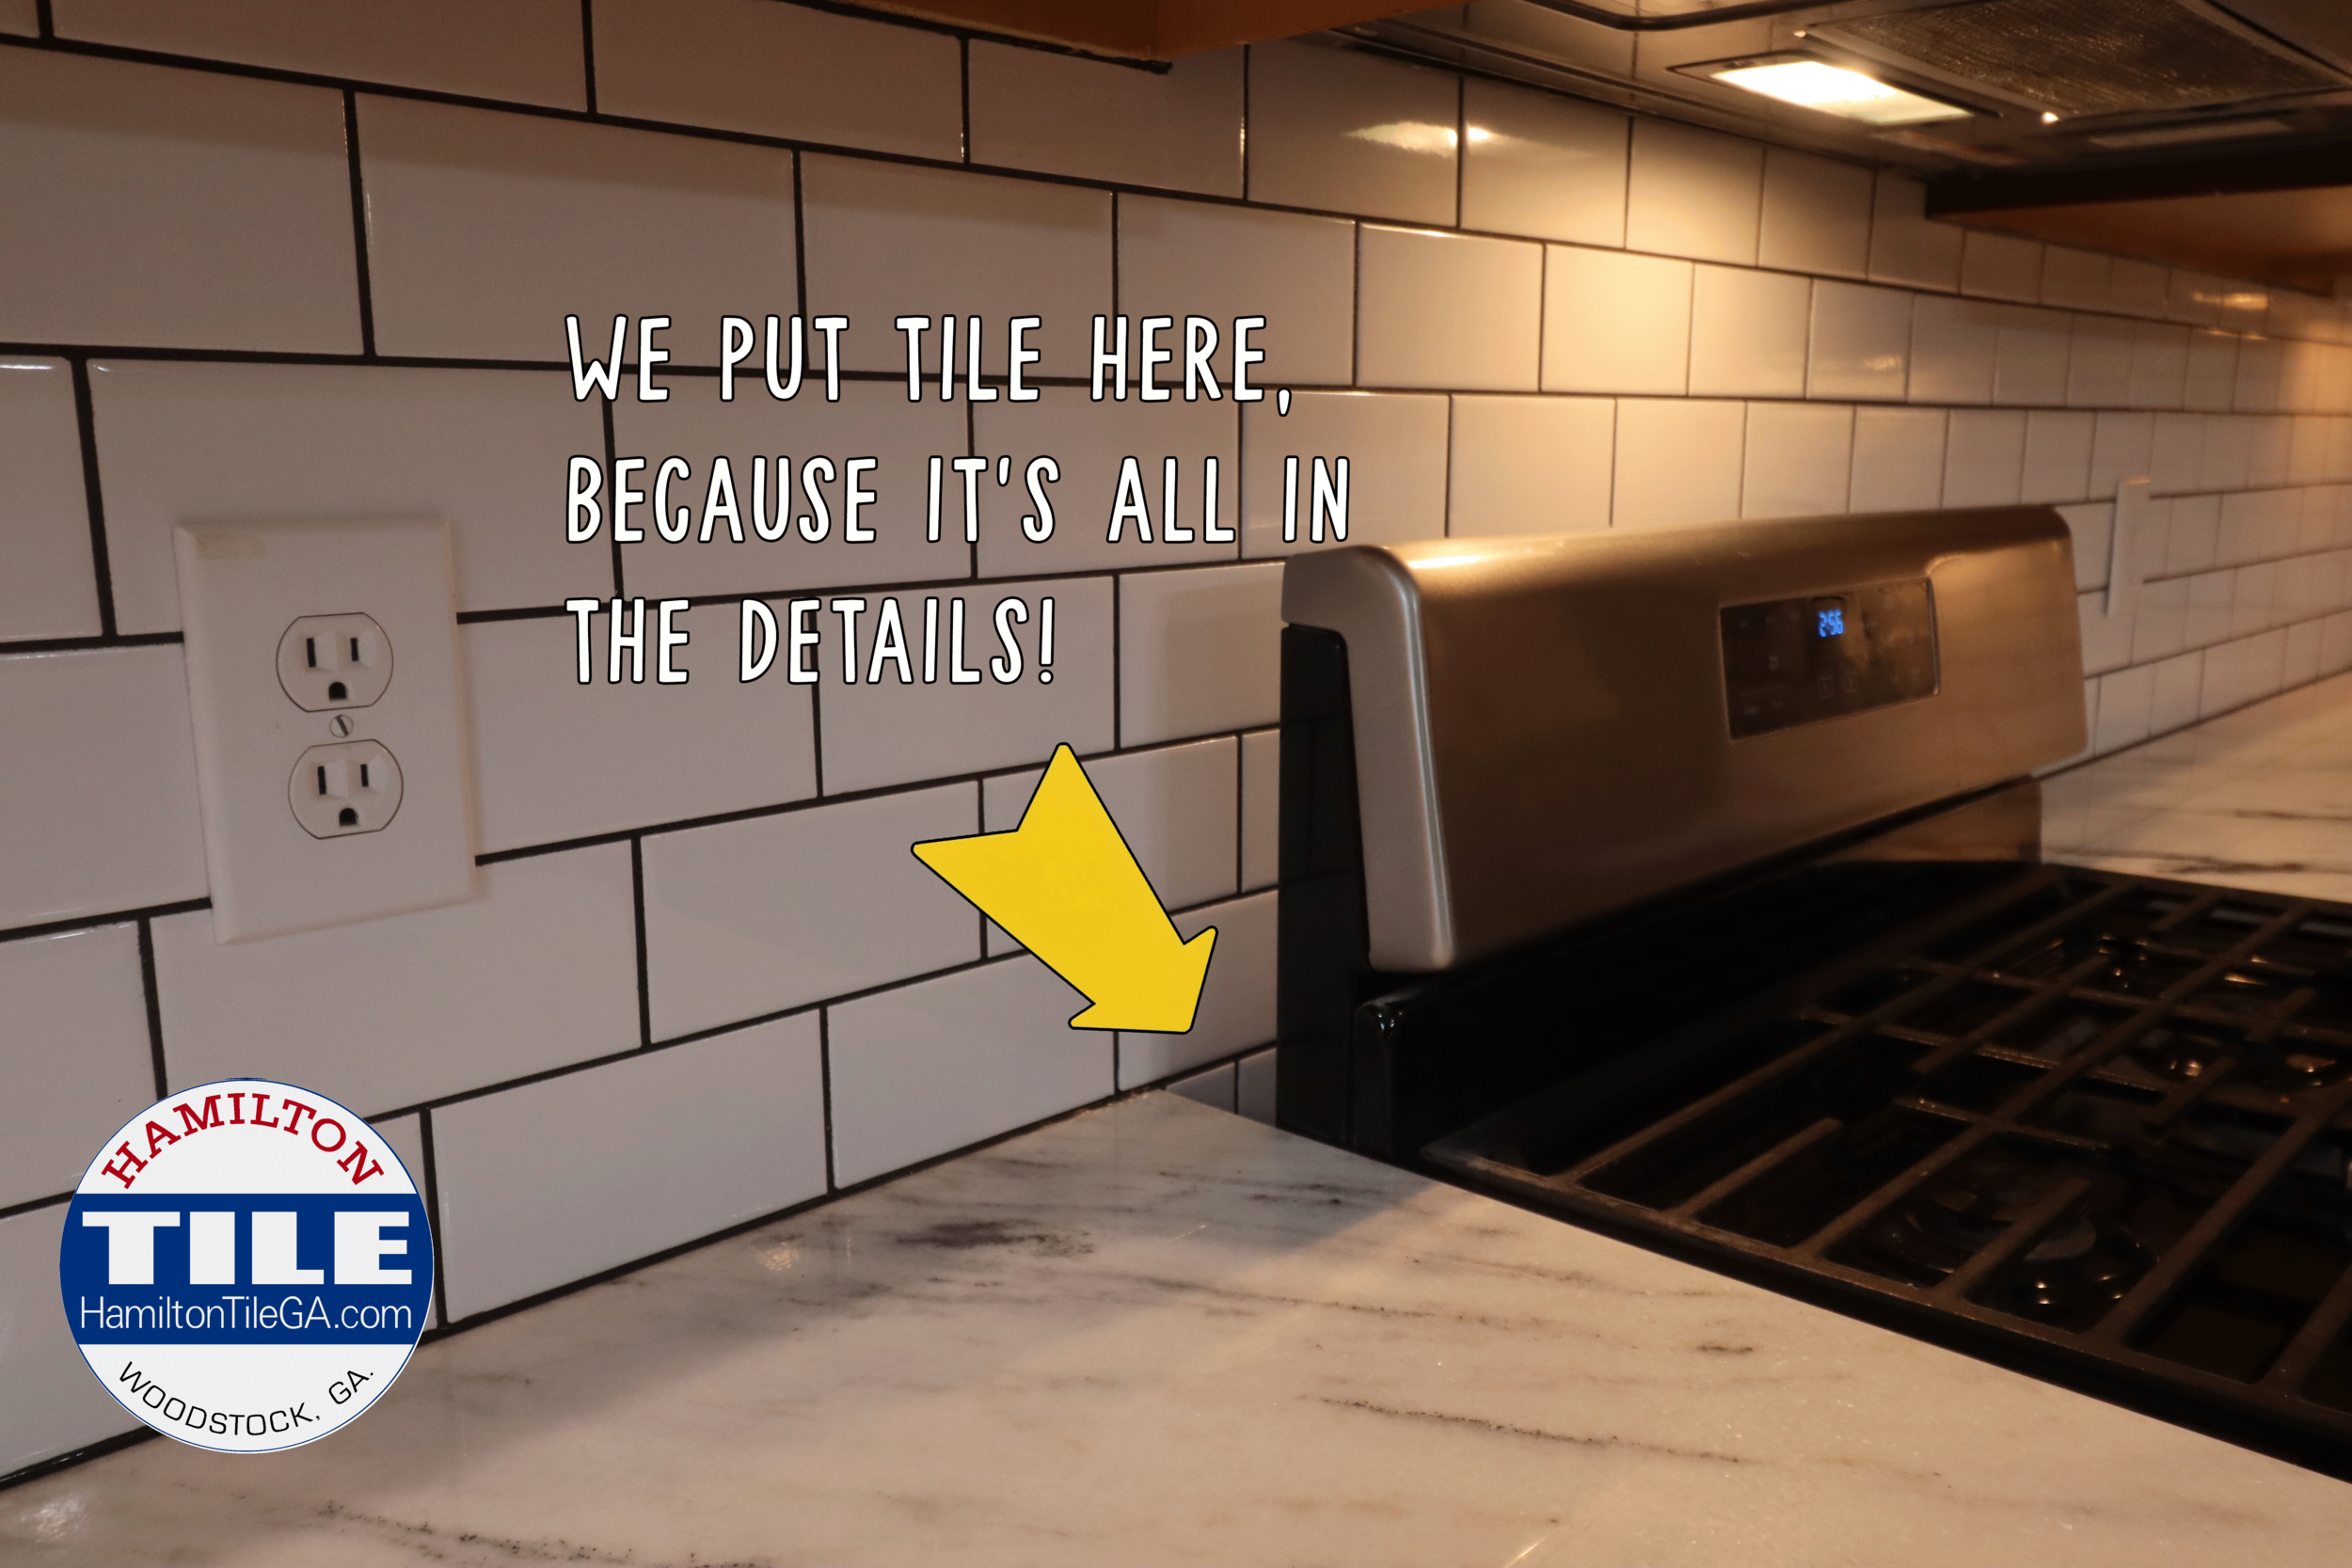
2. We tile with the SHORT and CURIOUS in mind.
In the corner of a back splash, two cabinets come together and there is a void behind the cabinets in the corner.
If you look straight on, (first picture) no big deal, all you see is back splash.
If you are short or if you look up into the corner, the vast majority of installers WILL NOT continue the back splash up the wall.
Yeah, mostly no one looks up there, BUT WHAT IF THEY DO?!
We have been installing a couple rows up the wall into the void, behind the cabinets, for quite some time now for short people, for curious people...
It's all in the details like this!
A THOROUGH JOB. A complete job.
Look around, you’ll see naked walls in the corners where cabinets meet EVERYWHERE. It’s rare that an installer does what we do!


3. We tile one row below the counter top behind stoves.
Behind the stove...we go one row BELOW the counter top so you see TILE when you look.
Behind a stove without the additional row of tile, guess what, you see a painted wall and NOT the back splash that you paid for.
We’re not trying to check a credential box or say, “We’ve been at this for 30 years!”
We want to be BETTER than ourselves, which in turn brings us above much of the competition!
This is another way that we accomplish that!
4. We FIX YOUR WALLS before we set tile.
The reason that a lot of tile work is wavy, wonky, SI-GOGGLIN, messed up, horrible looking, is because the prep isn’t done.
You don’t put good tile on a bad wall because the tile won’t look right.
You don’t “fix it with thin set”, you fix the walls FIRST…make them flat and in plane…THEN you install the tile.
If you have studs that aren’t in plane, that will transfer out to the tile.
The MOST DIFFICULT PART on any back splash with a tear out is getting the walls back to an acceptable state for tile installation.
Setting the tile is not the true skill. Fixing the walls in anticipation for tile is.

Granite installers leaving a 1/4” gap between the counters and the backer board. There is NO WAY tile will cover a gap like that! So, we shim out the wall to solve the problem.

We put a straight edge on the studs to make sure they are all in plane, with no dips and dives. Any irregularities we build out with drywall shims stapled to the wall. We then put backer board on for a flatter tile installation.
5. We bring our AIR CLEANER during your demolition!
On more than one occasion, after the tear out of an old back splash, the homeowner has informed us that they were so happy and pleased with how we treated their house. How thoroughly we cleaned up, how neat and organized we are.
This happens because people are used to contractors treating their house like a dumpster.
It’s very common.
Don’t be shocked when we work at your house. We will keep it cleaner, more organized, neater, with less dust spreading than any other company.
We use a lot of time and effort to make sure your property is protected. I talk about it and show pictures and video of it a lot on this website.
A Build Clean air scrubber, temporary walls, Hepa vacuums, micro fiber dusting, cardboard on floors/counters/appliances…extreme care, conscientiousness, remodeling to a high standard…
You deserve that at YOUR home because it’s not OURS. It’s YOURS.

6. We FINISH our edges. No rough, chipped tile edges!
The sure sign of an amateur or someone who simply doesn’t care are CHIPPED, UNFINISHED tile edges.
It’s the look from an installer who makes a cut on the saw, blows out the edges…and just throws the tile up on the wall without sanding or finishing.
I see it everywhere.
Smoothing tile edges is as simple as taking sand paper or an edge block and lightly giving the tile edge a touch, anywhere that a cut edge is going to be visible to the naked eye.
THAT is a tangible difference between us and the vast majority of other installers.
Rough, Jagged edges are a TRAVESTY and cannot be fixed once they are installed. They will annoy you every time you look, if you’re that type of person.
Another no-no is a tile edge without bullnose, a profile or pencil. The old “NAKED EDGE” . SO many houses have it.
PLAN OUT your edging prior to putting in tile.
When a wall with tile ends and doesn’t terminate into a cabinet or another wall, there has to be some sort of edging.
When you work with Hamilton Tile, that kind of detail is covered. We have the experience and care that you need to get a tremendous finished back splash.


7. We use high quality grouts.
The logic behind this one is quite easy. You’re buying a permanent, functional finish…Why would you buy cheap, garbage grout?
Grout is a major part of your installation and we don’t cheap out!
We use good grout because we want to make your back splash LIFE proof. Spaghetti sauces, over spray, all sorts of kitchen mess happens and a good quality grout will look great longer, with much less maintenance.
Grouts like Cusom’s Prizm grout, Mapei’s Flexcolor or the creme de le creme Ardex’s EPOXY WA. Spectralock PRO PREMIUM.
THAT’S what QUALITY MEANS TO US. QUALITY in PRACTICE with real MEANING behind it.

8. We silicone all plane changes. No cracked GROUT!
You’ve seen the cracked grout in corners and plane changes. In particular, on a back splash, where the tile meets the counter top, most will just grout that tight.
WRONG.
Some people use cheap, latex or “siliconized” caulking.
Not wrong, but not the same as what we do.
That stuff does not LAST. It will crack much like grout will crack in a corner because it is not as flexible as it needs to be.
I believe a lot of that is because water is used to form the joint.
Latex caulking also gets DIRTY much easier and is no where near as CLEANABLE as what we use.
We use 100% REAL SILICONE, which lasts longer, looks better and requires less MAINTENANCE.
We use silicone because it is a superior finished product. Walls move, houses move because wood expands and contracts. A basic rule of construction. When plane changes are grouted tight, there is no room for movement, so the grout or the cheap latex caulking cracks.
Silicone is a super flexible joint which allows for more movement.

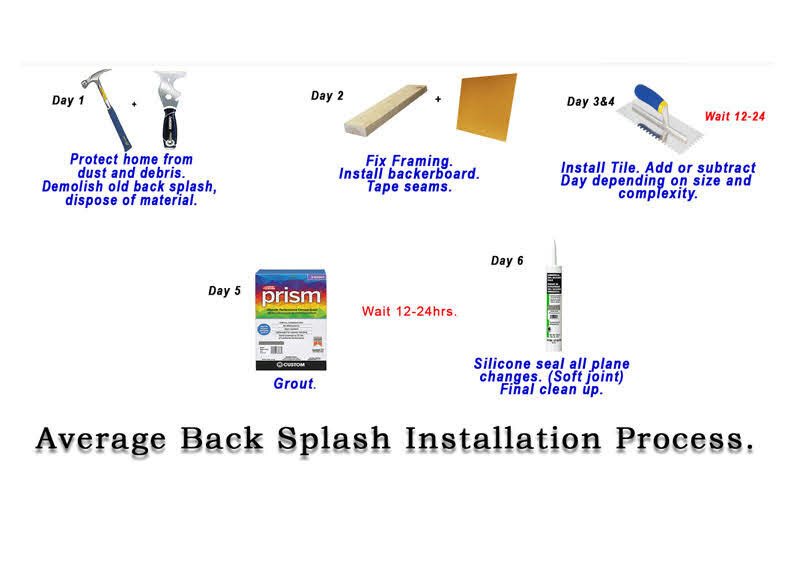
Here is a basic graphic of what our back splash process works out to be.
On average, 3-5 days labor for any back splash.
We want to give our customers more than average on every project.
Sometimes it’s things that no one sees, but our care is still present.
AS ALWAYS:
It’s what is UNDER the tile, the 25 DETAILS added up that make all the difference!
You ultimately see all the little things at the end of the project and also 10 years down the road when your tile remodel still looks incredible and functions the way it should.