


Today, the guys at Hamilton Tile in Woodstock, GA install a heated floor.
Let me walk you through this step by step and if you prefer some ACTION you can check out the accompanying YouTube Video. Find out how our projects go together. These videos offer a ton of insight into who you’re hiring, what you’re getting, and what kind of quality to expect when we show up at YOUR house!

We start out with high quality thin set. This stuff is called Ardex X77 and it’s one of the better “stick-ums” on the market. Very sticky, with a long open time. Open time refers to the amount of time a thin set can stay spread with out skinning over. You want a long open time when installing a membrane, like Flexbone, because we are spreading a lot of thin set at one time.

This is Ardex Flexbone Heat. It’s an uncoupling membrane that allows for wire to be laid out within these plastic protrusions. It also allows for self leveling compound to be applied over top of it instead of spreading thin set to cover the wire. We are liking it better because it protects our wire during the installation process. It’s very hairy installing on top of heated floor wires, because one drop, one oops and you may destroy your wire. This makes a destroyed wire less likely.
The back of this plastic is a micro fiber cloth backing that adheres very well to thin set.

We’ve pre cut all of our Flexbone pieces, we’ve laid out where they go. This floor was considerably out of whack, so we have already used self leveling compound to make it right. Click here to see the video about how we self level. Here in our first step, Jason gives the substrate a drink of water by wiping it with a wet sponge in order to encourage better thin set adhesion and pick up any dust or residue. A very important (and often ignored) first step.

Next step is to take the flat side of the trowel and “burn in” your thin set into the substrate. This is also an often ignored tile technique. What this does is work the thin set into the substrate at a molecular level. Doing this is far superior to starting with the notch side of the trowel, exclusively.

After burning in his thin set, Jason uses a 1/4” notch trowel, and starts evenly spreading his thin set.
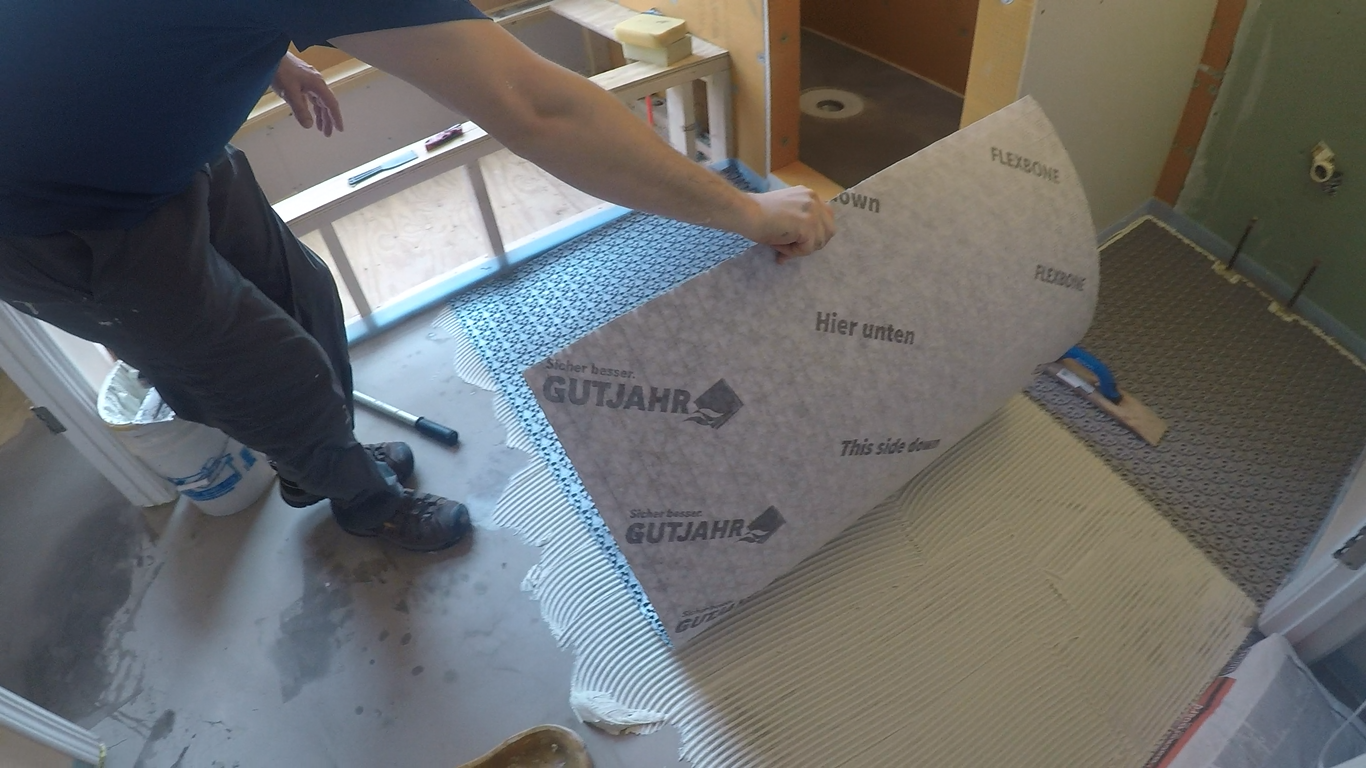
Jason then (very carefully as not to create a MESS) places the Flexbone into the bed of thin set. Speaking of messes, notice the lack of mess at the end of this project.

Jason is seen rolling the mat into the thin set, applying all of his weight to ensure proper adhesion.

Through out this process, we are checking for coverage under our mat. Coverage is going to determine how well tile or mat is sticking to whatever you are applying it to.
Once all this mat is down, we leave and let it dry. Putting the mat down is all we do that day. The mat needs to be dry before we can install the heat wire. Wondering where the added expense of a heated floor comes from? There it is. The time it takes to put them in. We don’t move to a different project, because everyone wants you to work for them exclusively. No one wants to be shuffled. So, exclusive treatment come at an added expense. We wouldn’t want to do multiple jobs at the same time any way. Why? Because we put 100% of our focus and passion into each job…we do not spread ourselves thin. That’s what you want out of your bathroom re-modeler. Multi-tasking is a lie in this business!

Jason is testing the wire before we start putting it in. We will test this wire time and time again through out this process. Better to take it back or take it out before tile is on top of it. What do I always say, “An ounce of prevention”? This is the perfect example of us living the saying.

Jason is snapping the wire into place. These kits come according to the amount of square footage you want to cover. Do a little math to figure out your spacing and Bob’s your Uncle. We stay a certain distance away from cabinets, toilets and walls. The blue “sill seal” foam is to create a space for expansion and contraction. A MUST when installing self leveler (or any tile for that matter). The spray foam and blue “sill seal” also prevents the water like self leveler from escaping. This stuff will flow EVERYWHERE if it is not CONTAINED.

Here we test our hole that will have our conduit that will lead to the Thermostat.

Jason uses hot glue to secure his termination point and hot/cold splice.

Once all the wire is down and tested once again, we start mixing our liquid backer board self leveling compound. We are conscientious of dust, because we are in a master bedroom here. We use OSHA approved HEPA vacuum suctions systems and equipment designed to mitigate dust. Floors covered with carpet plastic and an added layer of rubber mat liner. Ask our former customers about dust. I assure you, they speak highly of what we do to minimize it.
The reason this is done inside, close to the work area, is because of the speed that is necessary when putting this stuff down. If it’s not done quickly, the different pours do not meld together as they should.

Self Leveler compound is poured on top of the wire and spread to completely cover it.

Let it all dry and it’s ready for tile. Jason is checking to see how flat we were able to get it with a level! It’s great and ready to go! Quite a process. But if you are over a garage and you have a cold bathroom like this one, it’s money well spent.
